[Houdini]UV Notes
keywords: Houdini, UV
How to’s
How to adjust (tweak) UV layout
- Set view mode as UV View in the top-right of viewport.
- Select
Show Handlein the left of viewport. Then you can edit UV layout.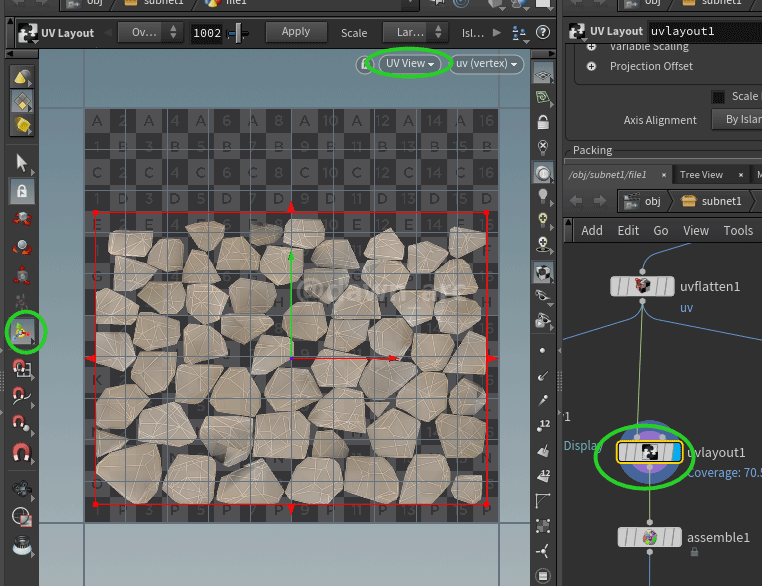
Issues
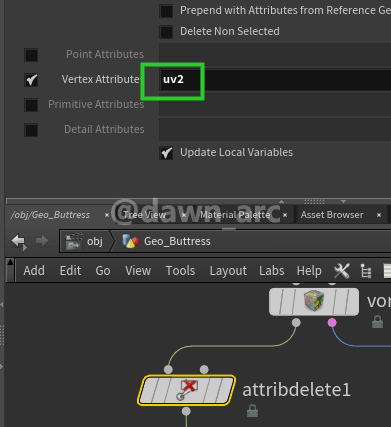
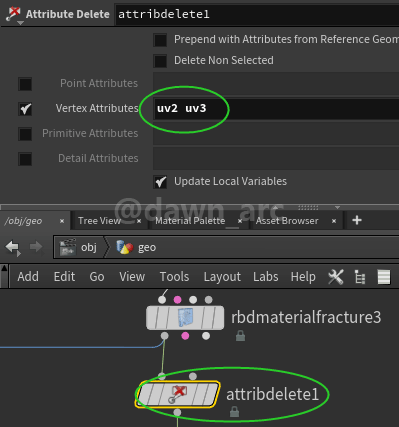
Do not include the vertex attribute “uv2”
Vertex Animation Textures node rendering error:
Do not include the vertex attribute "uv2", "uv3", or "uv4" for Rigid-Body Dynamics (Rigid) mode. They will be overwritten.
Solution:
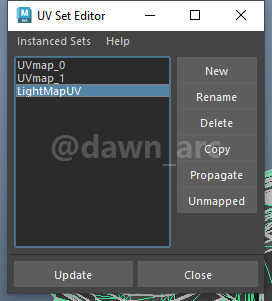
Delete others UV shell, keep only one UV shell.
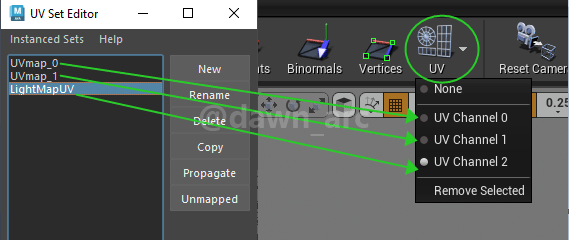
If don’t want to delete uv in Houdini, you need to delete others UV channel (e.g. LightMap) in Maya.
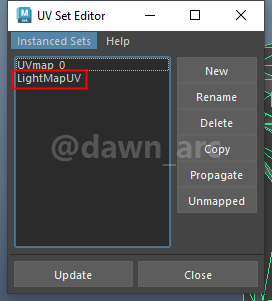
If the asset has more than two UV channels:
No angular velocity attribute “w” is found on the input geometry
Vertex Animation Textures baking error:
Error: Rotation Interpolation is set to "Accurate Multi-RPF Slerp with Angular Velocity" but no angular velocity attribute "w" is found on the input geometry. Make sure "w" is included in the simulation output attributes and that "w" is transferred to points.
Rigid-Body Dynamics (Rigid) mode expects the point attributes "pivot" and "orient" on packed points but at least one of them is not found on the input geometry..
It’s an issue of version 19.5.
Solution:
Make sure that UV layout was placed after UV Flatten:
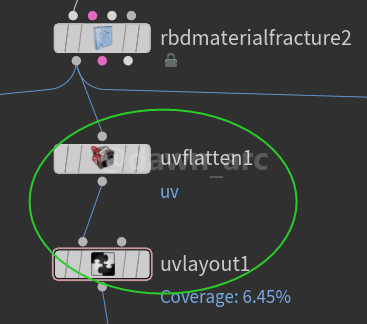
and make sure there’s only one UV set (UV channel) in your primitive.
Tutorials
Youtube Tutorials
Houdini Tutorial: Closed Sweep Spline and keep UVs
https://www.youtube.com/watch?v=Phz3BTwFWRg
How to Retopology and Auto UV | Houdini tutorial beginner(include project file) Tutorial Pt.01
https://www.youtube.com/watch?v=_wYCrs523xs
Foreach loop uses in UV unwrap Houdini tutorial
https://www.youtube.com/watch?v=x8BlyWO38LI
“In all chaos there is a cosmos, in all disorder a secret order.” ― Carl Gustav Jung