[Maya]Rigging 16 - Ankles & Heels
Keywords: Animation, Maya Rigging, Leg Controller, Toe, Heel, Ankle
Maya Rigging series of articles:
- [Maya]Rigging Overview
- [Maya]Rigging 01 - Joint
- [Maya]Rigging 02 - Skinning
- [Maya]Rigging 03 - Visualization
- [Maya]Rigging 04 - Controller
- [Maya]Rigging 05 - Attributes
- [Maya]Rigging 06 - Foundations of IK
- [Maya]Rigging 07 - Advanced IK
- [Maya]Rigging 08 - IK FK Switch
- [Maya]Rigging 09 - Spine FK
- [Maya]Rigging 10 - Spine IK
- [Maya]Rigging 11 - Neck and Head
- [Maya]Rigging 12 - Limbs FK
- [Maya]Rigging 13 - Limbs IK
- [Maya]Rigging 14 - Space Swapping
- [Maya]Rigging 15 - Arm Twist
- [Maya]Rigging 16 - Ankles & Heels
- [Maya]Rigging 17 - Clavicles & Fingers
- [Maya]Rigging 18 - Common Tricks
Asset mentioned in articles: UE5 Rig
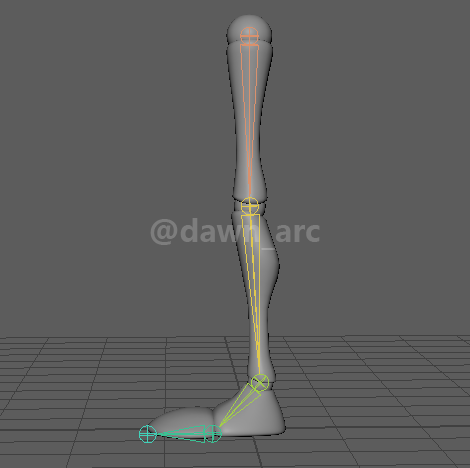
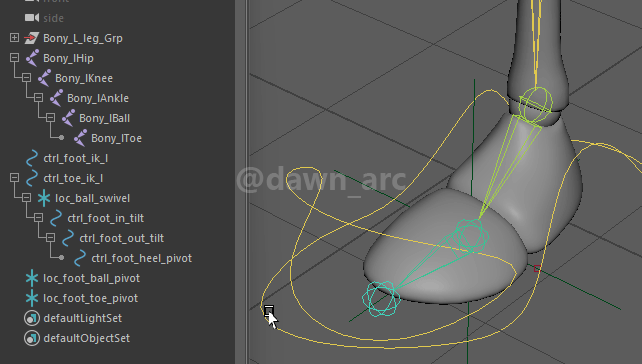
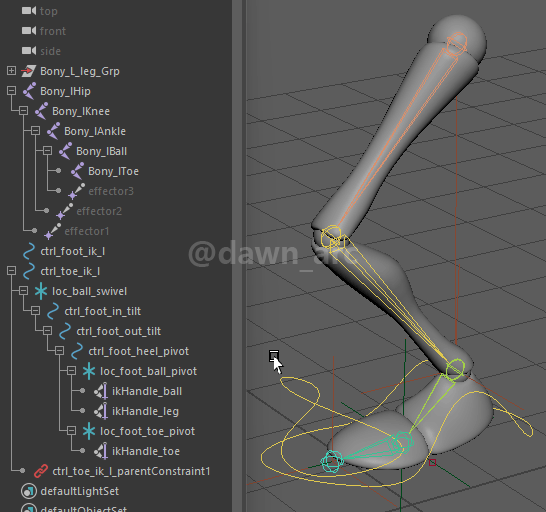
Leg Rigging Sample
This is the final effect we will done. Feel free to learn it.

1, Prepare the leg rig asset: Download.
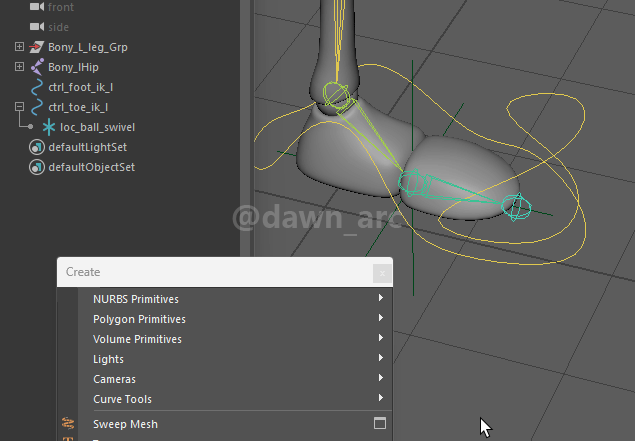
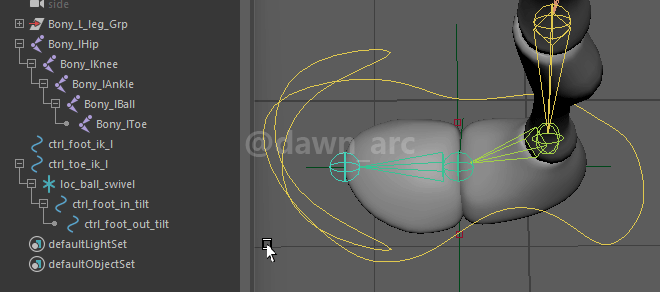
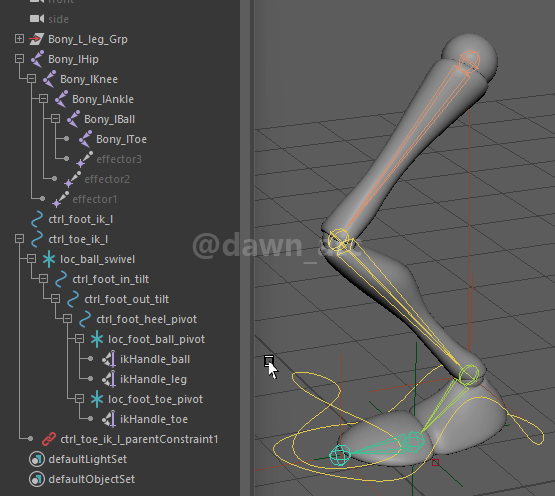
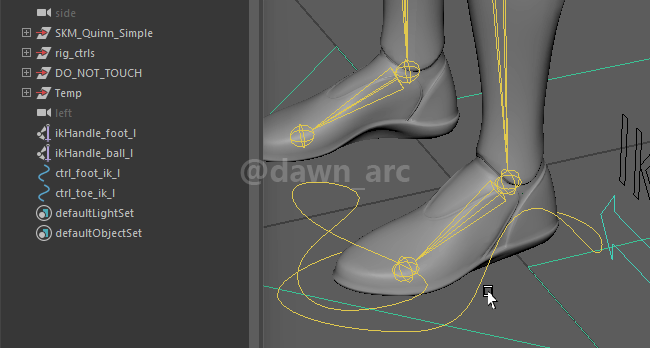
2, Create two IK controllers: ctrl_foot_ik_l, ctrl_toe_ik_l.

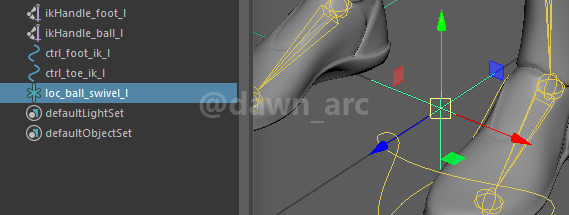
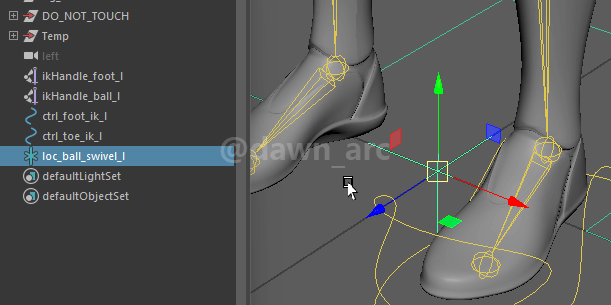
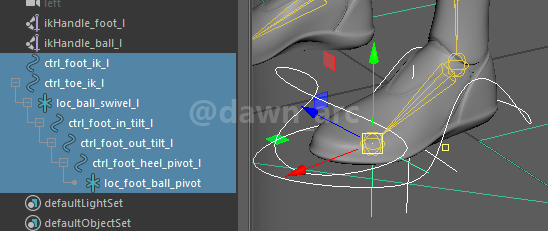
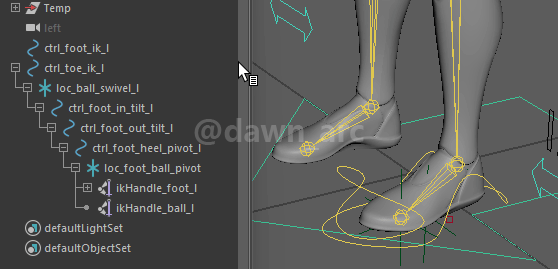
3, Create locator named loc_ball_swivel.
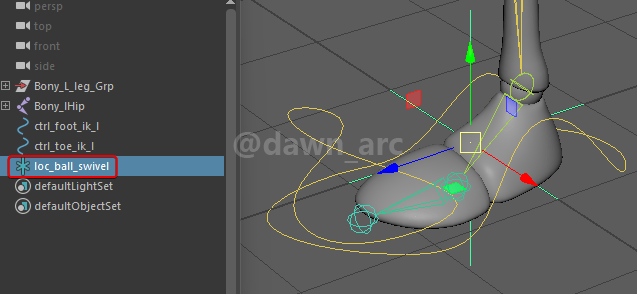
Then Match Transformations from loc_ball_swivel to Ball joint.
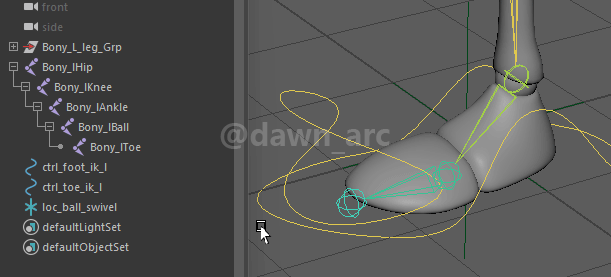
4, Set up the hierarchy: place loc_ball_swivel under the ctrl_toe_ik_l.
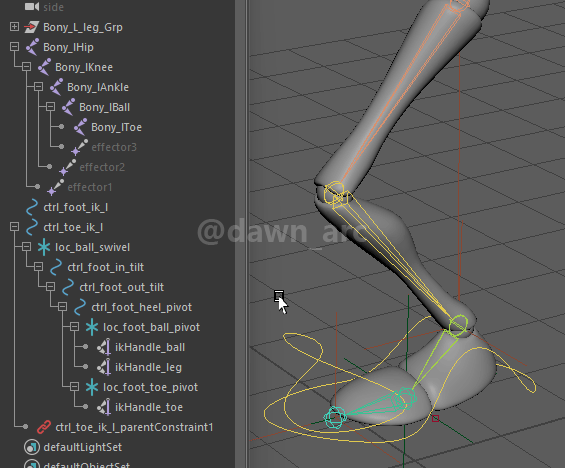
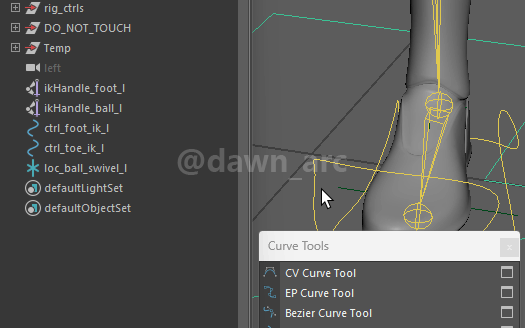
5, Create empty curve to use as pivot.
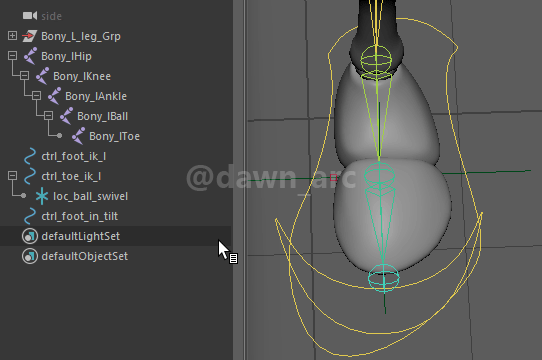
Create ctrl_foot_in_tilt:
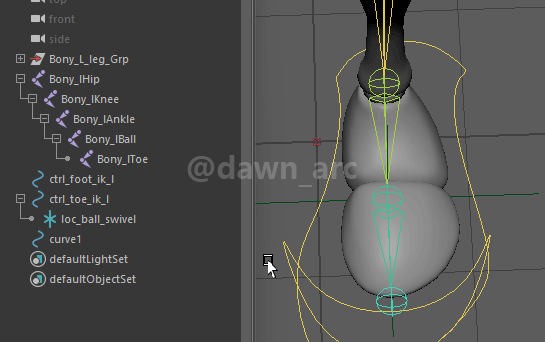
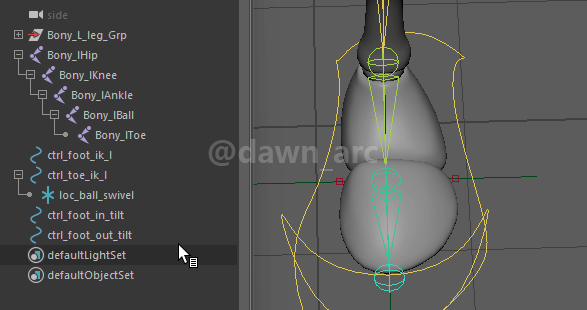
Create ctrl_foot_heel_pivot:
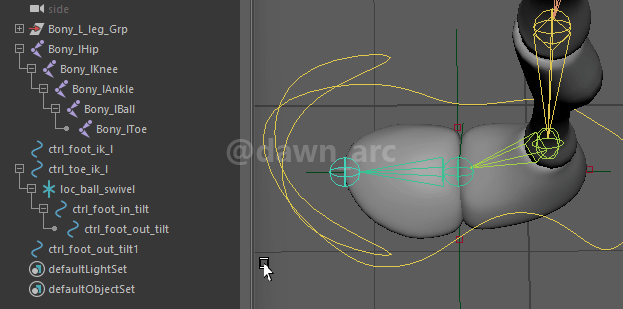
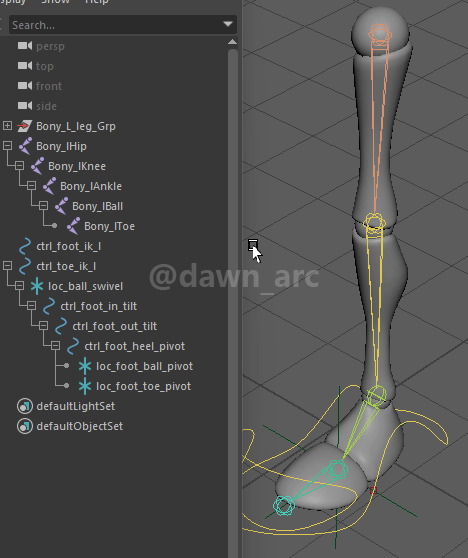
6, Create two locator: loc_foot_ball_pivot, loc_foot_toe_pivot.
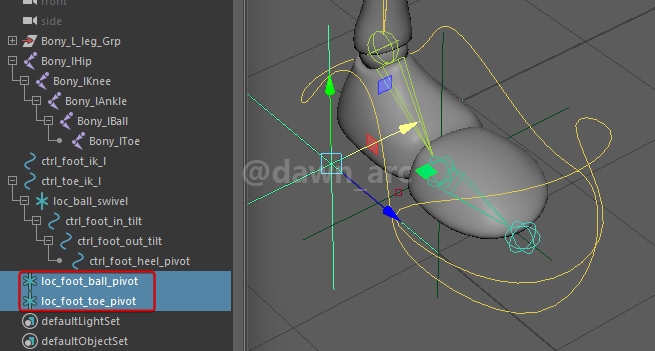
Match Transformations:
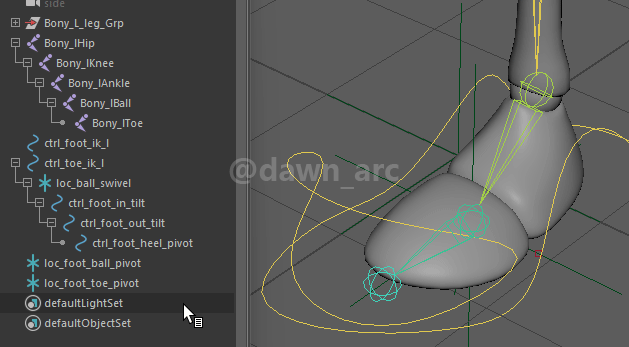
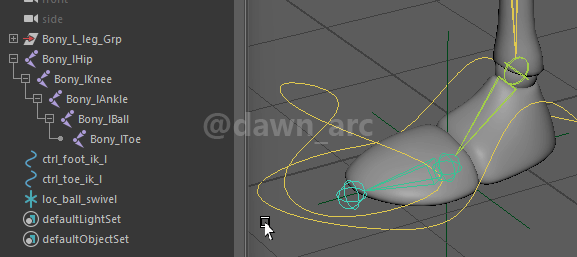
Set up the hierarchy.
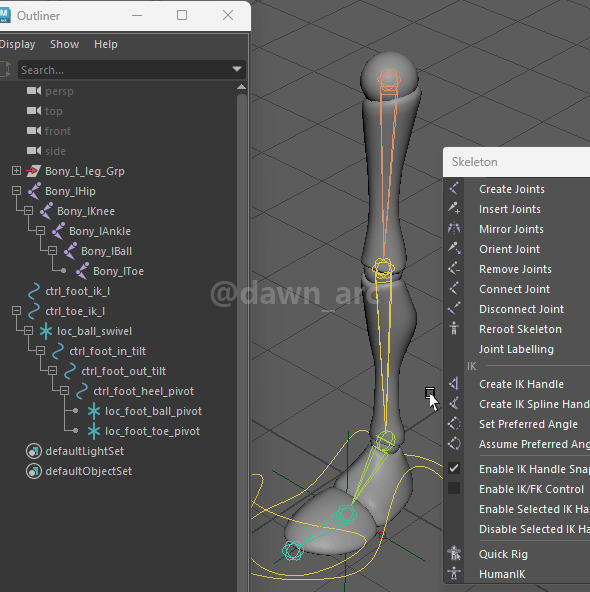
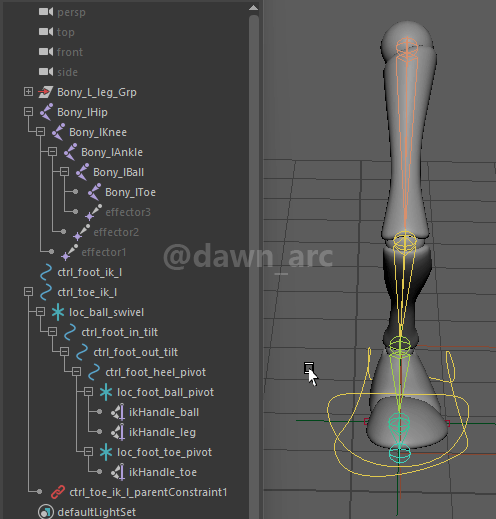
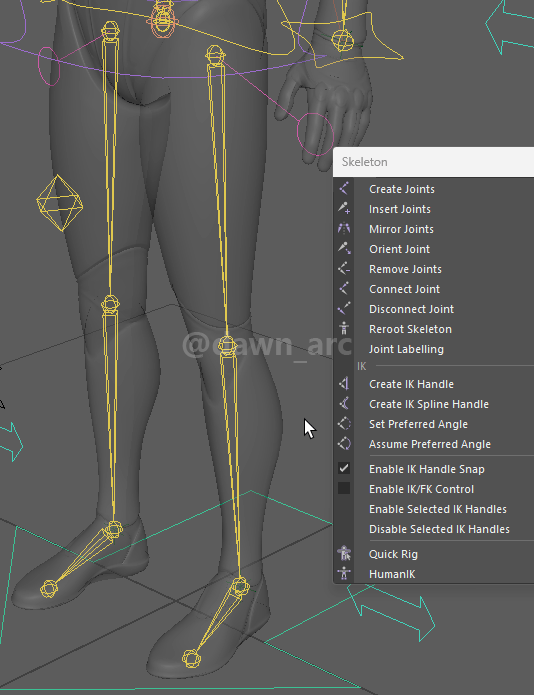
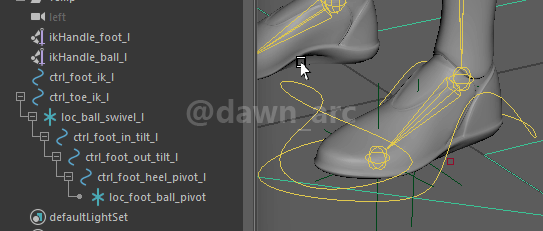
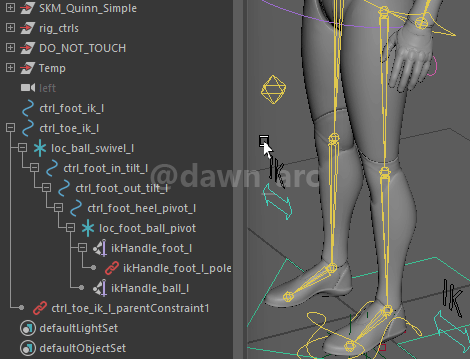
7, Now we prepare to create IK handle, make leg joints was Set Preferred Angle before create it.
Create IK handle: ikHandle_leg, ikHandle_ball and ikHandle_toe.
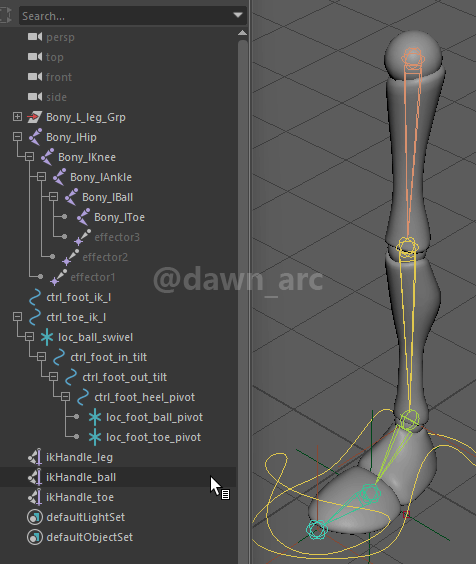
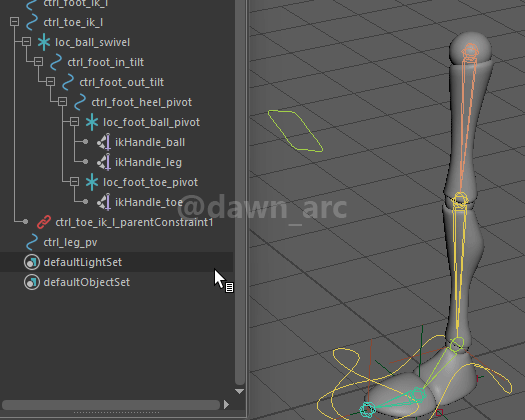
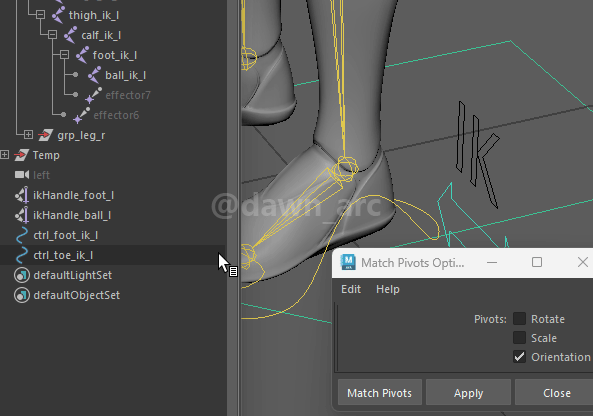
8, Optimize the Offset Parent Matrix of controllers and locators. (See: Offset Parent Matrix)

Then set up the hierarchy for IK handles.
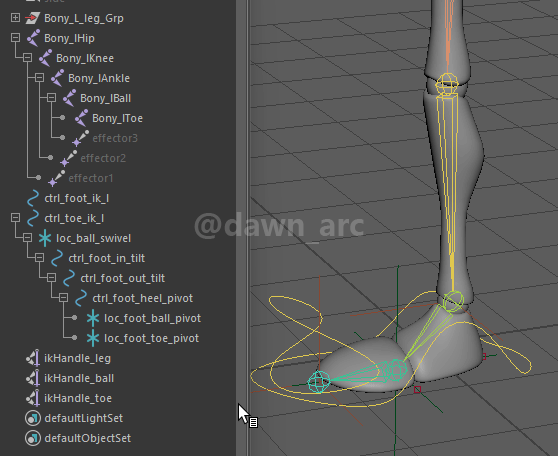
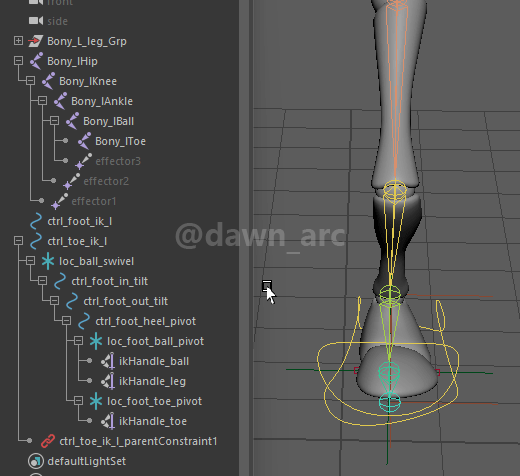
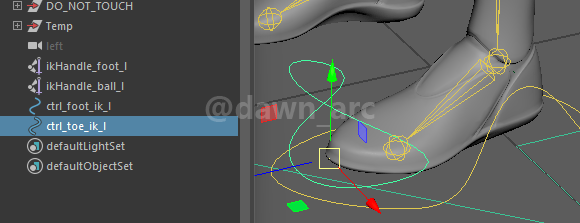
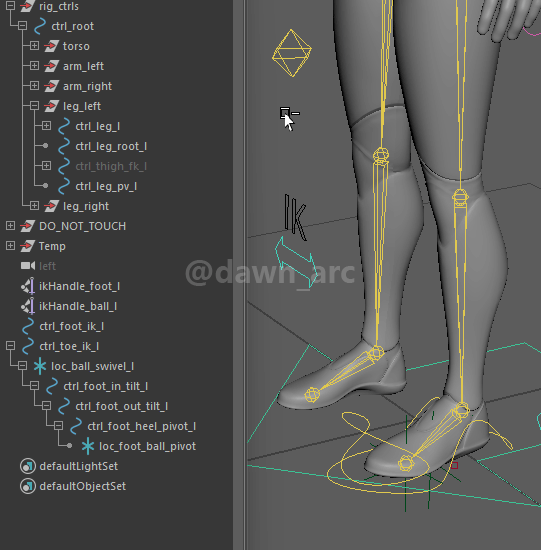
9, Create Parent Constraint from ctrl_foot_ik_l to ctrl_toe_ik_l.
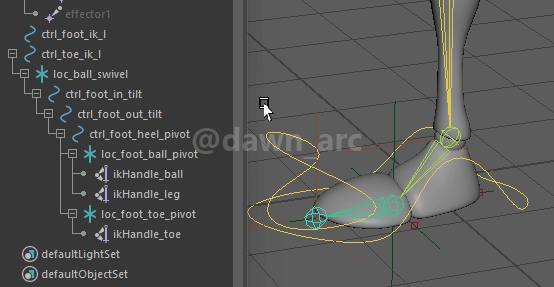
Now all the driven processes were finished.
Test them if works right.

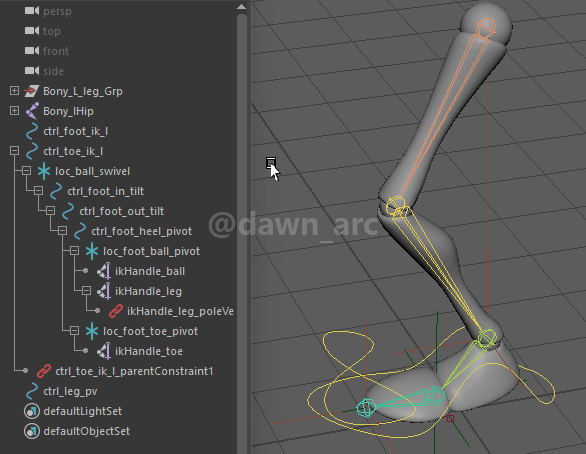
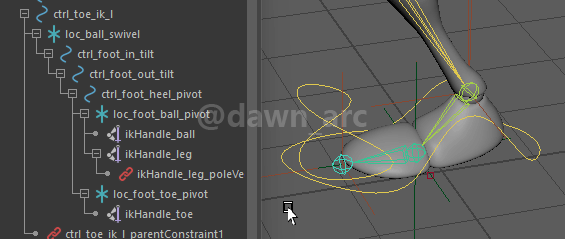
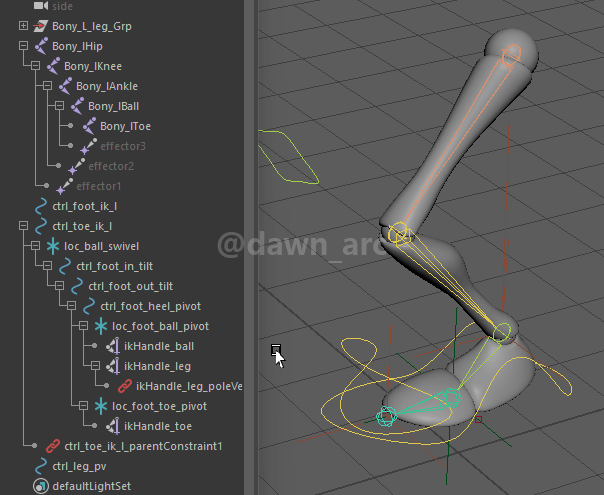
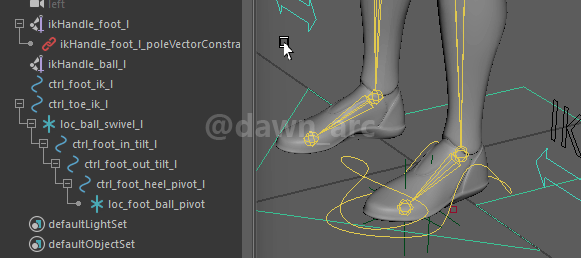
10, We will see an deformation issue if rotate ball pivot a lot.
This is because the Pole Vector handle was missed.
To address this issue, create a new controller: ctrl_leg_pv.

And set the contraint relationship.
Now the deformation was fixed.
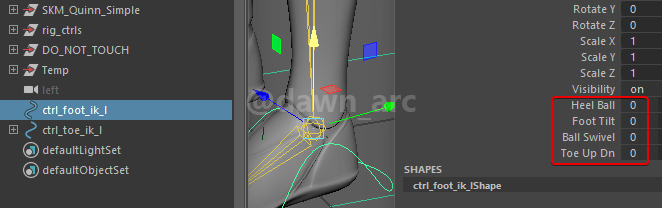
11, From this step, we will create a group of switches for advanced foot control.
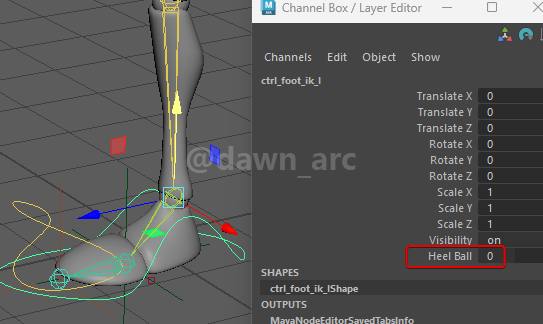
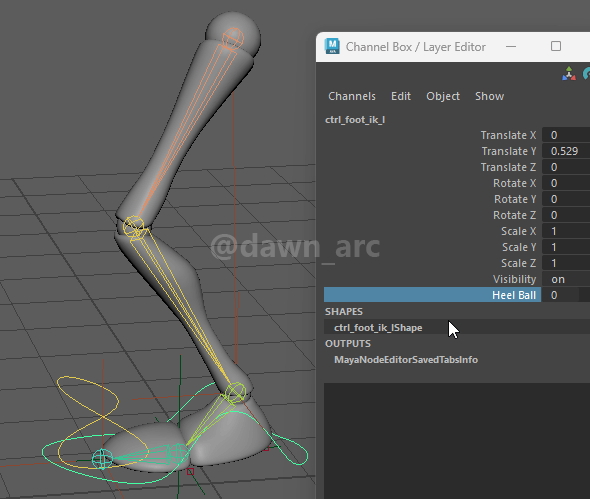
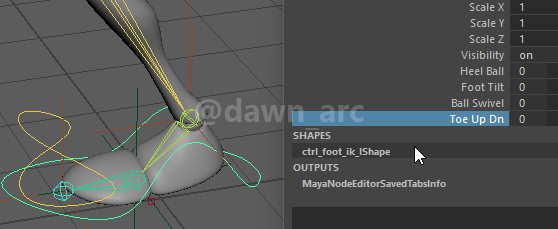
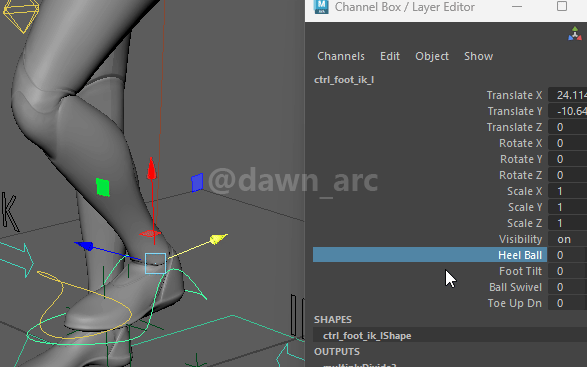
Create an attribute named Heel_Ball for heel joint rotation.
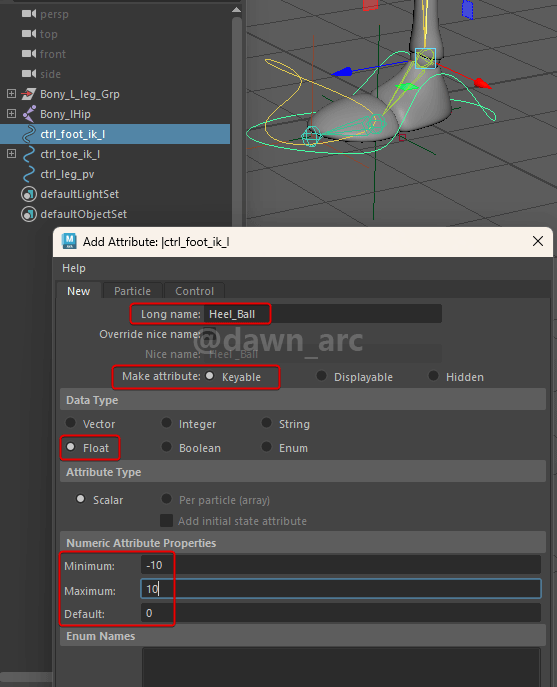
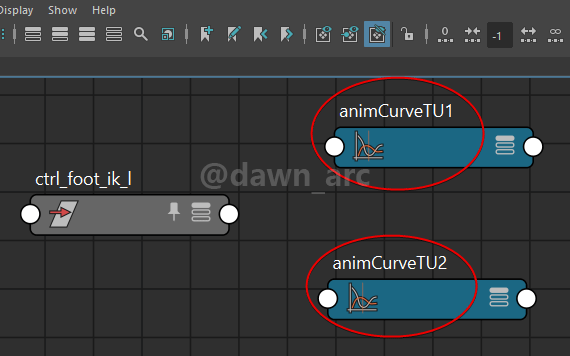
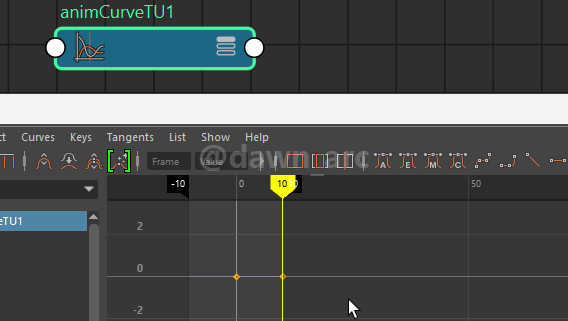
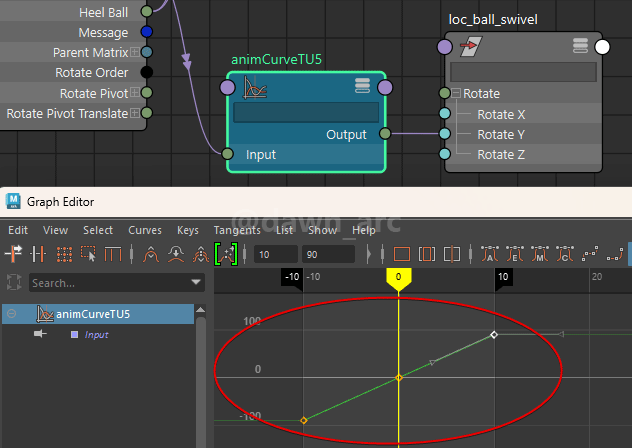
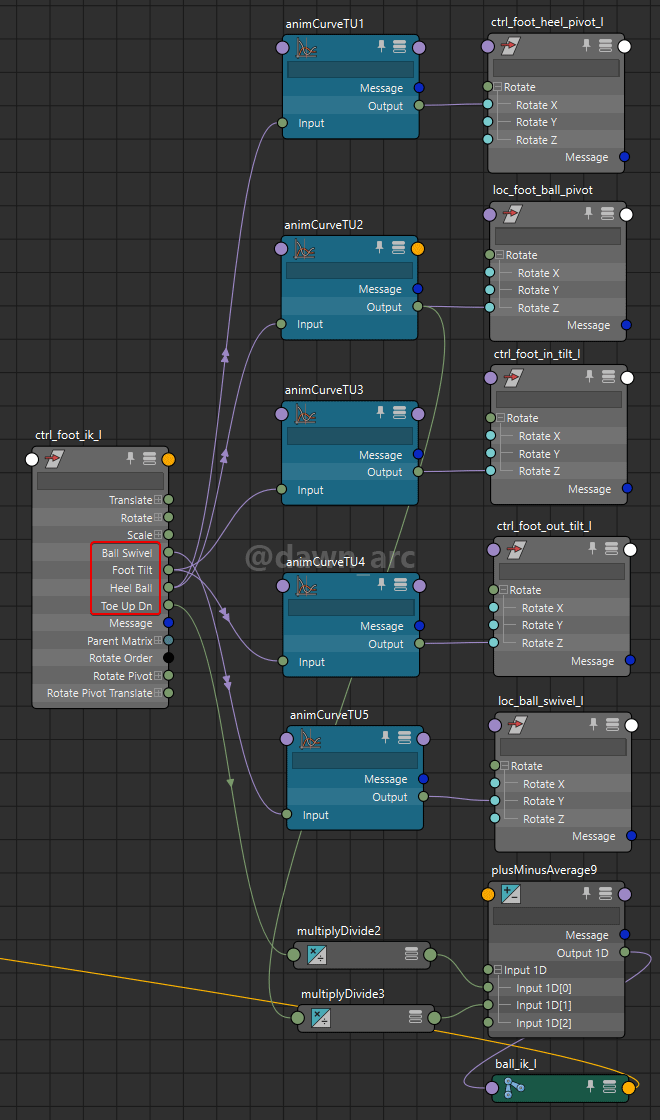
12, Create two Anim Curve nodes: animCurveTU.
Then adjust the frame range: -10 to 10.
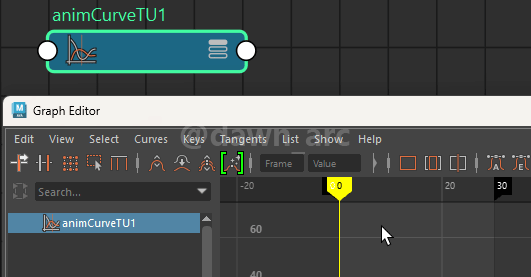
Then set Keyframe (hit S) at 0 frame and 10th frame.
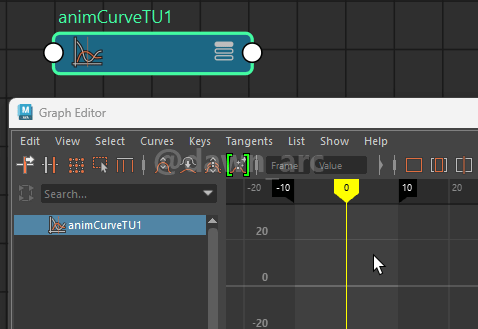
Set the key value and straighten the anim curve.
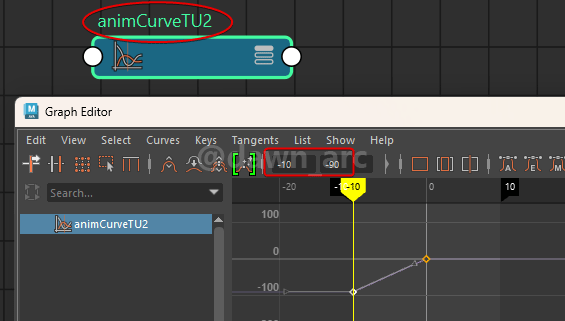
Do the same for the 2nd animCurveTU node, but set the first key value to -90.
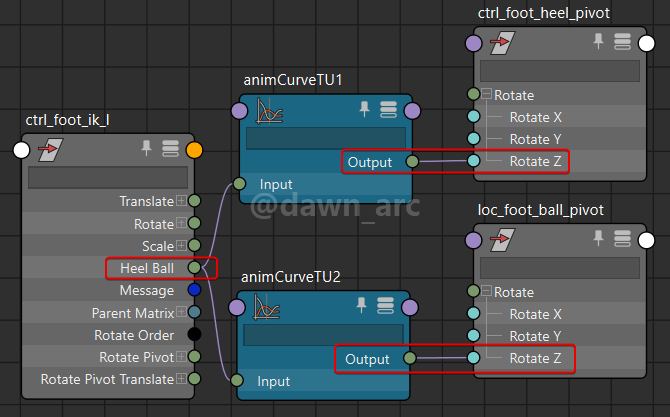
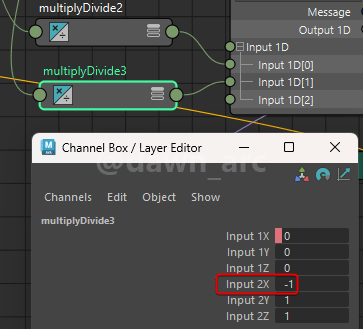
13, Build the driven process for Heel_Ball attribute:
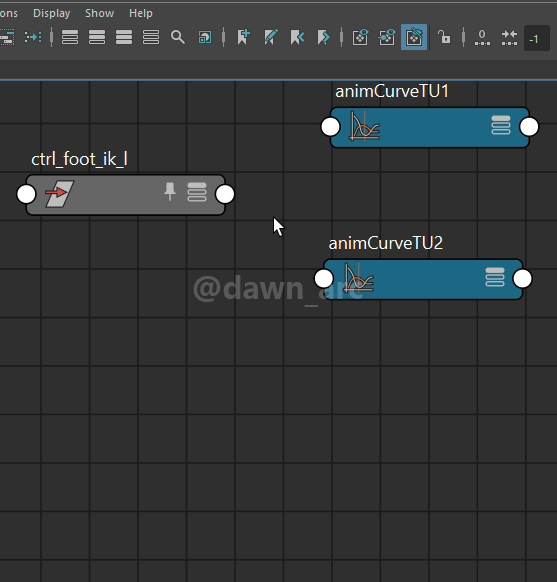
Drive the rotation of ctrl_foot_heel_pivot and ctrl_foot_ball_pivot using the output of animCurveTU.
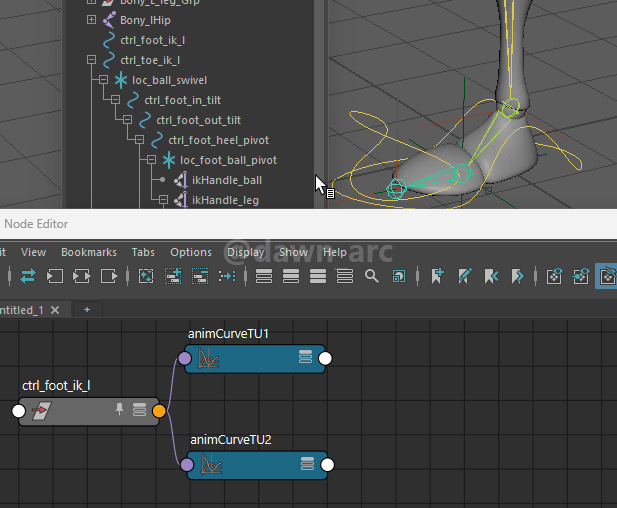
Final diagram for Heel_Ball attribute:
Fantastic!
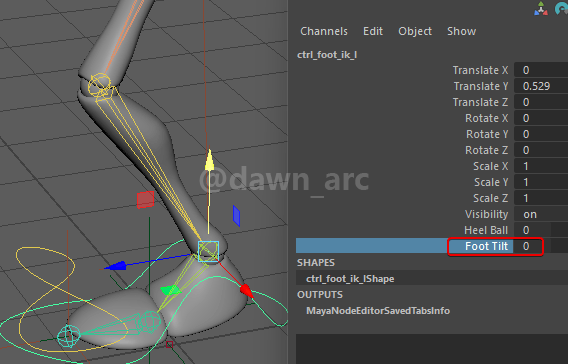
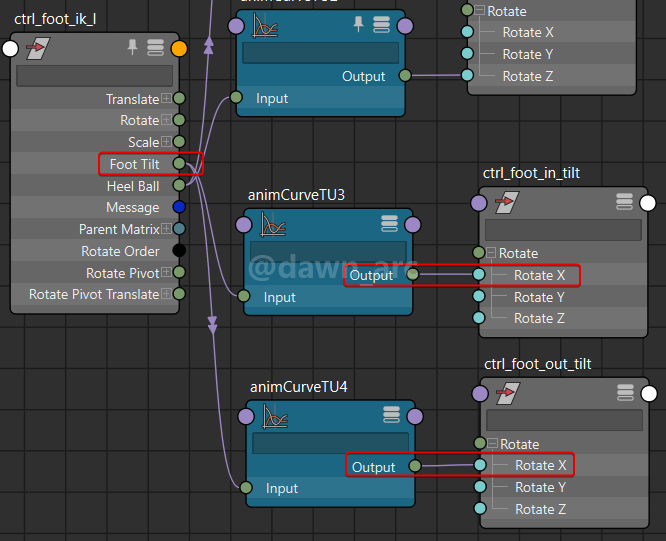
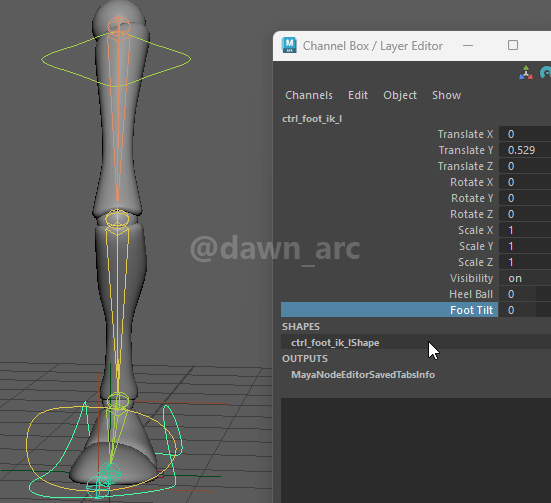
14, Create the second attribute named Foot_Tilt.
Ctrl + D to duplicate animCurveTU node.
Build the driven process for Foot_Tilt attribute:
Dope looking!
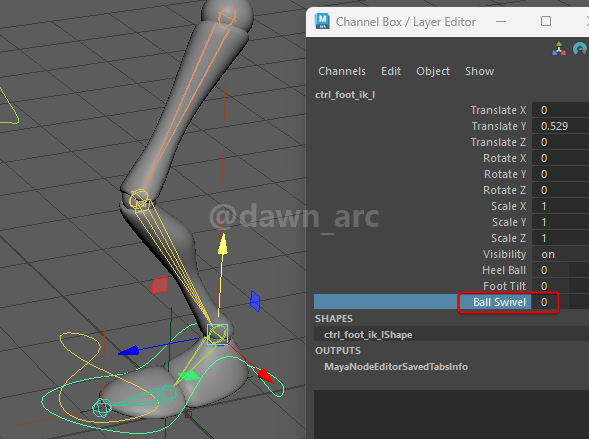
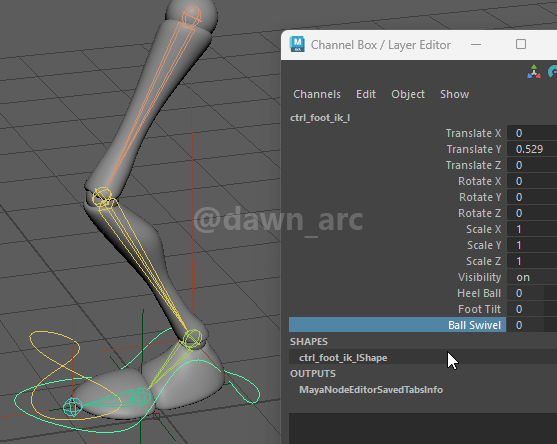
15, Create third attribute named Ball_Swivel.
Build the driven process for it.
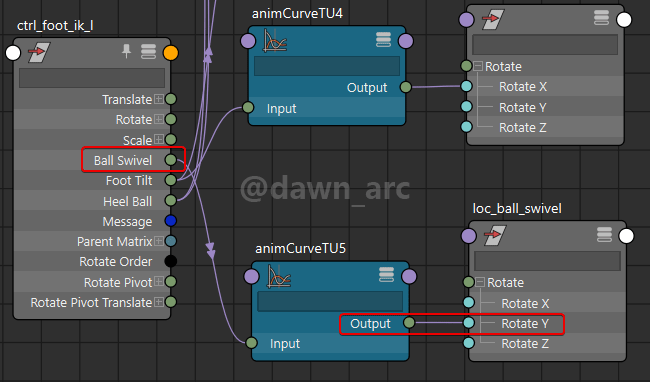
Set the key value from -90 to 90 in animCurveTU node.
Result:
16, Create the last attbutes named Toe_Up_Dn.
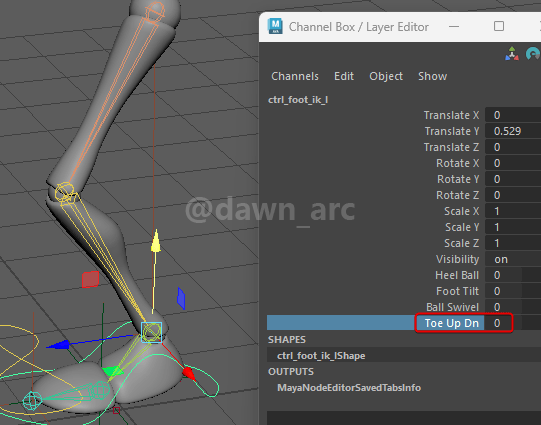
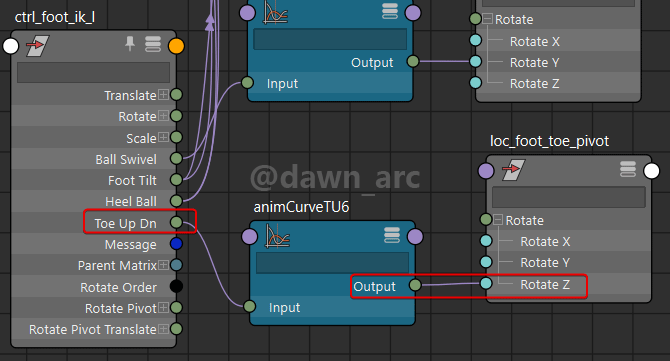
Result:
Update UE5 Rig: Leg Control
Now we will upgrade the our rig control for legs using the above method.
This is old leg rig control:
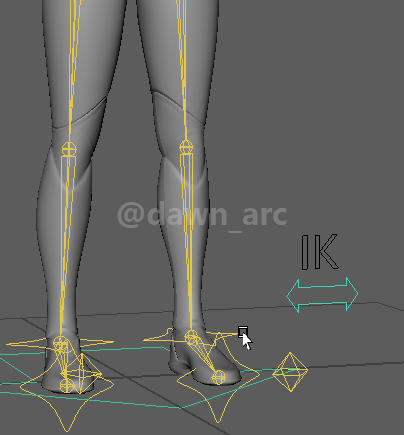
This is the new leg rig control we expected to.
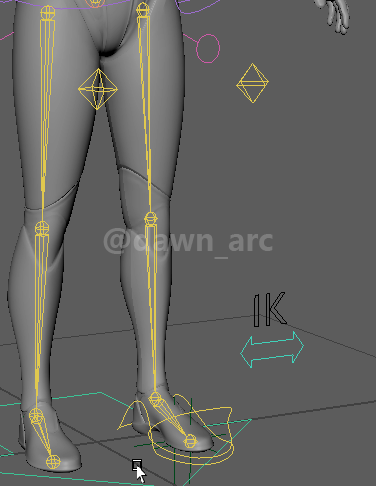
1, Delete the old foot IK controller.

Also delete the old foot IK handle to clean the constraint that created before.
2, Re-create the foot IK handle.
3, Create IK control for left leg: ctrl_foot_ik_l, ctrl_toe_ik_l.
Don’t forget to match the orientation of ctrl_foot_ik_l.
Because UE5 rig doesn’t have toe joint, so we don’t need to match orientation for ctrl_toe_ik_l.
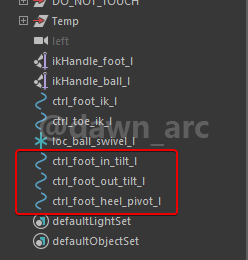
4, Create locator loc_ball_swivel_l.
5, Create three blank curves as anchor: ctrl_foot_in_tilt_l, ctrl_foot_out_tilt_l and ctrl_foot_heel_pivot_l.
Fine tune the position of anchors.
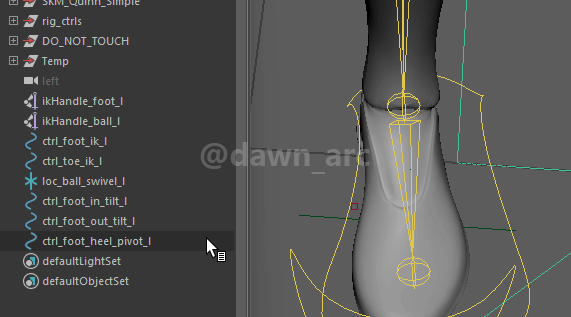
6, Create locator loc_foot_ball_pivot.
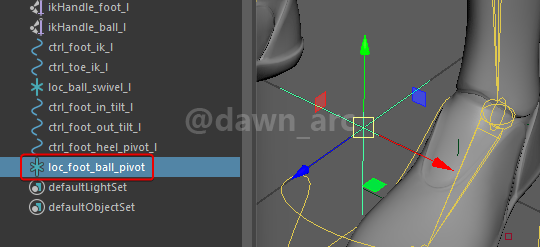
Match Transformations from loc_foot_ball_pivot to ball_ik_l.
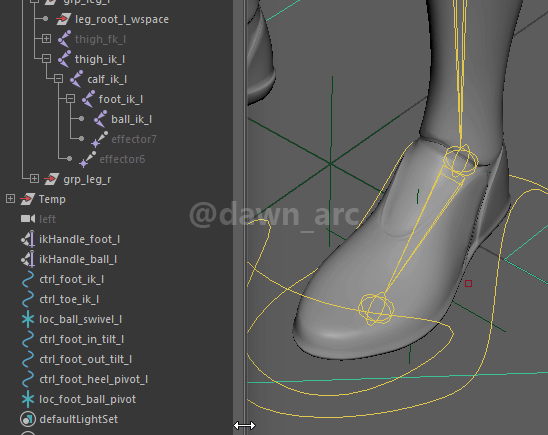
7, Set up the hierarchy.
8, Put the leg IK handle under the loc_foot_ball_pivot.
You see the ankle joint was deformed when putting IK handle into locator. This is because the Pole Vector handle was missed.
To address this issue, create Pole Vector constraint for ctrl_leg_pv_l first.
Then set up the hierarchy again.
10, Create Parent Constraint from ctrl_foot_ik_l to ctrl_toe_ik_l.
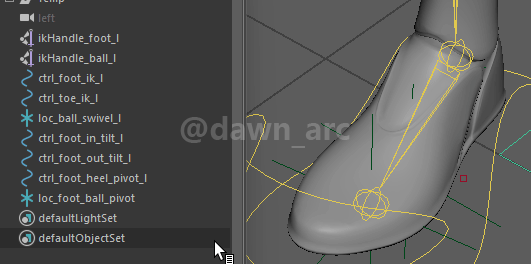
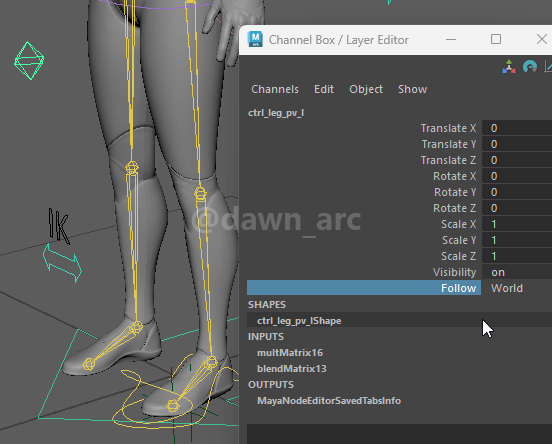
11, Test the all leg controllers if works right.
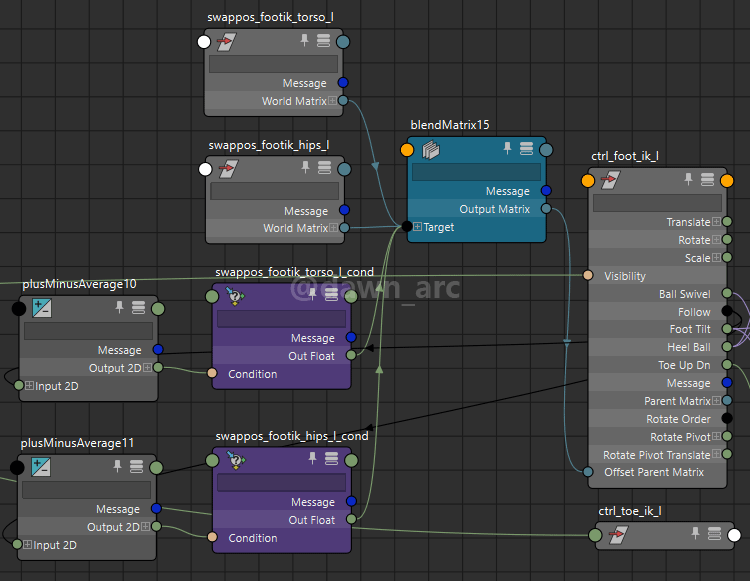
12, Create keyable attributes in ctrl_foot_ik_L.
Build the driven process for attributes.

Test the attributes at last.
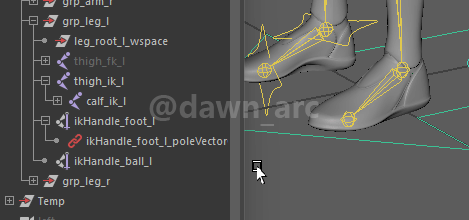
Re-build Pole Vector Handle
Because we had remove leg IK handle before, so we need to rework the Pole Vector handle again after the new leg IK system finished.
For more details, see: [Maya]Rigging 14 - Space Swapping
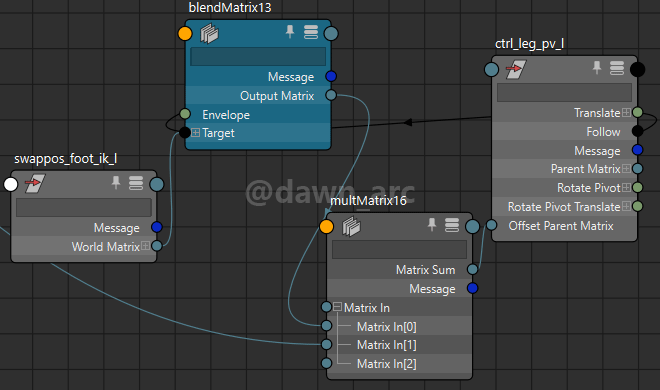
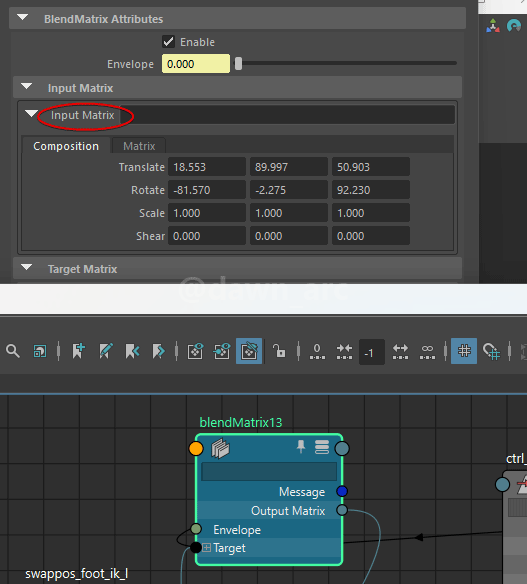
Don’t forget to initialize the Input Matrix of blendMatrix node.
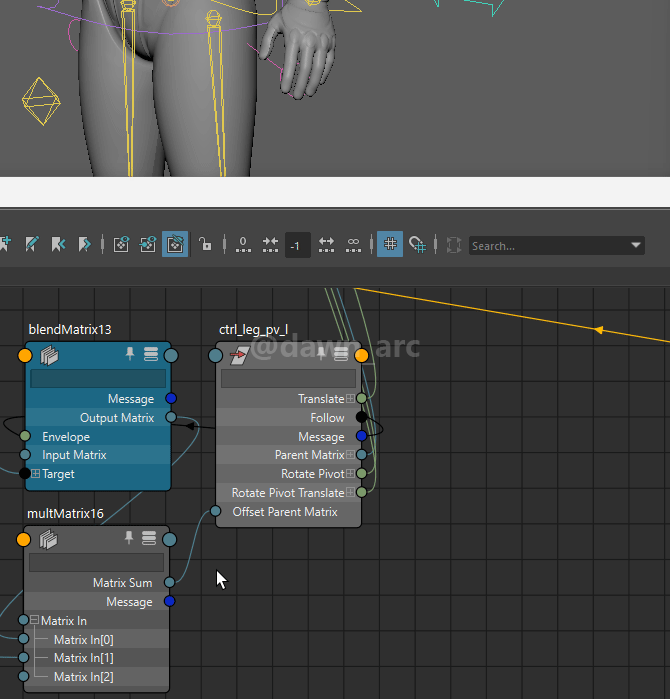
Result:
战国战争史:五国攻秦之战
五国攻秦之战是公元前241年赵、楚、魏、韩、燕五国联合进攻秦国的战争。此战五国战败,从此,六国更加无法抵御秦国的兼并,秦国最终统一六国,建立秦朝。
公元前241年,赵、楚、魏、韩、燕五国共推楚考烈王为纵约长,春申君为联军主帅,共同攻打秦国。联军攻至函谷关时,秦军出击,诸侯联军败退。联军转而进攻秦国的盟国齐国,夺取了饶安(今河北省盐山县西南)