[Maya]Rigging 08 - IK FK Switch
Keywords: Animation, Maya, Rigging, IK FK Switch
Maya Rigging series of articles:
- [Maya]Rigging Overview
- [Maya]Rigging 01 - Joint
- [Maya]Rigging 02 - Skinning
- [Maya]Rigging 03 - Visualization
- [Maya]Rigging 04 - Controller
- [Maya]Rigging 05 - Attributes
- [Maya]Rigging 06 - Foundations of IK
- [Maya]Rigging 07 - Advanced IK
- [Maya]Rigging 08 - IK FK Switch
- [Maya]Rigging 09 - Spine FK
- [Maya]Rigging 10 - Spine IK
- [Maya]Rigging 11 - Neck and Head
- [Maya]Rigging 12 - Limbs FK
- [Maya]Rigging 13 - Limbs IK
- [Maya]Rigging 14 - Space Swapping
- [Maya]Rigging 15 - Arm Twist
- [Maya]Rigging 16 - Ankles & Heels
- [Maya]Rigging 17 - Clavicles & Fingers
- [Maya]Rigging 18 - Common Tricks
Asset mentioned in articles: UE5 Rig
Stage 1: Limbs FK Controller Setup
Take left arm joints as an example.
1, Duplicate the skeleton for IK and FK using.
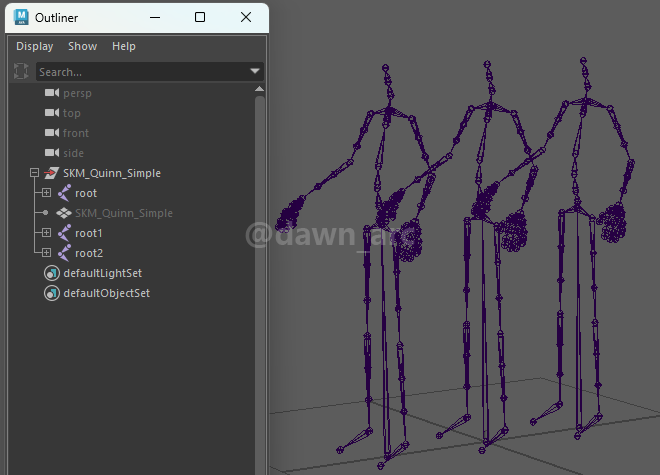
Make sure the distance between original skeleton and replicas are equal, because we will using position offset which was required same distance for IK and FK afterward.
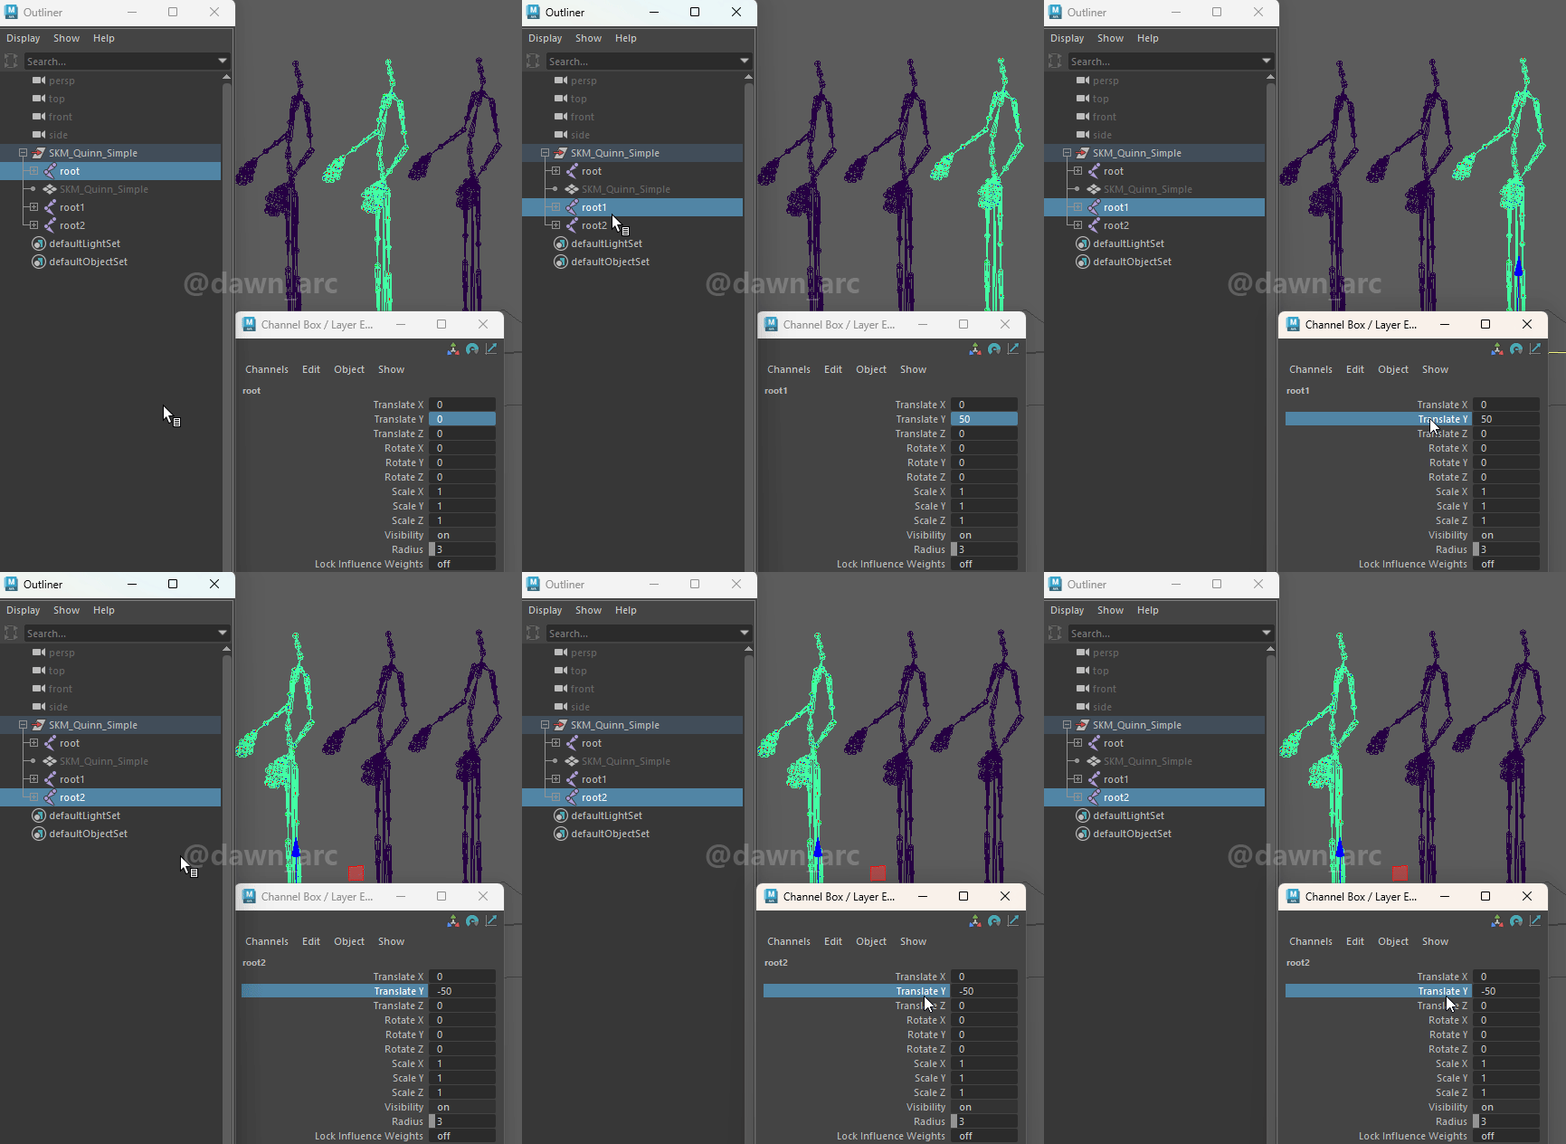
2, Cull the unused joints for IK and FK
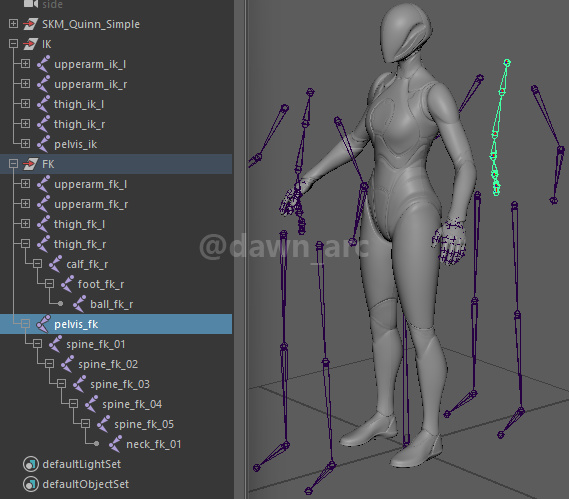
If a new Transform node was created automatically after unparenting (shift + P) joint:
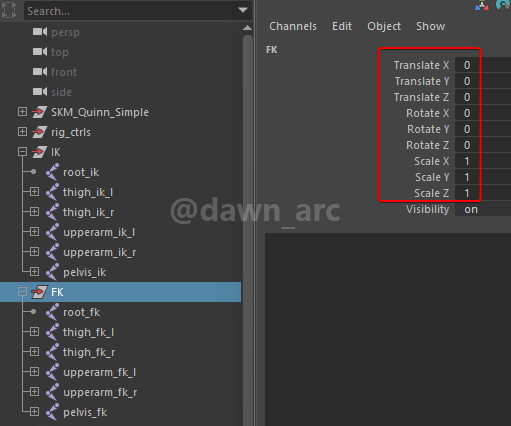
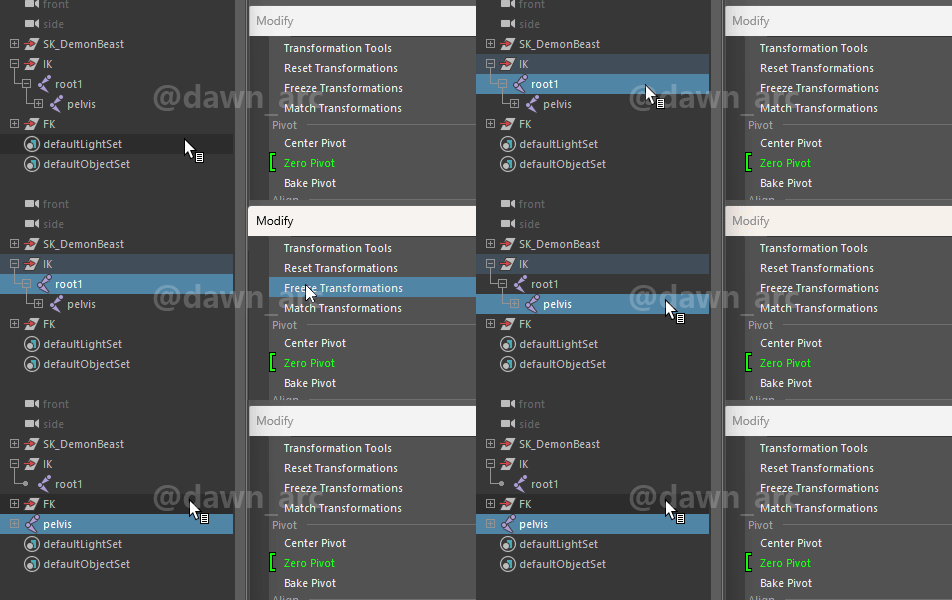
Make sure the transformation of group has been zeroed and normalized, otherwise it will lead to deforming issue in the subsequent flow.
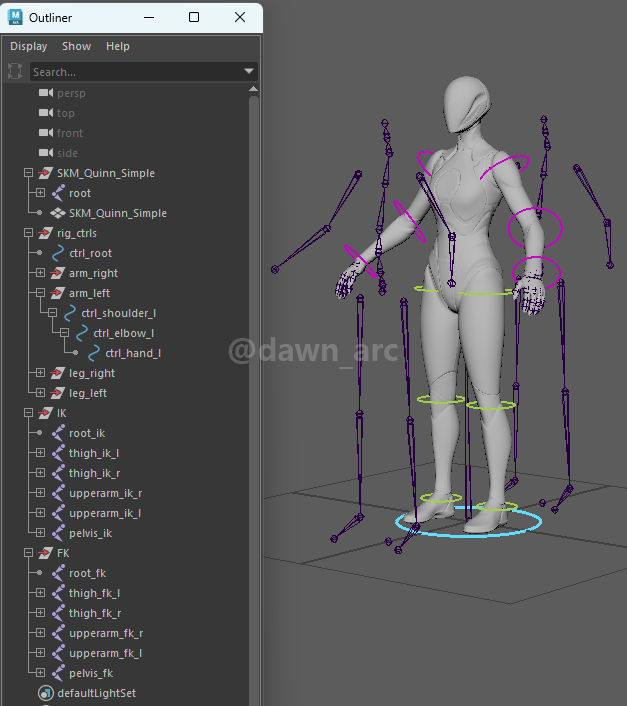
3, Create FK controllers for left arm, then match transformations and tweak the rotation.
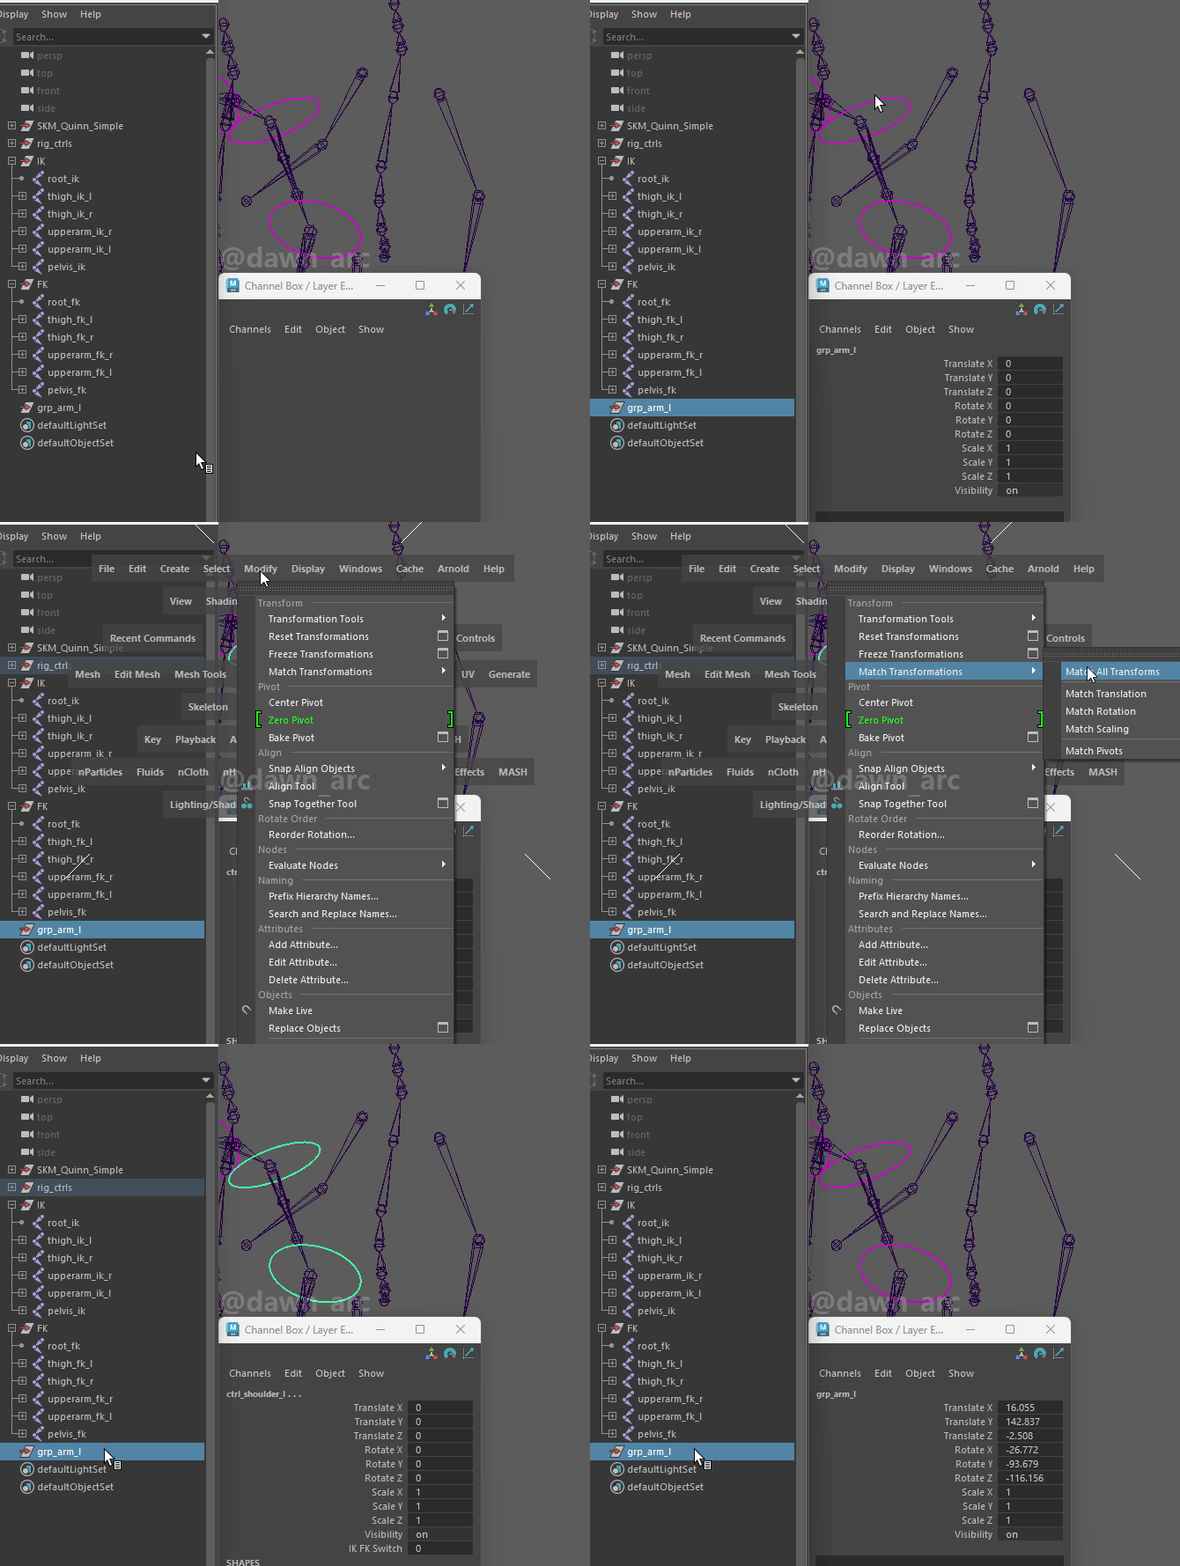
4, An issue need to be noted is that the pivot orientation of controller and joints are not matched.
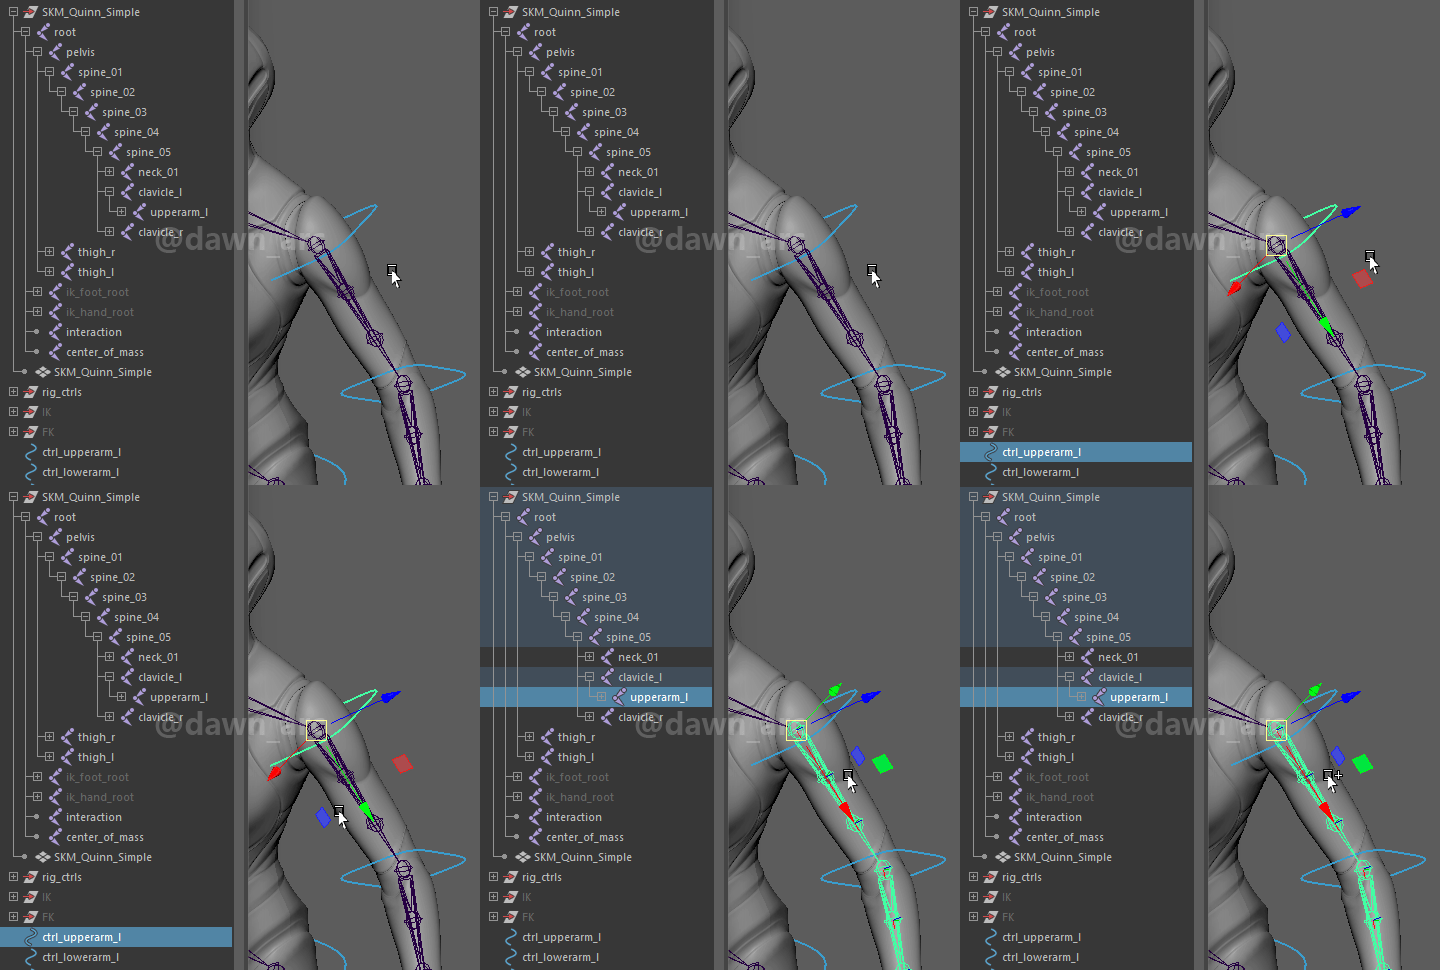
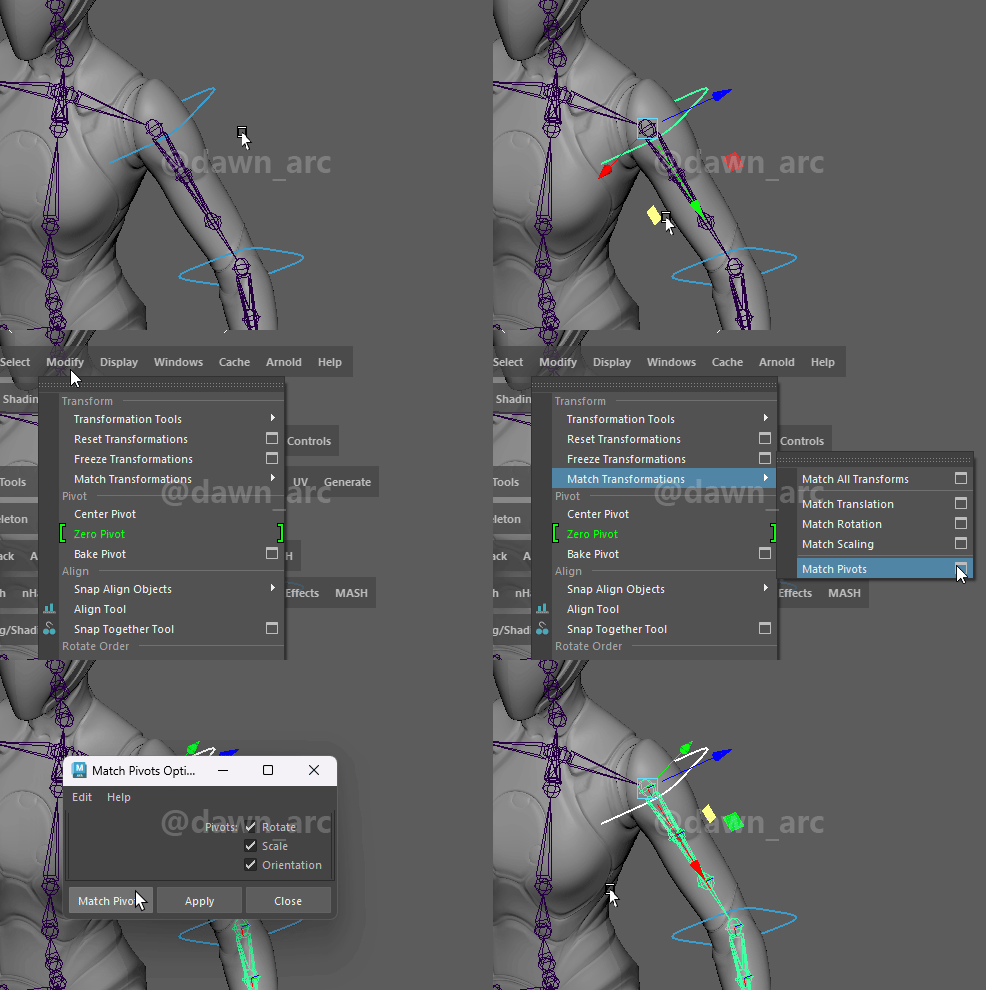
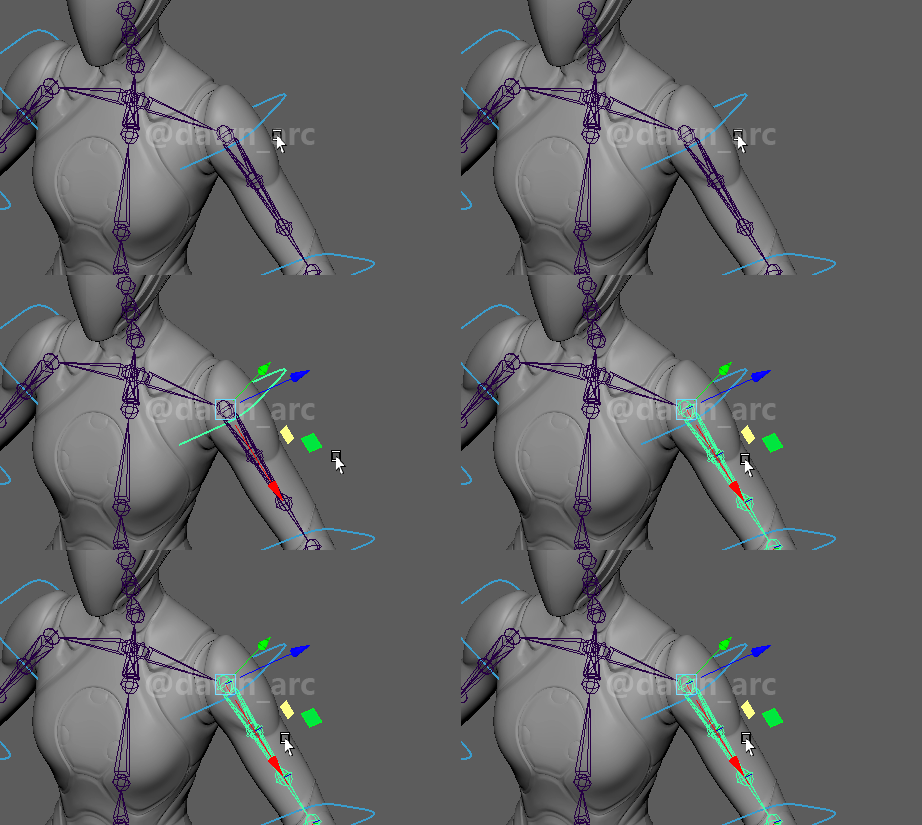
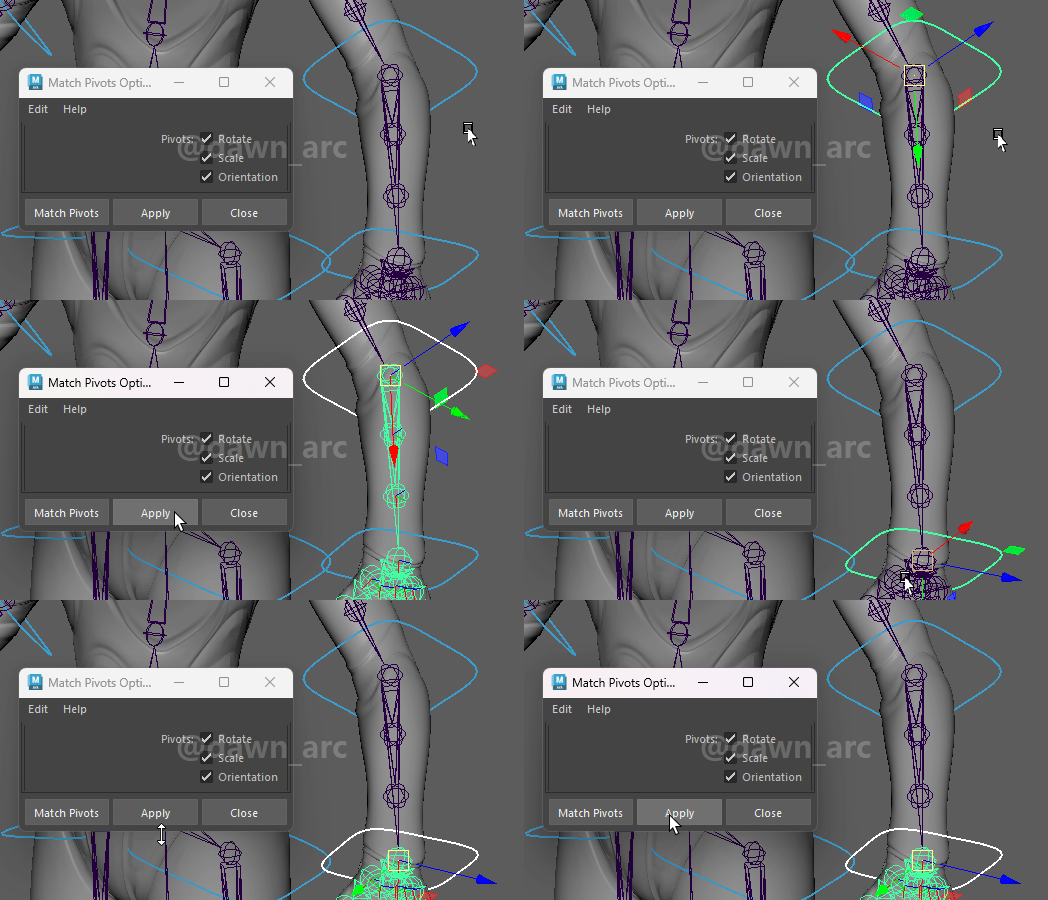
Because we will set up the limbs FK system in the follow-up article ([Maya]Rigging 12 - Limbs FK), if the pivot orientation of controllers hadn’t been matched in current step, it will cause rework when setting up limb IK later.
5, Set up the hirearchy for FK controllers.
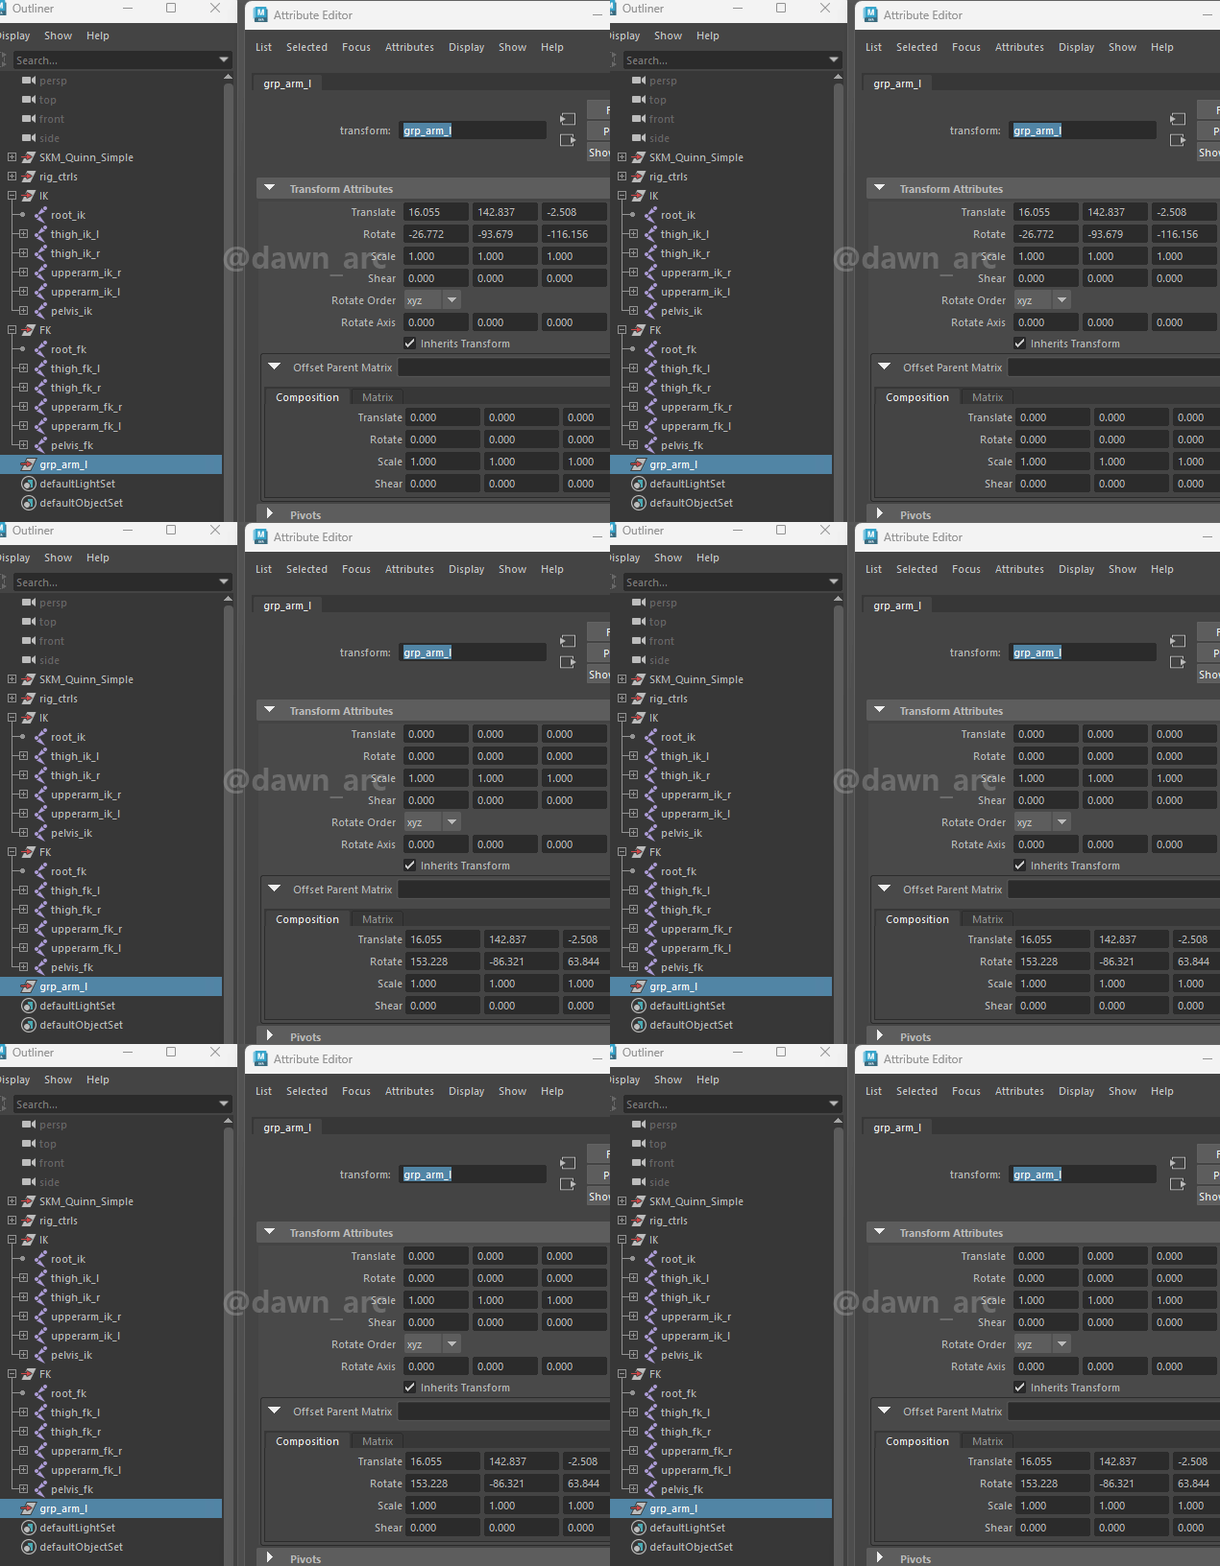
6, Optimize the transformation of the controller. (See: Offset Parent Matrix)
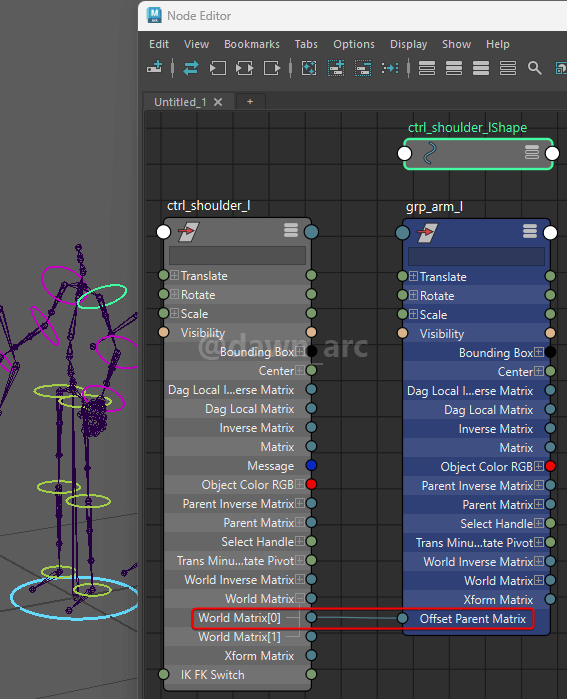
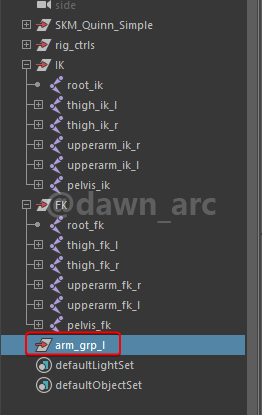
7, Create an empty group, and match the transformation of group to the Control.
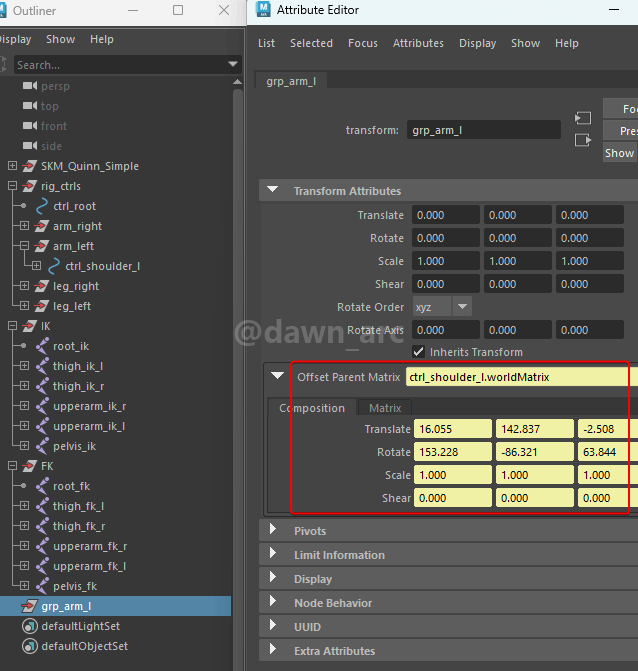
8, Optimize the transformation of the group. (See: Offset Parent Matrix)
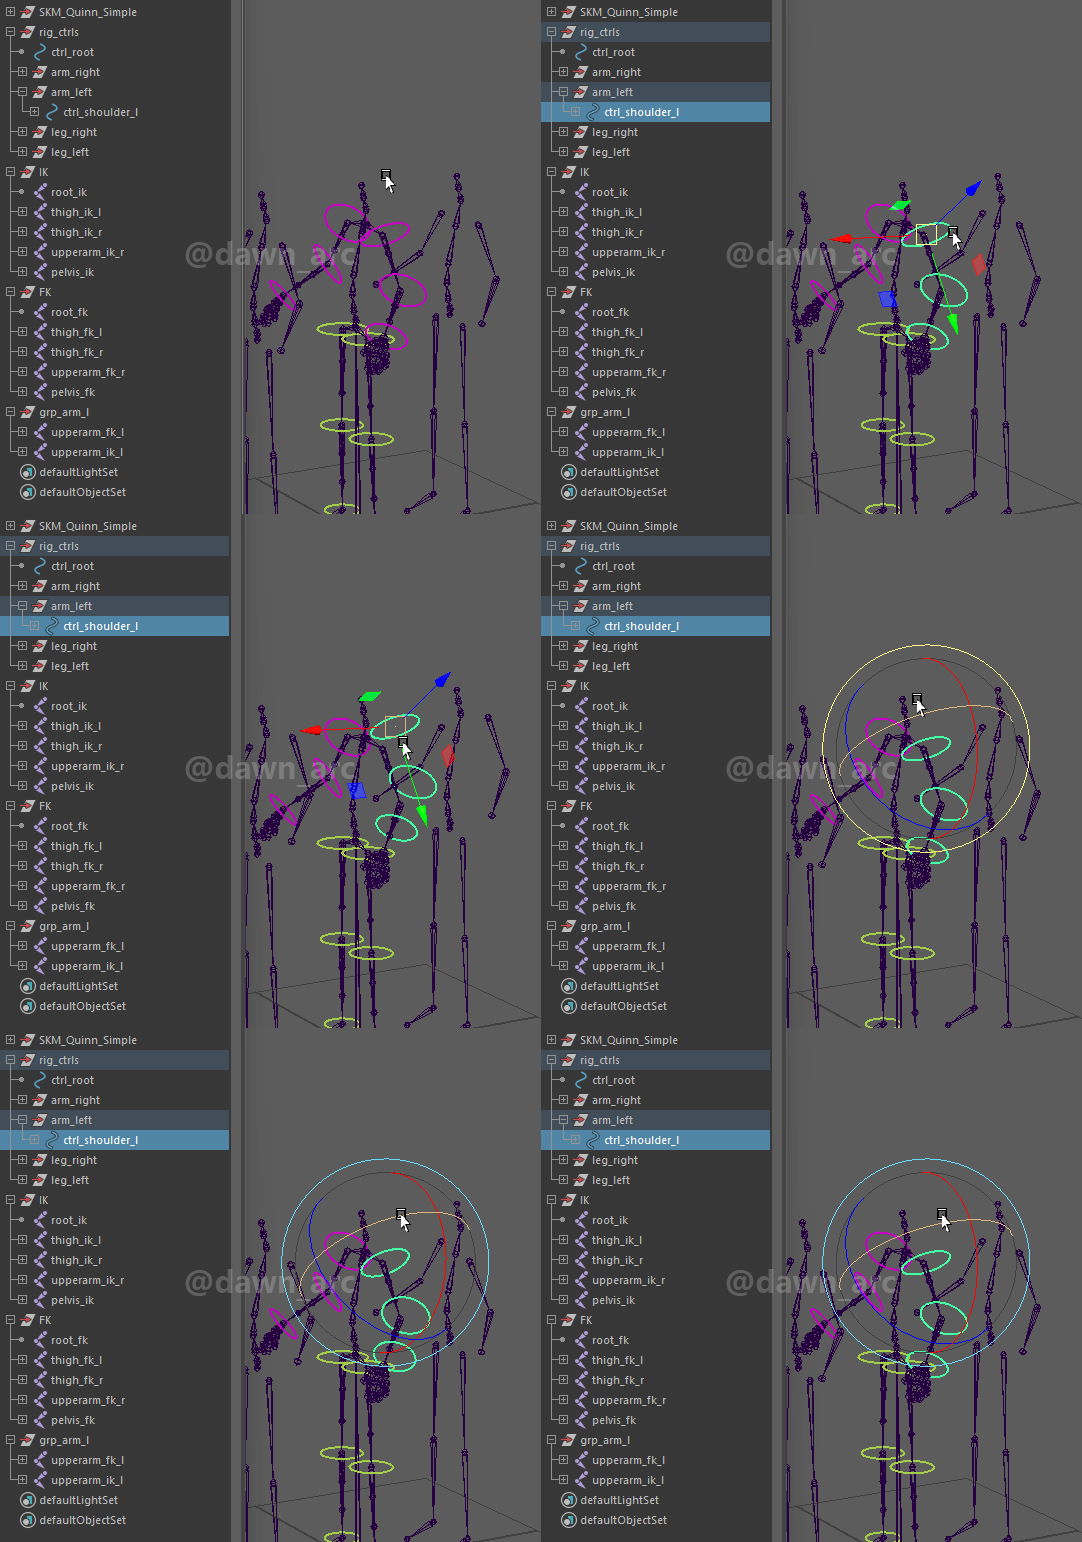
Why we don’t zero and normalize (Freeze Transfromations) the group grp_arm_l instead of Offset Parent Matrix?
Because we need to utilize the transformation of group grp_arm_l to drive joints, this requires that the transformation of joint and controller are equal.
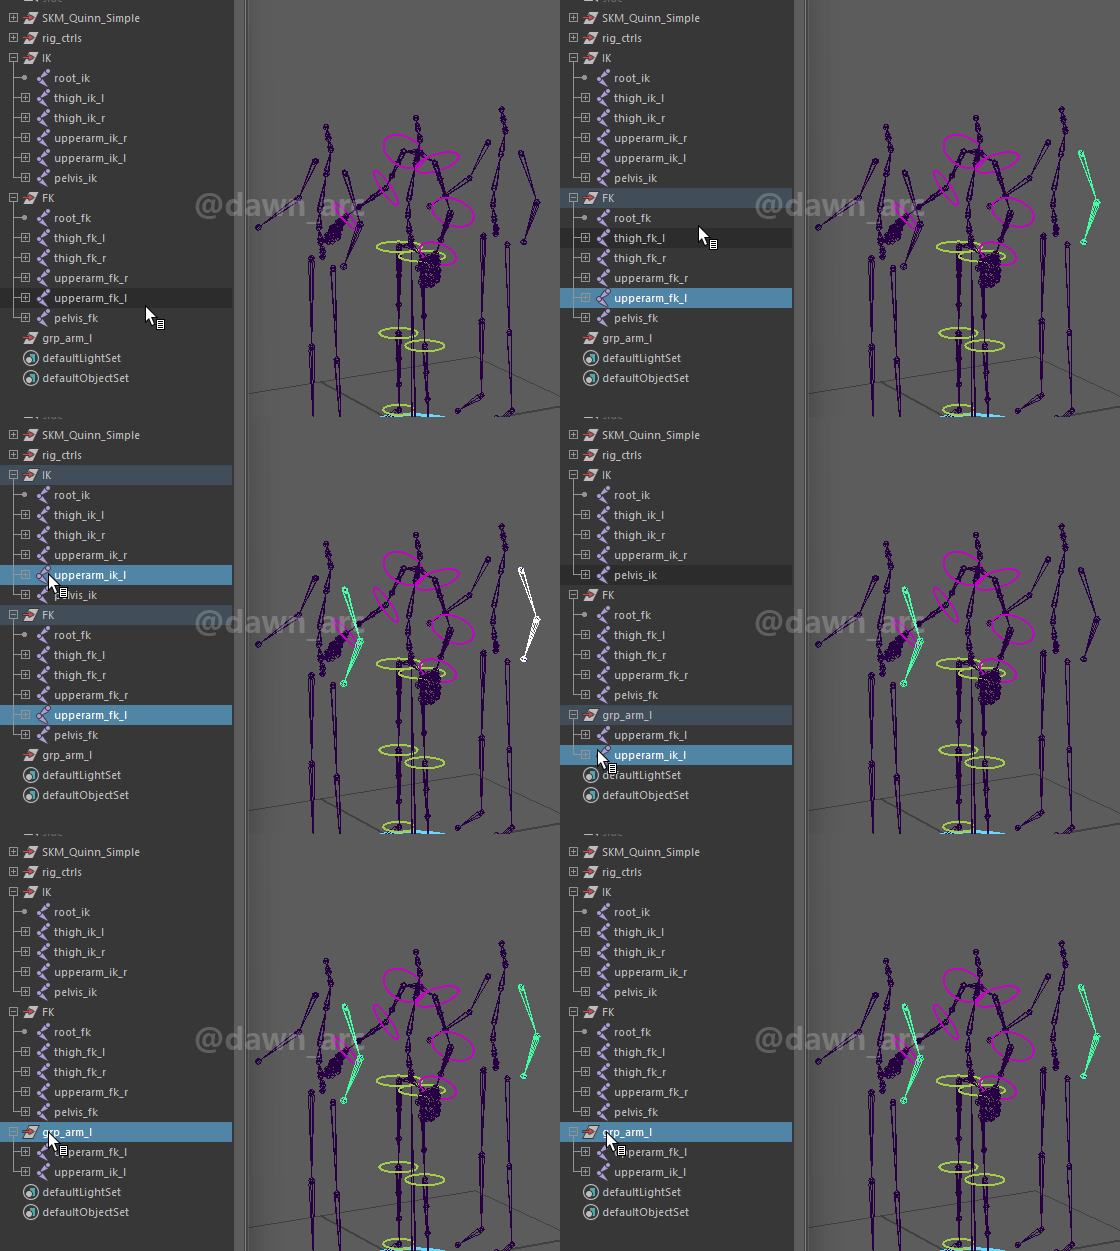
9, Move the joints of IK and FK into the group.

10, Drive the Offset Parent Matrix from Control in the Node Editor.
In current stage, we will not set up the FK system completely, just to demonstrate the driven process between FK controller (ctrl_upperarm_l) and group arm_grp_l.
We will explain more details for FK controllers in later article: [Maya]Rigging 12 - Limbs FK.
11, Optimize the transformation of the IK joints and FK joints (also include their child joints). (See: Offset Parent Matrix)
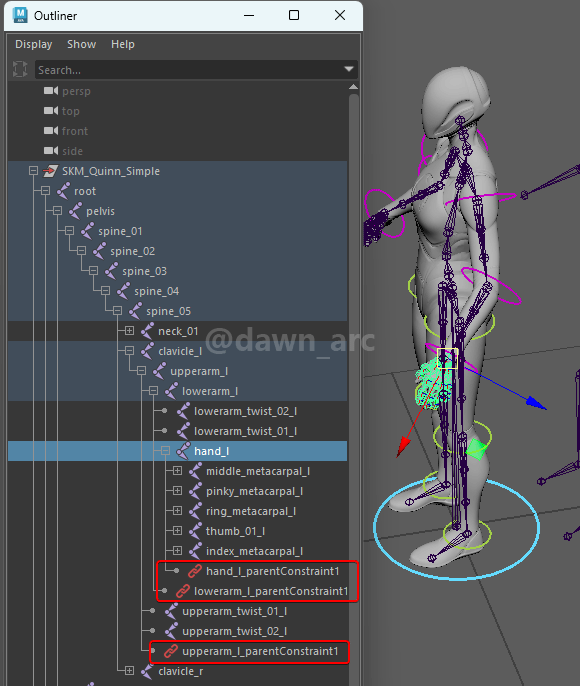
Because we will set up the limbs FK system in the follow-up article ([Maya]Rigging 12 - Limbs FK), if the Offset Parent Matrix of IK joints and FK joints hadn’t been optimized in current step, it will cause rework when setting up limb IK later.
Stage 2: IK FK Constraints
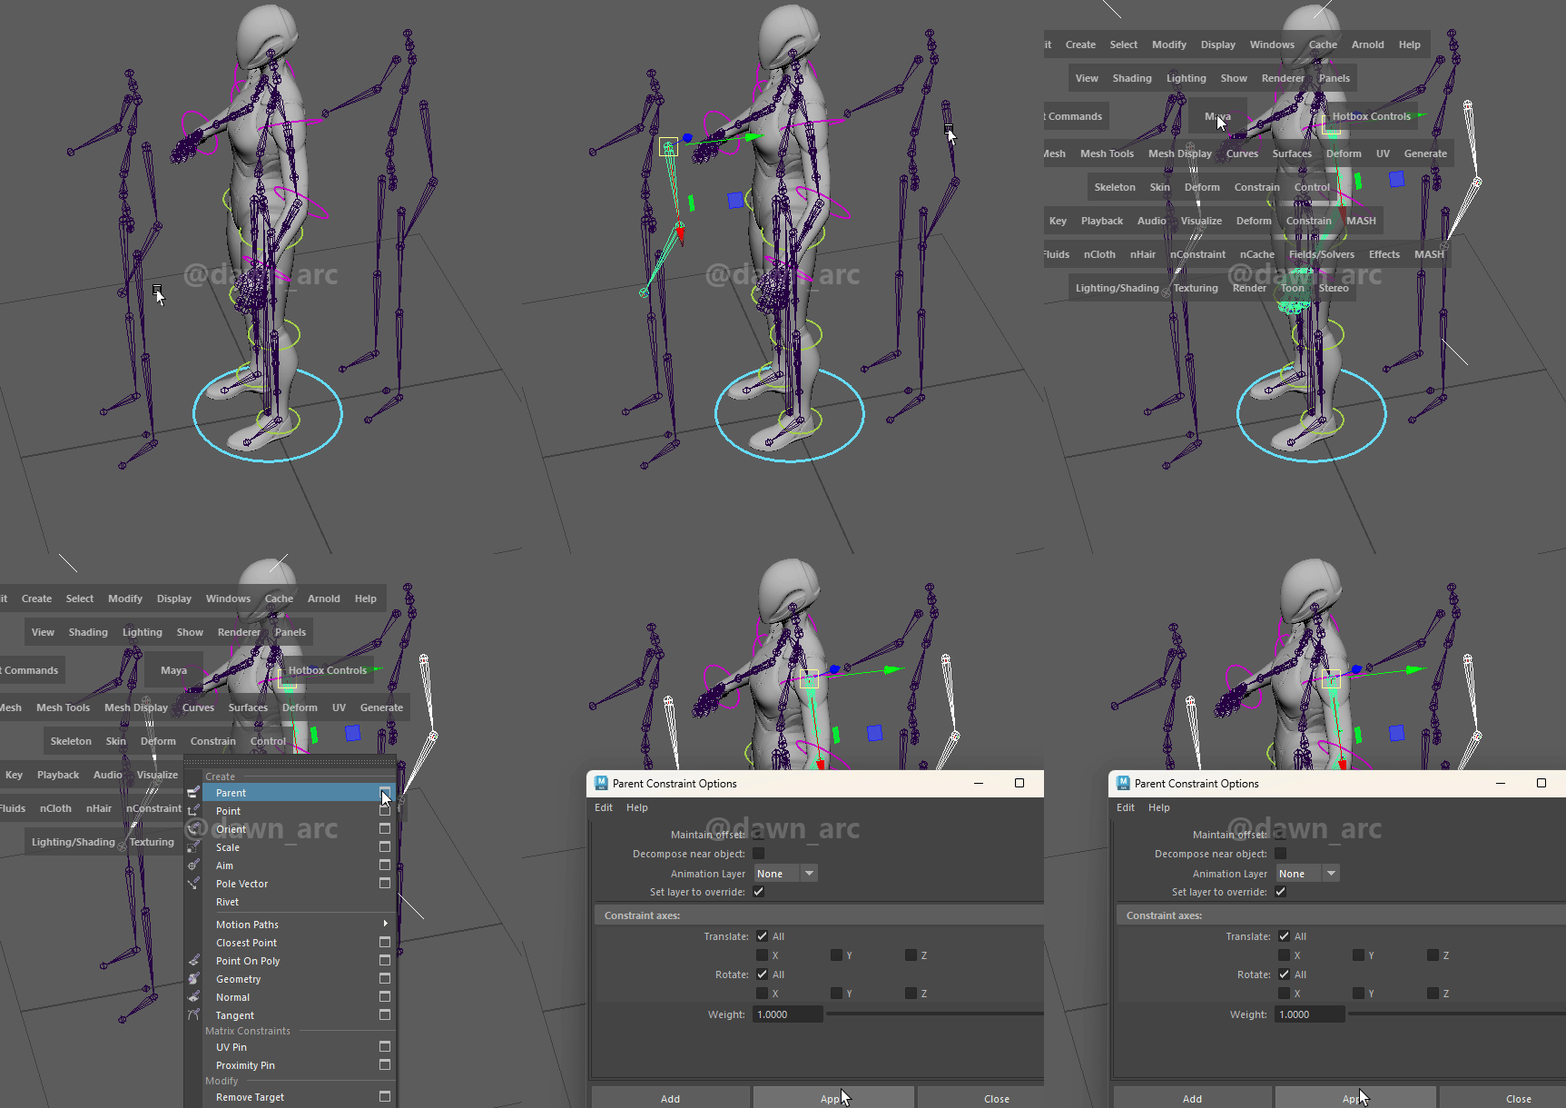
1, Create Parent Constraint to IK FK joint and source joint.
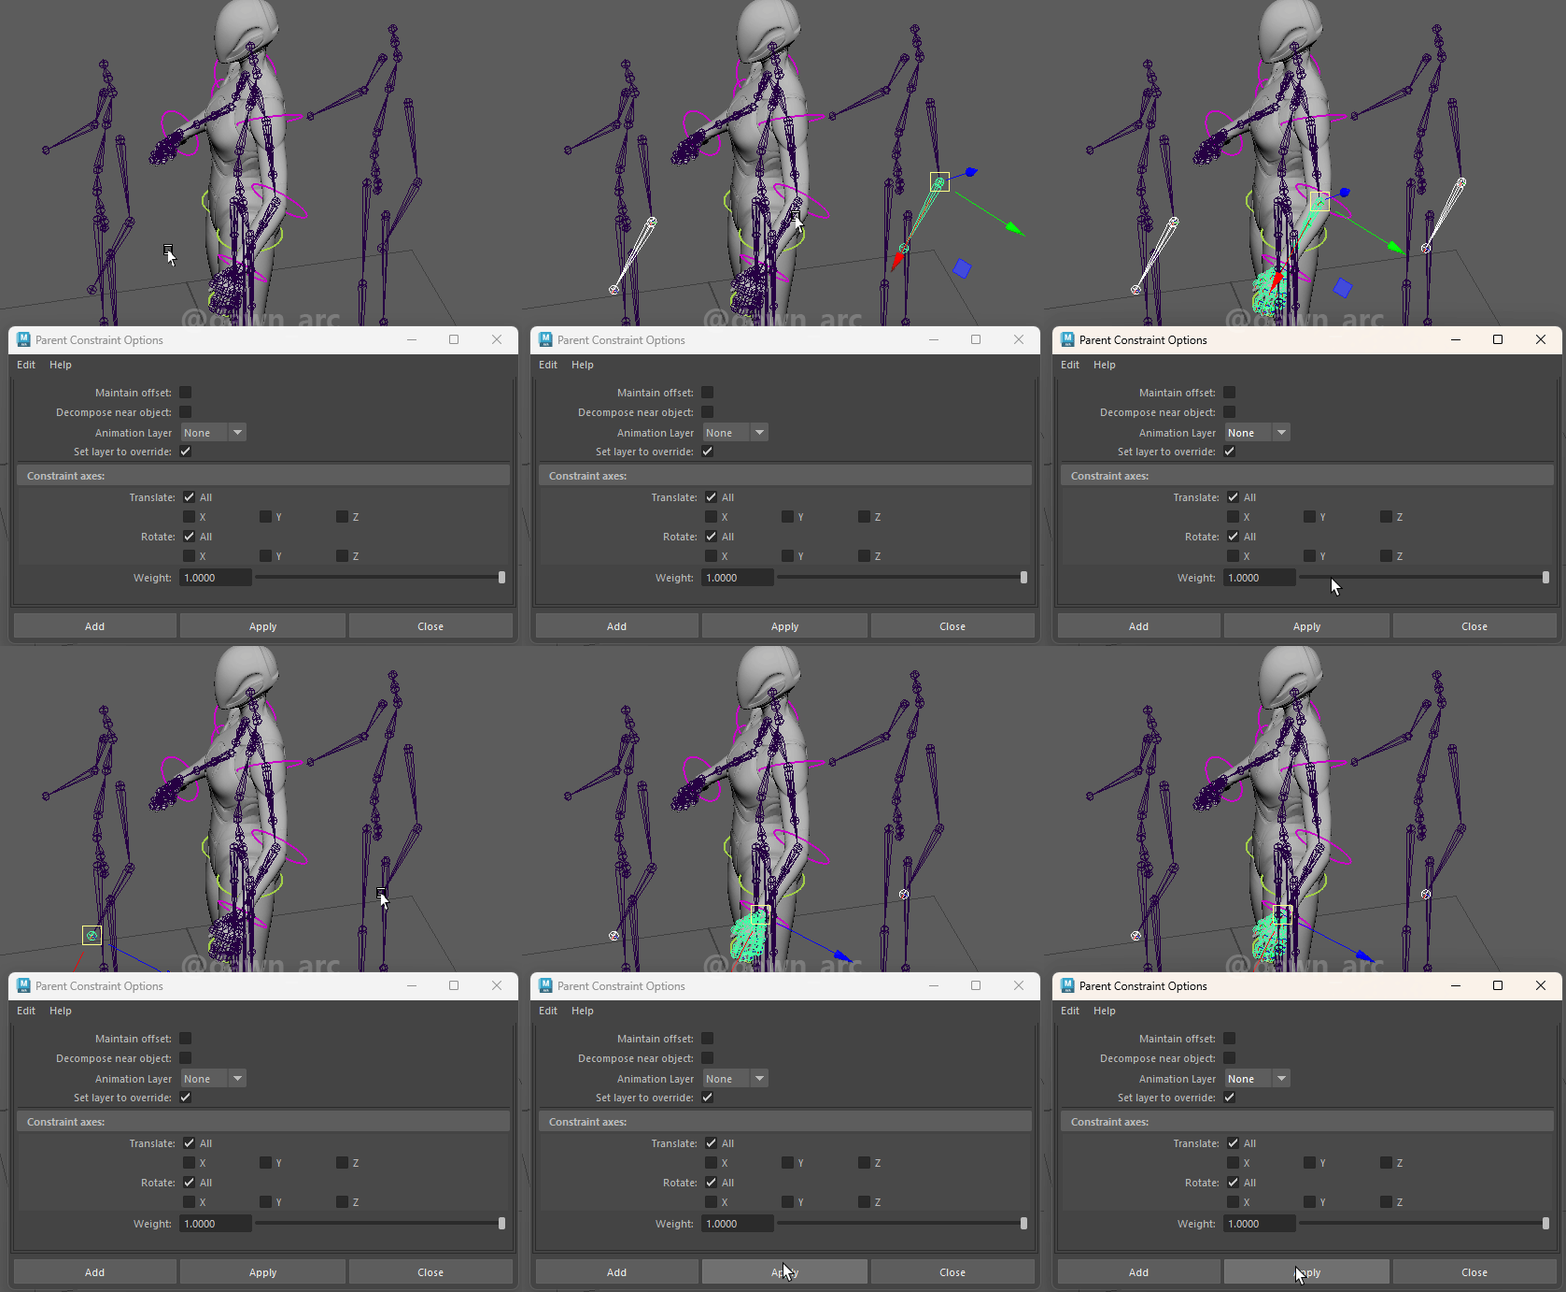
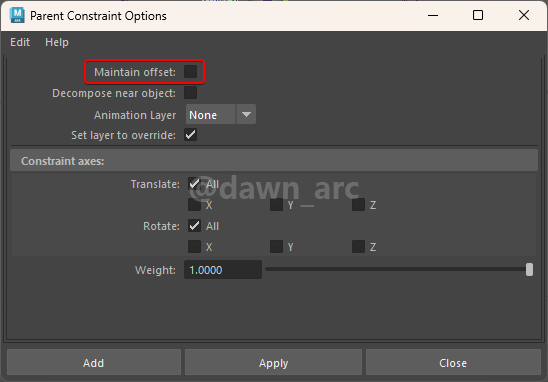
Caution: Uncheck the Maintain offset before applying.
If there are multiple node need to be as child in another node simultaneously, the transformation (position and rotation ) of parent node was calculated from transformation averages of child node by default.
But in current scenario, we don’t expect that parent’s (original joints) position was effected by the position IK and FK joints, and we want to maintain the position of parent by self, this is why need to keep the same distance between IK FK joints and original skeleton that mentioned above.
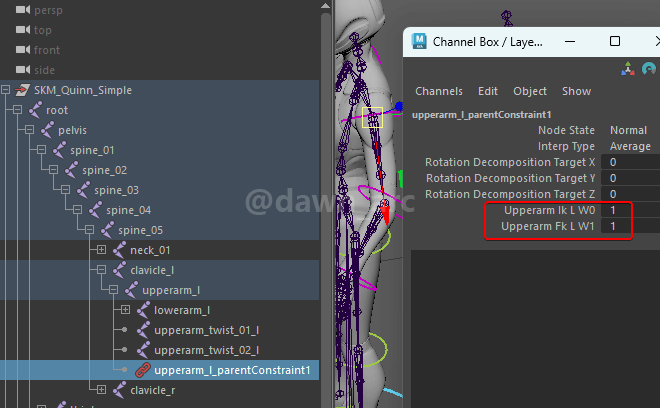
Then you will see two switches which were used to enable or disable Offset Matrix have been created on Constraint. They’re the final switch to IK and FK afterward.
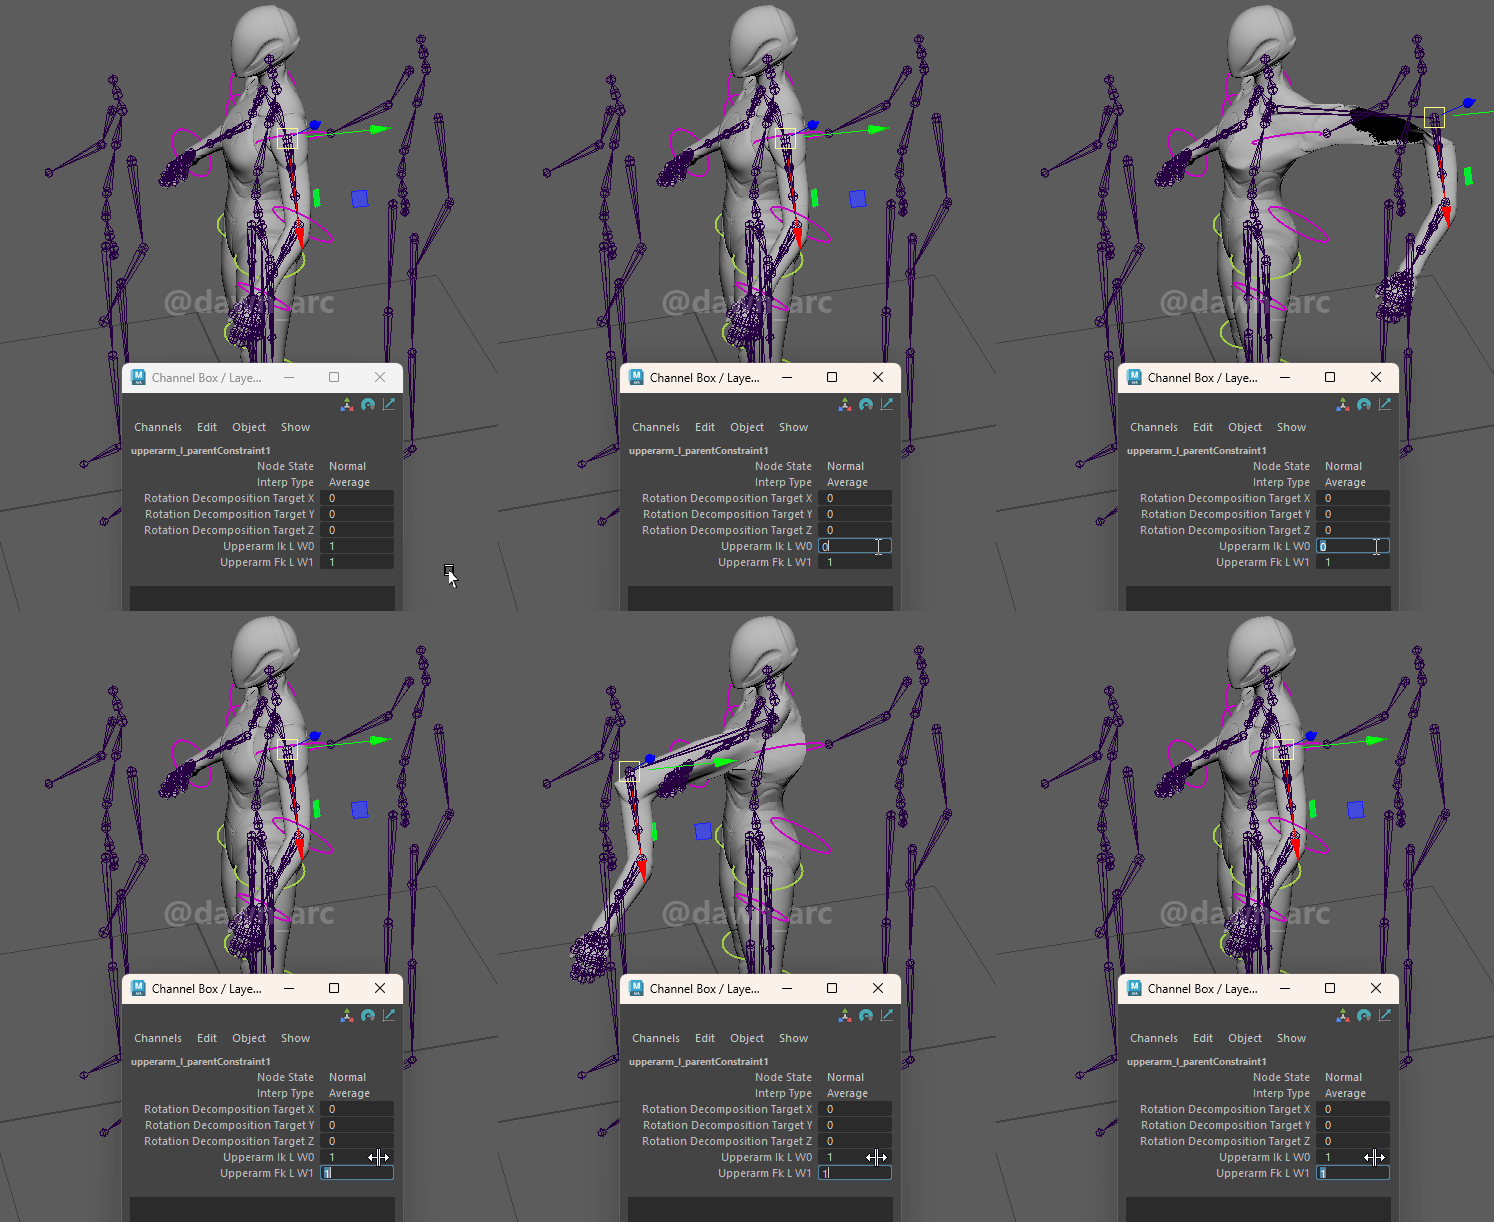
We can test the switch for IK and FK.
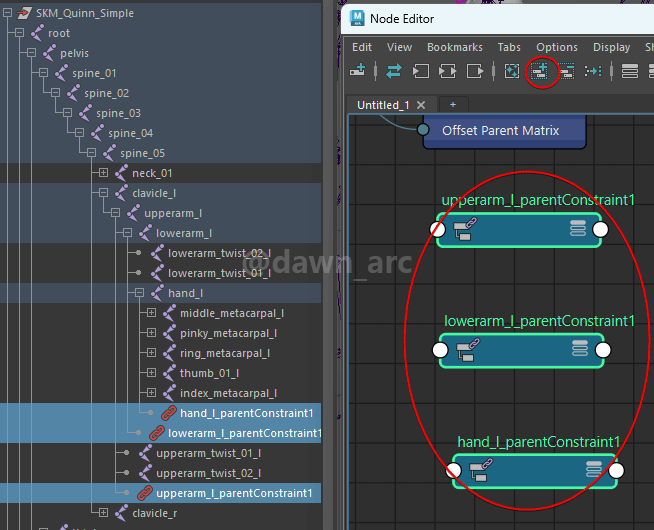
2, Continue to setup the Constraints for the rest of joint for left arm.

3, Create an new controller named ctrl_arm_l, we will use it as switch to swap between IK and FK system.
Then create two curve controls to visual tips. (How to create letter curve, see: Type Curves).

Stage 3: IK FK Switch
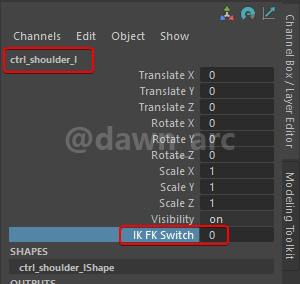
1, Create attribute on Control, this attribute is the switch to swap IK and FK.

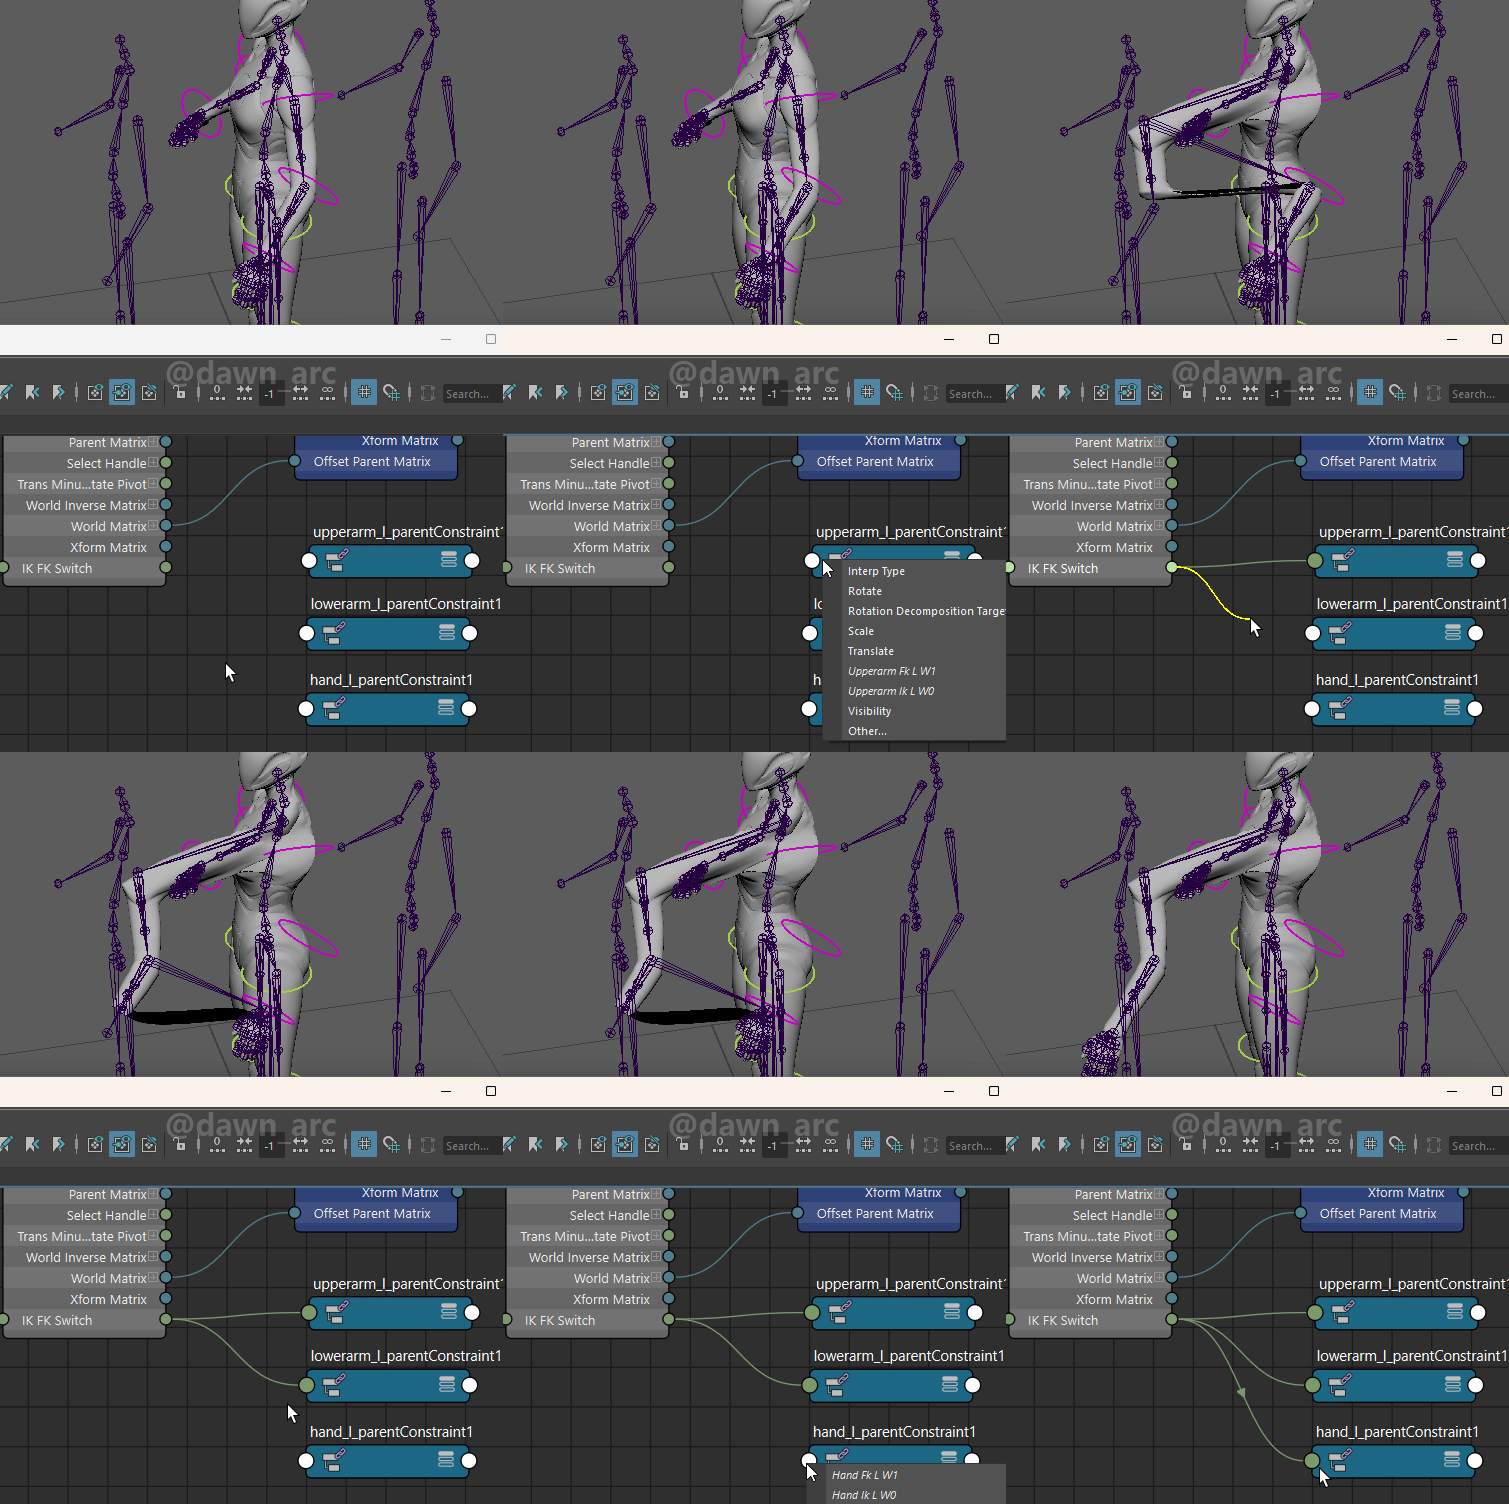
2, Since tweak the switch on constraint directly is not intuitive to animator, so we need to provide an visible switch.
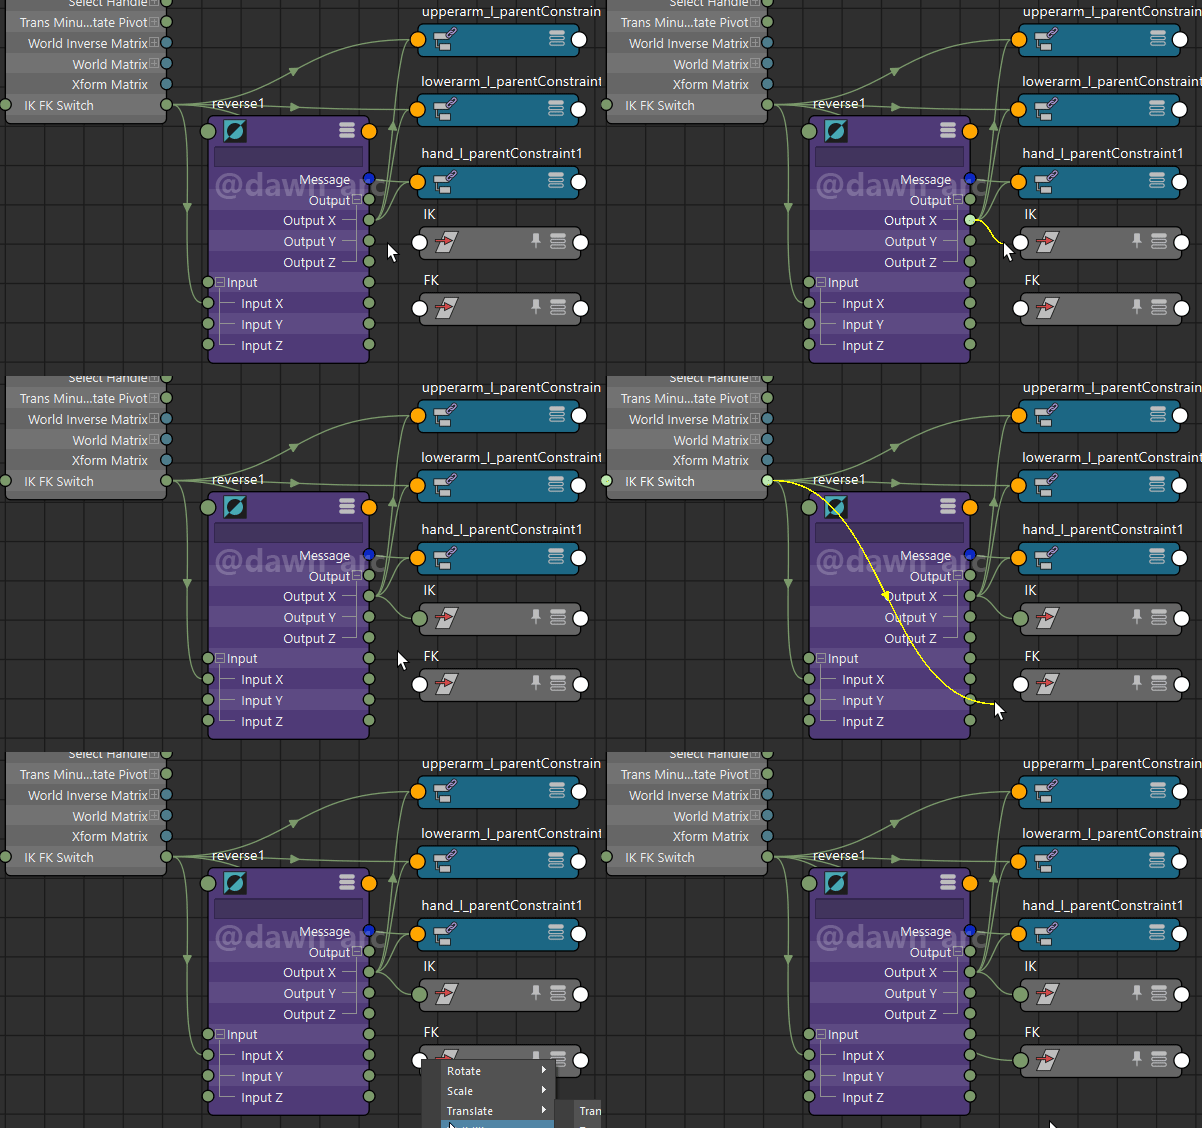
Open Node Editor, and add nodes for constraints.
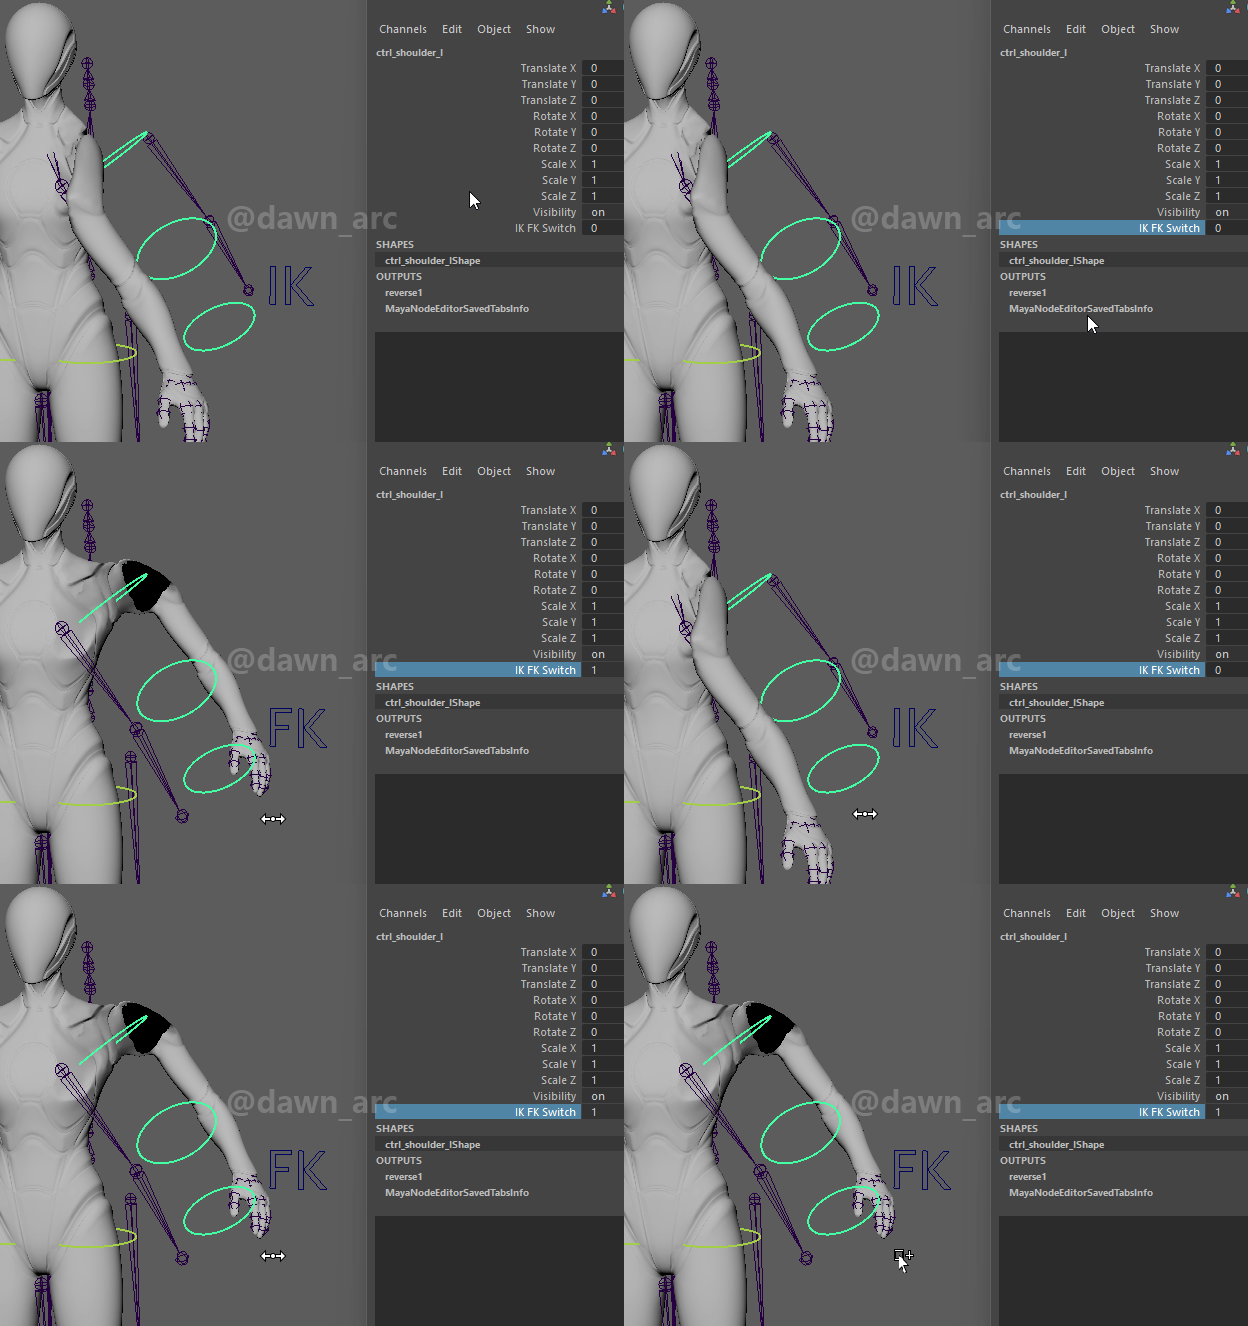
Then connect IK_FK_Switch to all the FK switches.
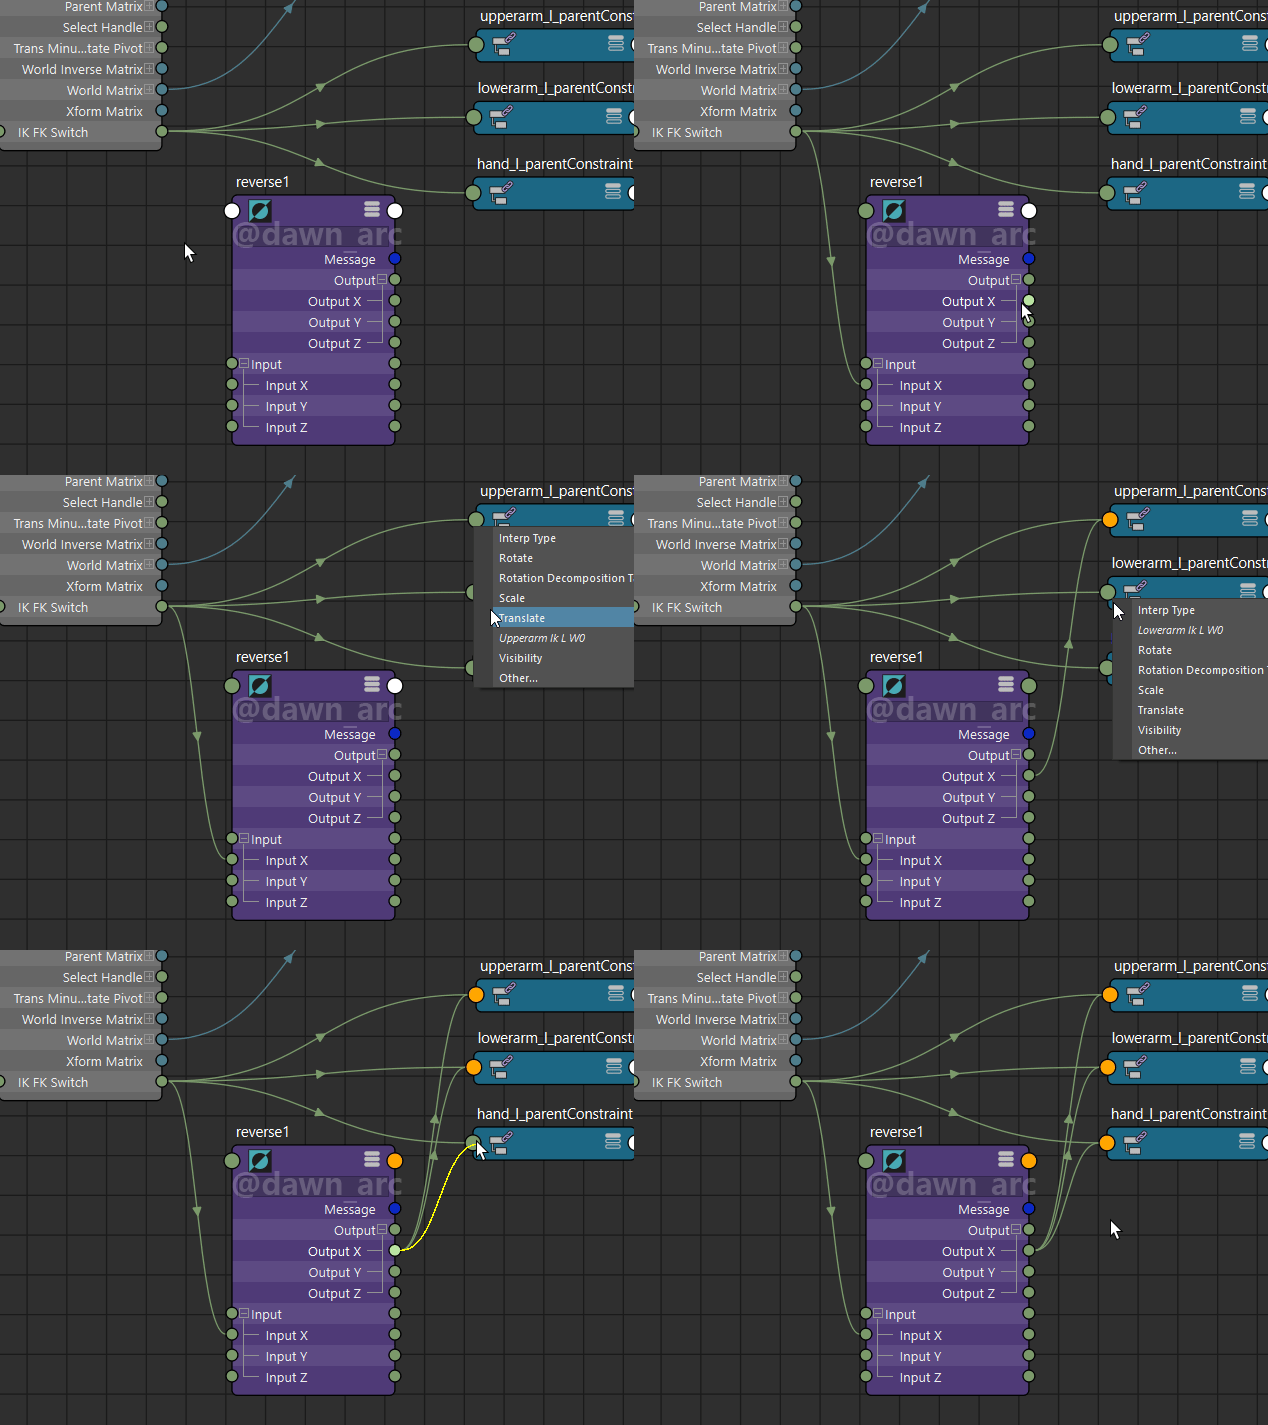
Then hit Tab to open command line, and create a reverse node.
Then connect the IK_FK_Switch to all the IK switches, pass through reverse node.
Finally we can switch IK and FK using the attribute of arm Control.
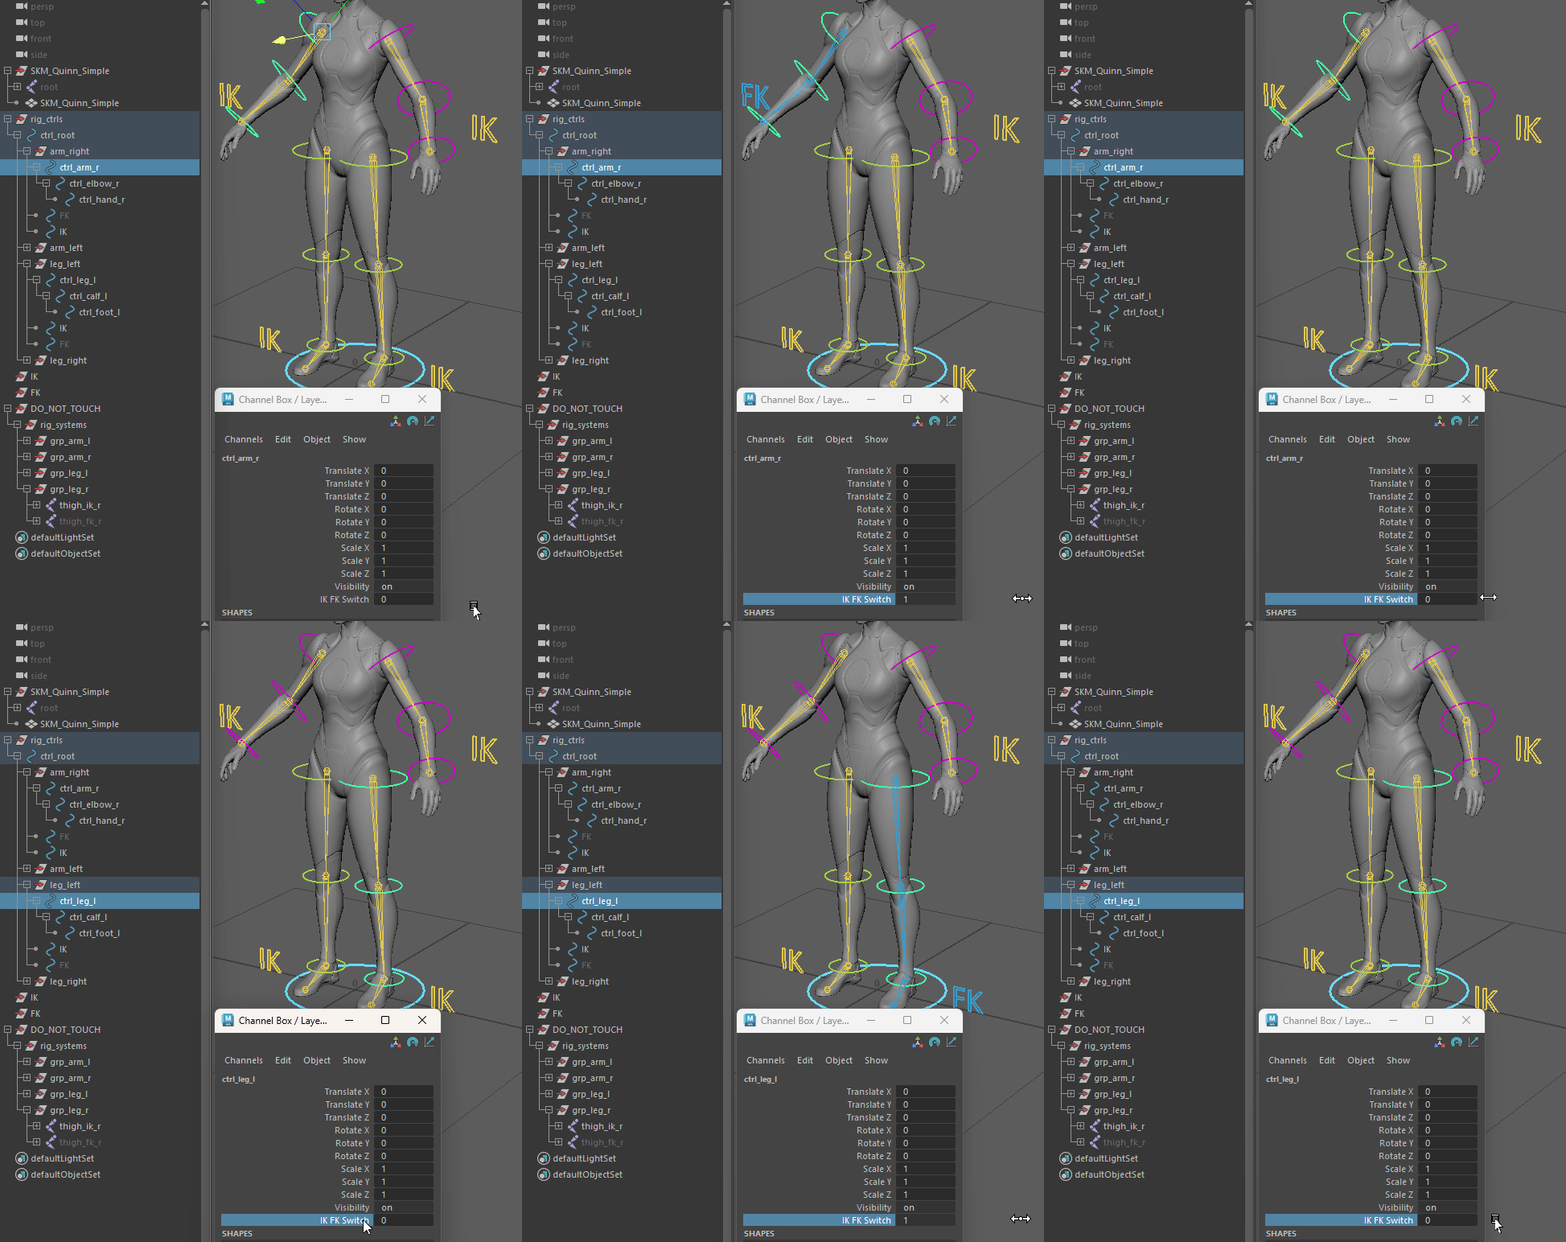
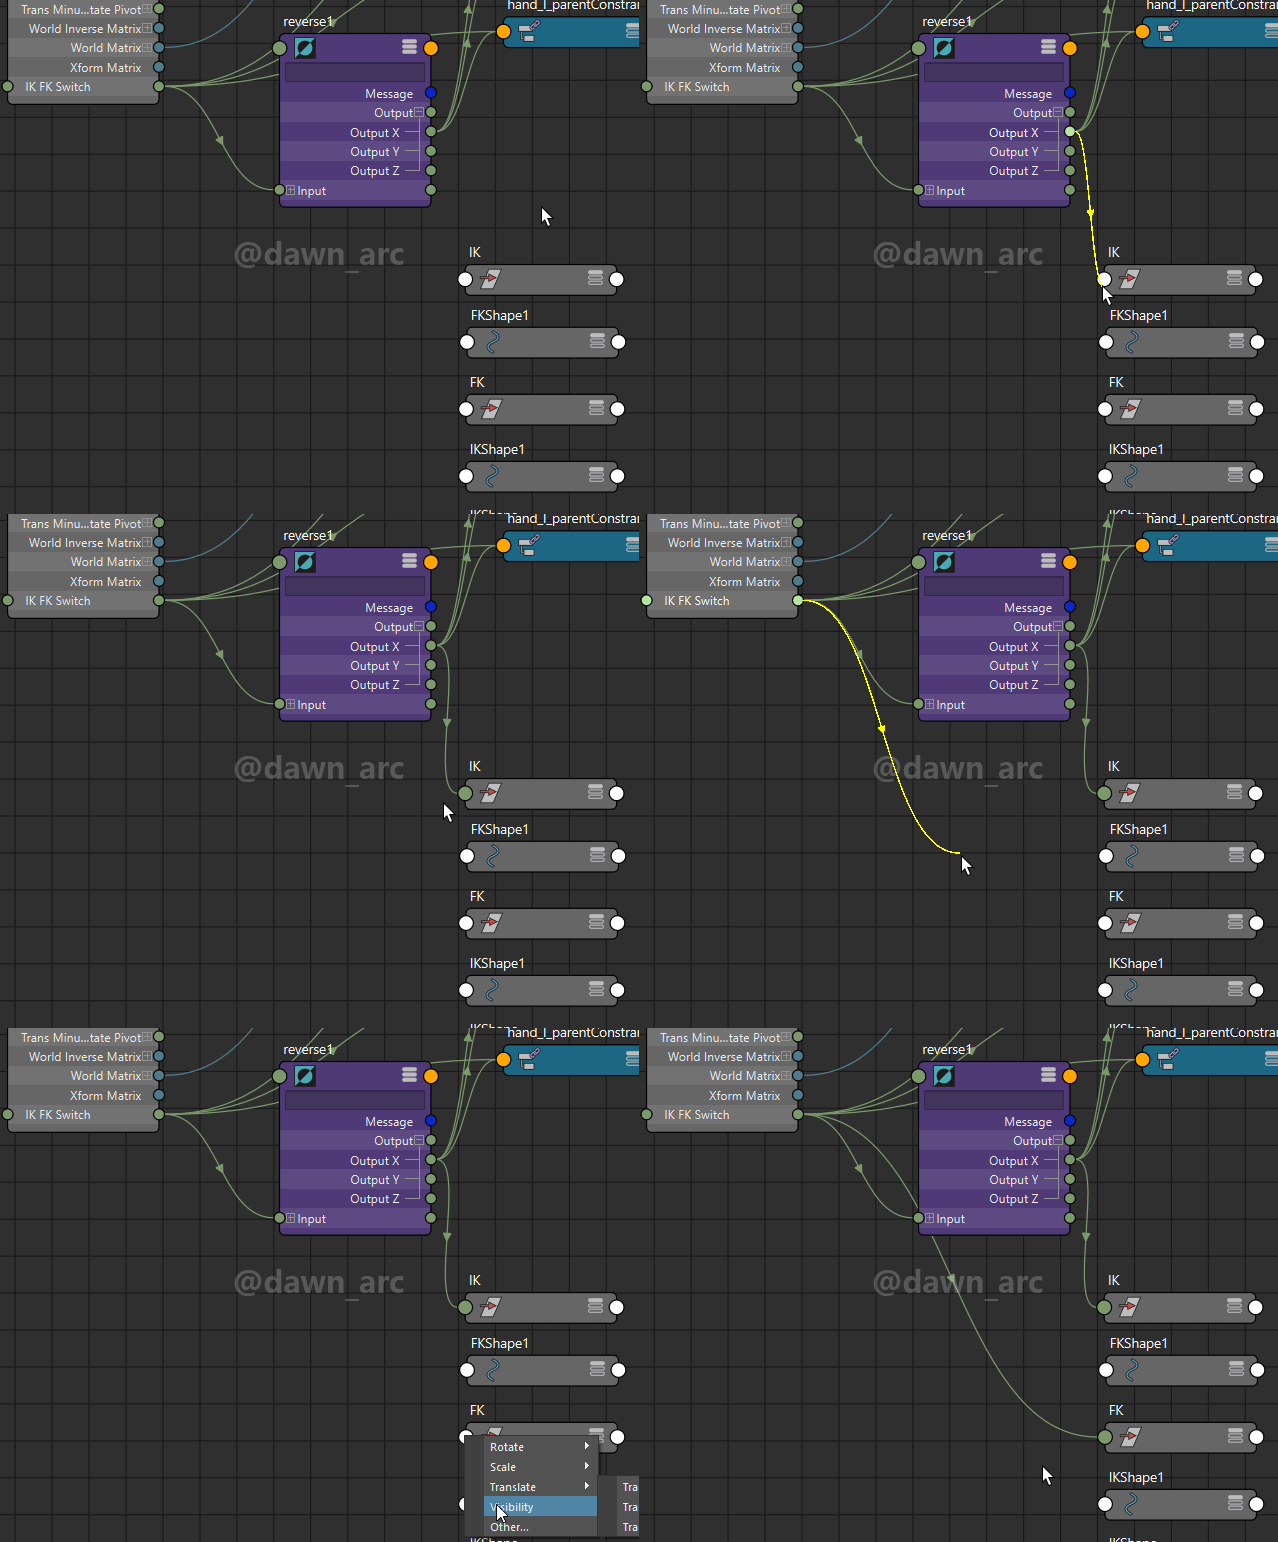
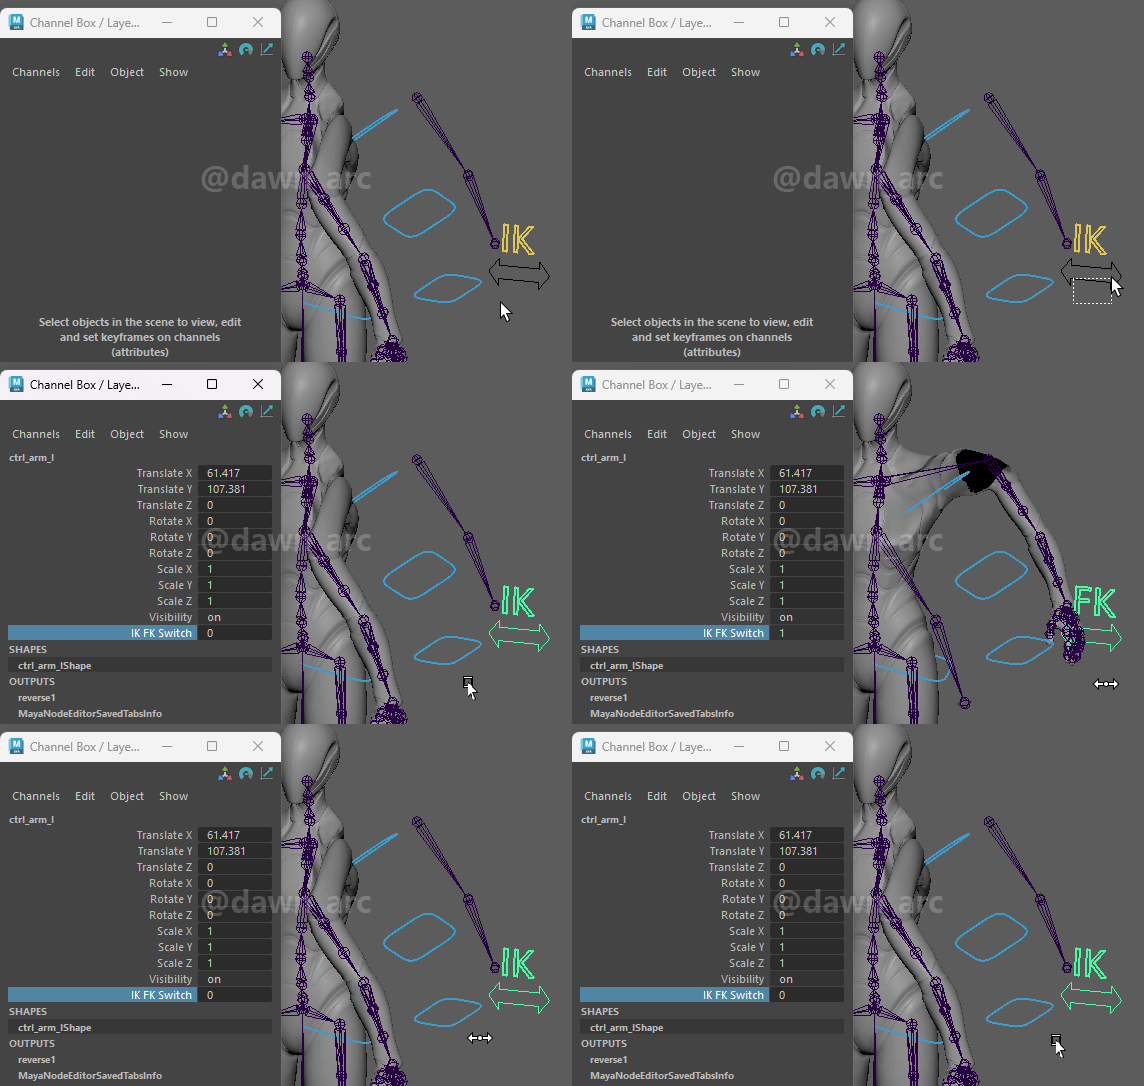
3, Drive the attribute for visibility of visual tips.
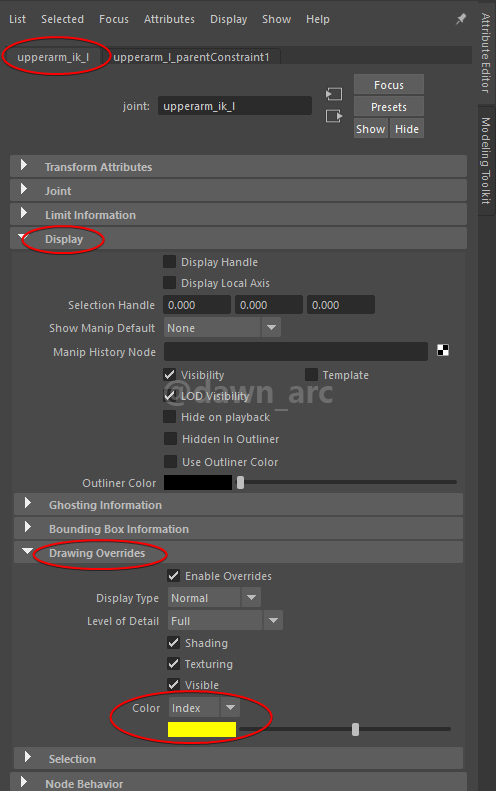
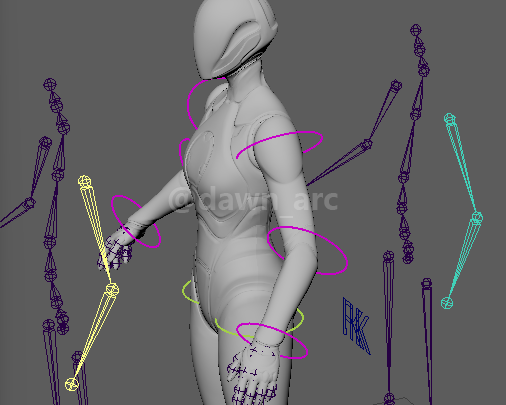
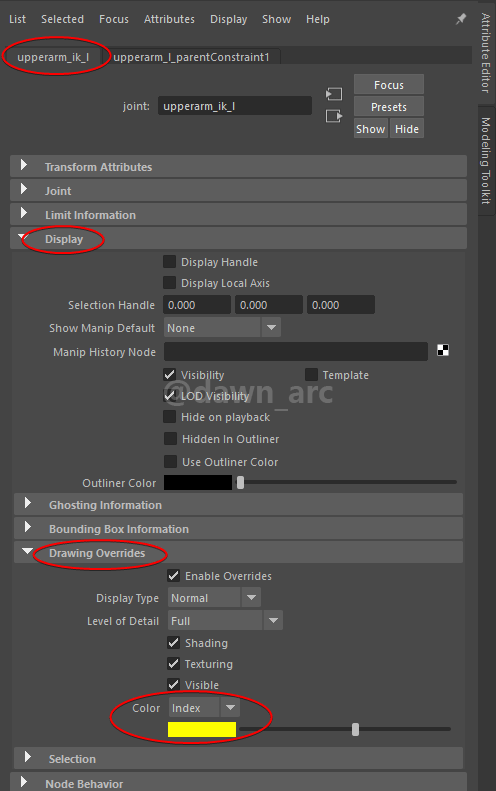
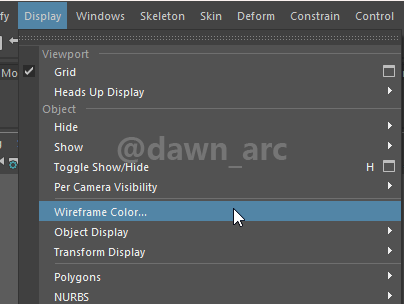
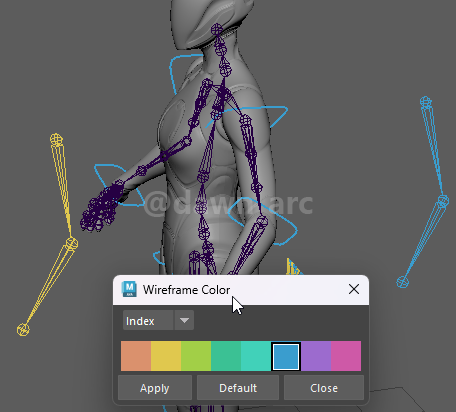
4, We can change the display color of IK and FK joints to distinguish them.
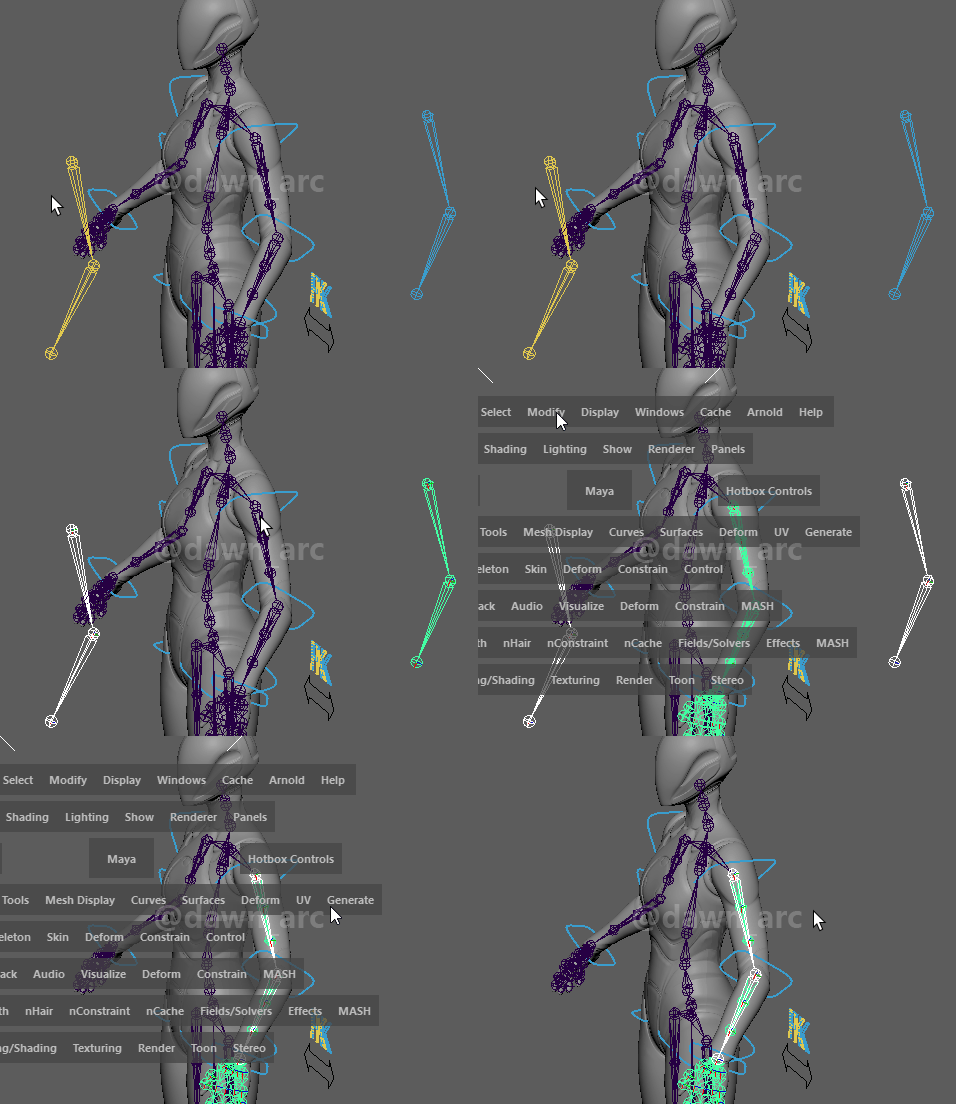
We can setup the IK FK system for left arm and legs in the same way.
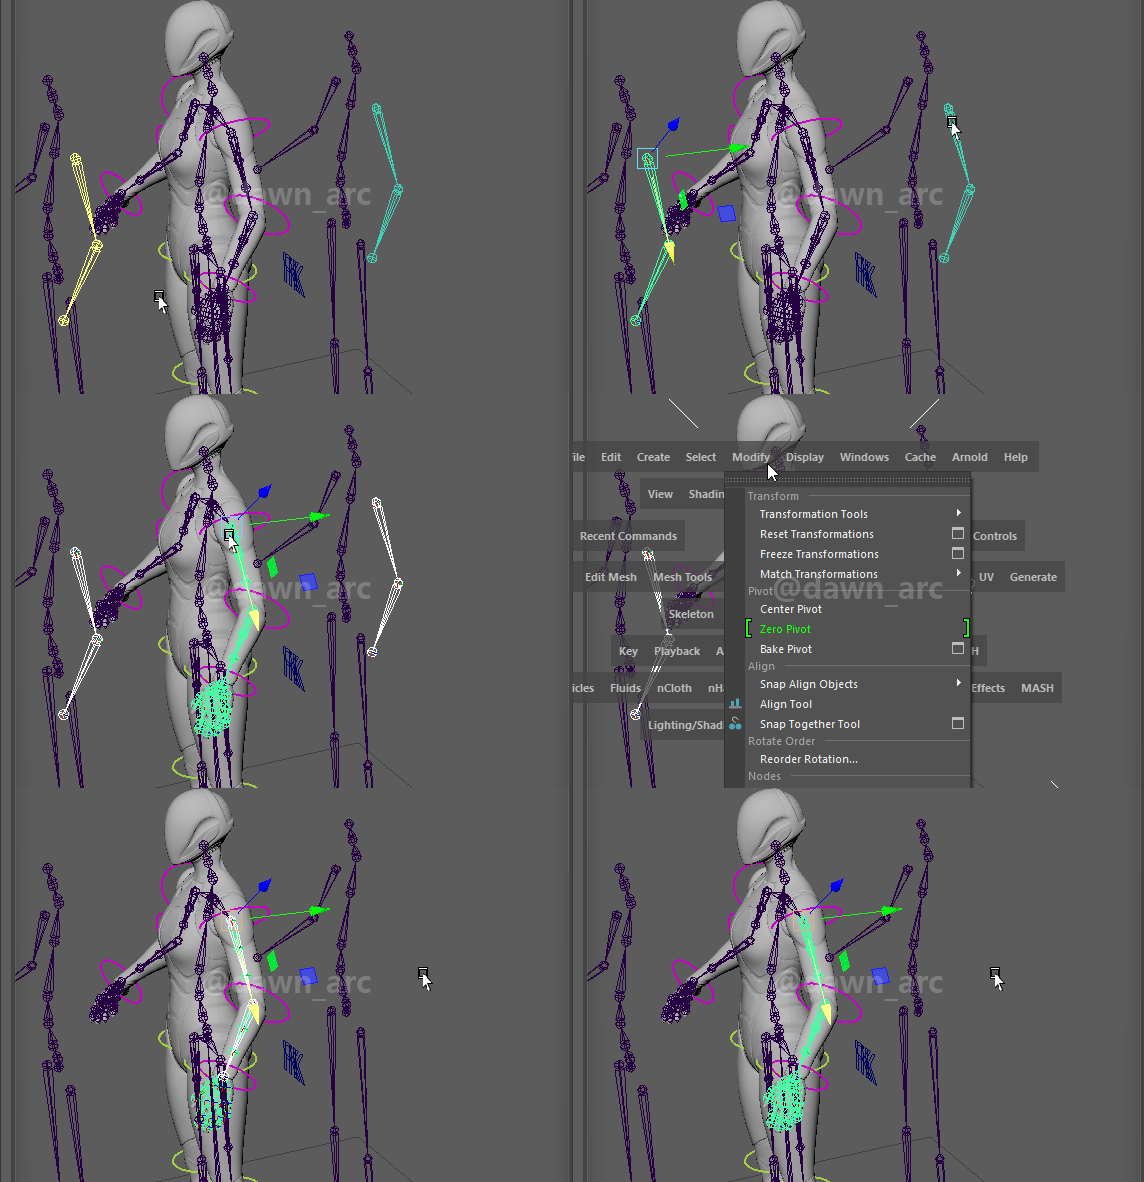
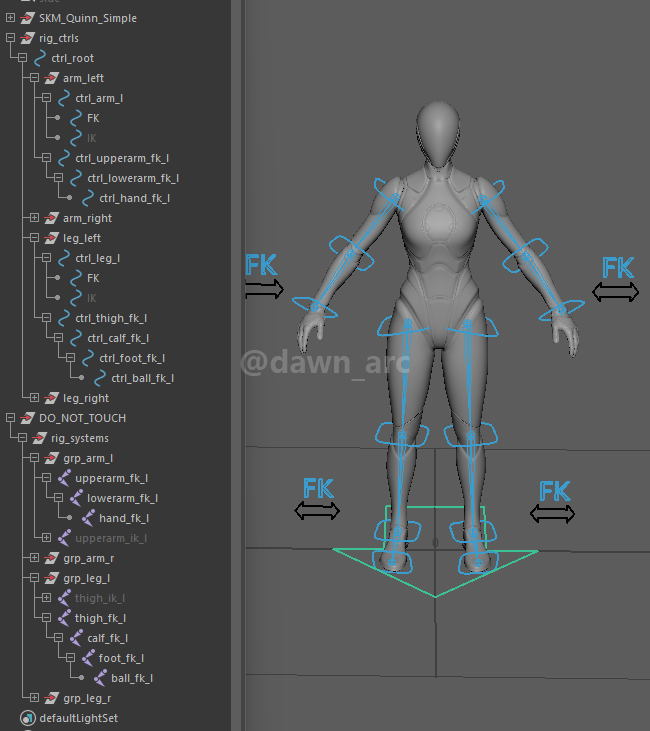
5, Setup the hierarchy for other limbs: right arm, left leg and right leg.
References
Realtime Creature Rigging Workshop (9 / 19) : Control joints
https://www.youtube.com/watch?v=-3OE_uI24qs
紫光阁名录:瓜尔佳·富德
富德(1695年—1776年),清朝瓜尔佳氏,驻防吉林,满洲正黄旗人,军机大臣。
乾隆初年,由护军升为三等侍卫,乾隆十三年(1748年),随大学士傅恒征讨大金川,官至副都统。乾隆二十年(1755年),征准噶尔,为正黄旗蒙古都统。乾隆二十四年(1759年),随兆惠征大小和卓,兵至巴达克山,因功进封一等清远成勇侯,官至御前大臣。乾隆二十五年(1760年)二月,富德入直军机处。二十七年(1762年)九月富德革。因为索贿和用人不当,两次下狱。乾隆三十八年(1773年)随军征讨小金川。乾隆四十年(1775年),金川平定,因为滥赏贪污,押送京师杀害。