[Maya]Rigging 02 - Skinning
Keywords: Animation, Maya, Rigging, Skin
Maya Rigging series of articles:
- [Maya]Rigging Overview
- [Maya]Rigging 01 - Joint
- [Maya]Rigging 02 - Skinning
- [Maya]Rigging 03 - Visualization
- [Maya]Rigging 04 - Controller
- [Maya]Rigging 05 - Attributes
- [Maya]Rigging 06 - Foundations of IK
- [Maya]Rigging 07 - Advanced IK
- [Maya]Rigging 08 - IK FK Switch
- [Maya]Rigging 09 - Spine FK
- [Maya]Rigging 10 - Spine IK
- [Maya]Rigging 11 - Neck and Head
- [Maya]Rigging 12 - Limbs FK
- [Maya]Rigging 13 - Limbs IK
- [Maya]Rigging 14 - Space Swapping
- [Maya]Rigging 15 - Arm Twist
- [Maya]Rigging 16 - Ankles & Heels
- [Maya]Rigging 17 - Clavicles & Fingers
- [Maya]Rigging 18 - Common Tricks
Asset mentioned in articles: UE5 Rig
How to bind skin (combine skeleton and mesh)
Rigging (F3) -> select both the skeleton and mesh -> Skin -> Bind Skin.
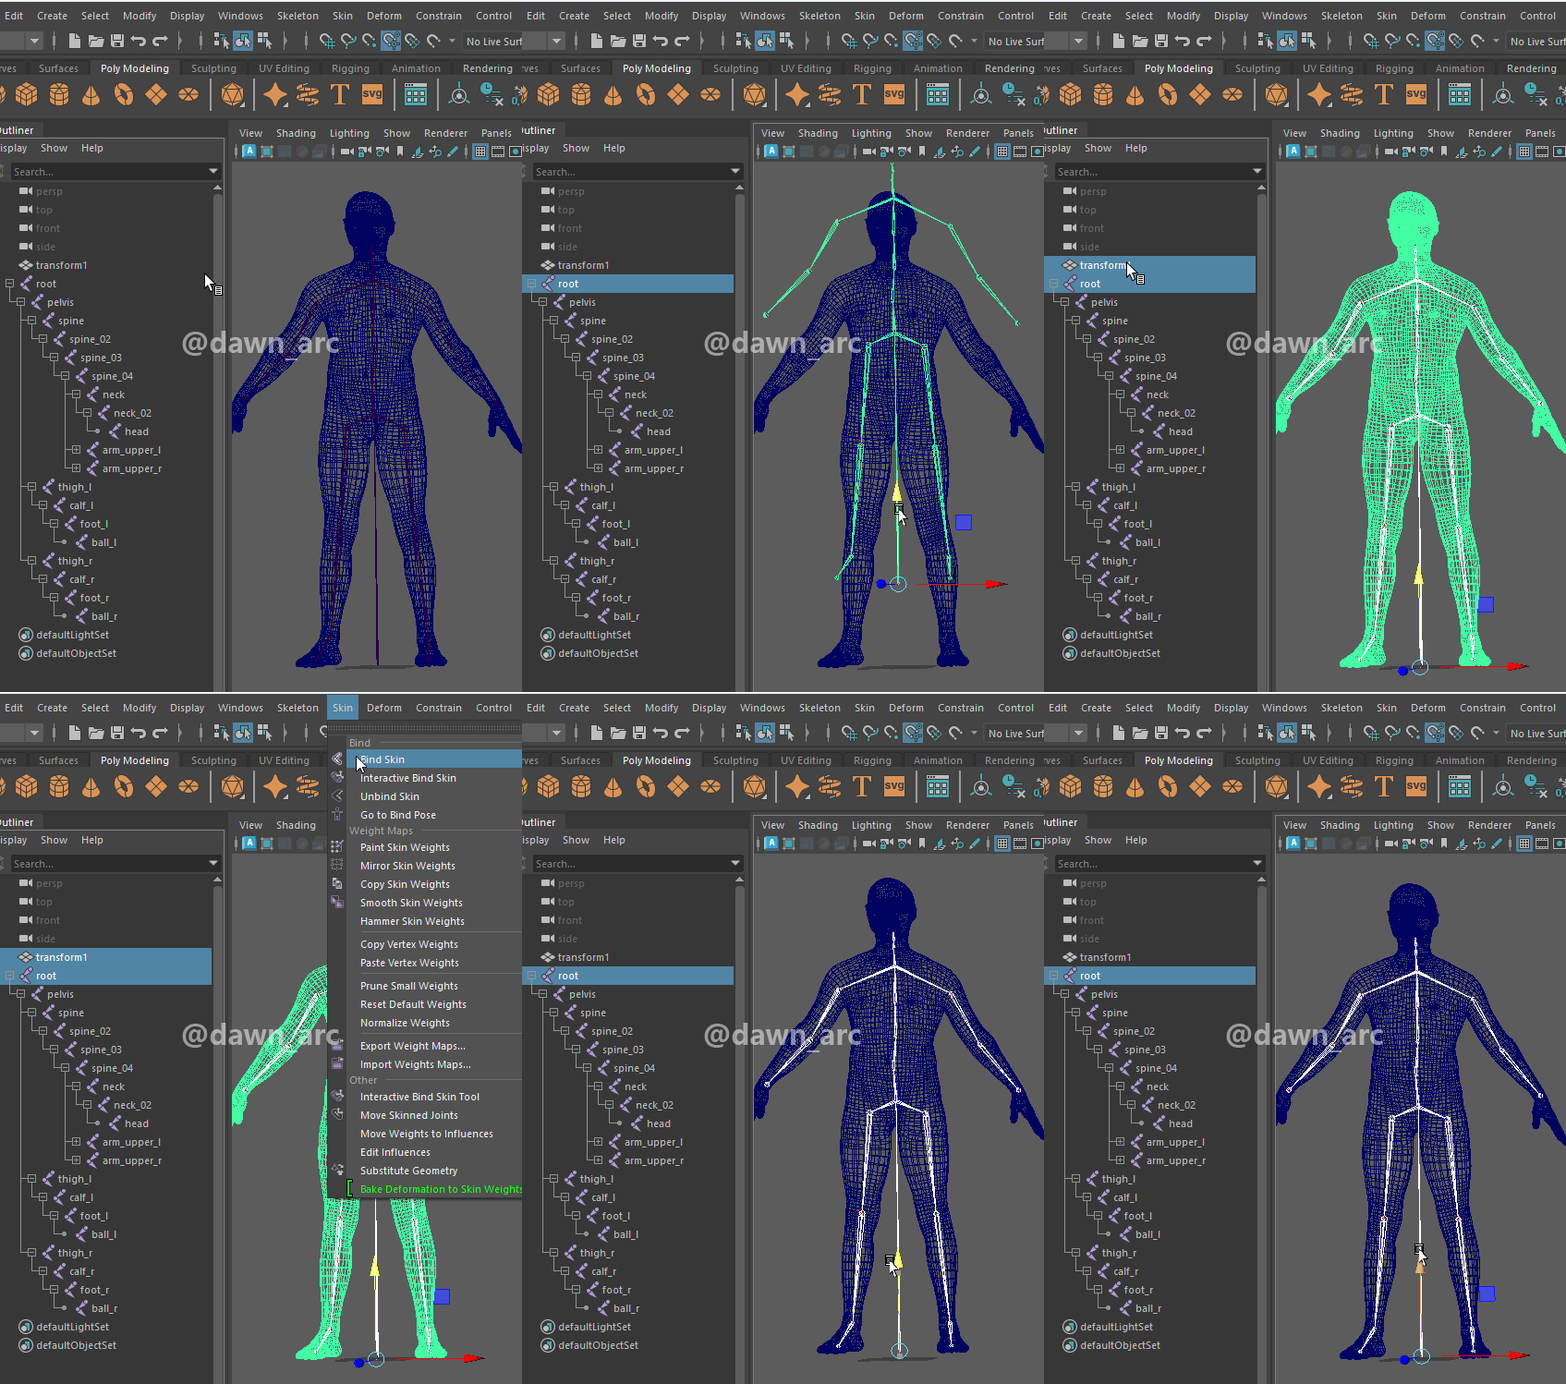
How to separate skeleton and mesh:
Skin -> Unbind Skin.
Mesh must bind skin before painting skin weights.
Skinning Method 1: Paint Skin Weights Tool
Rigging (F3) -> Skin -> Paint Skin Weights.
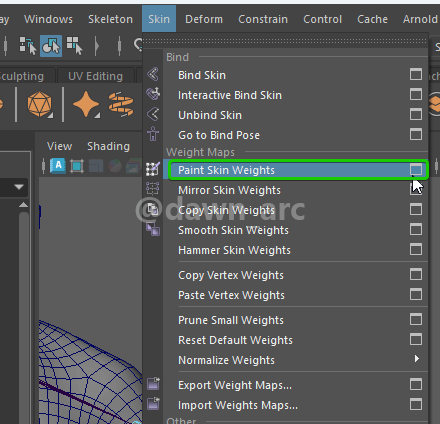
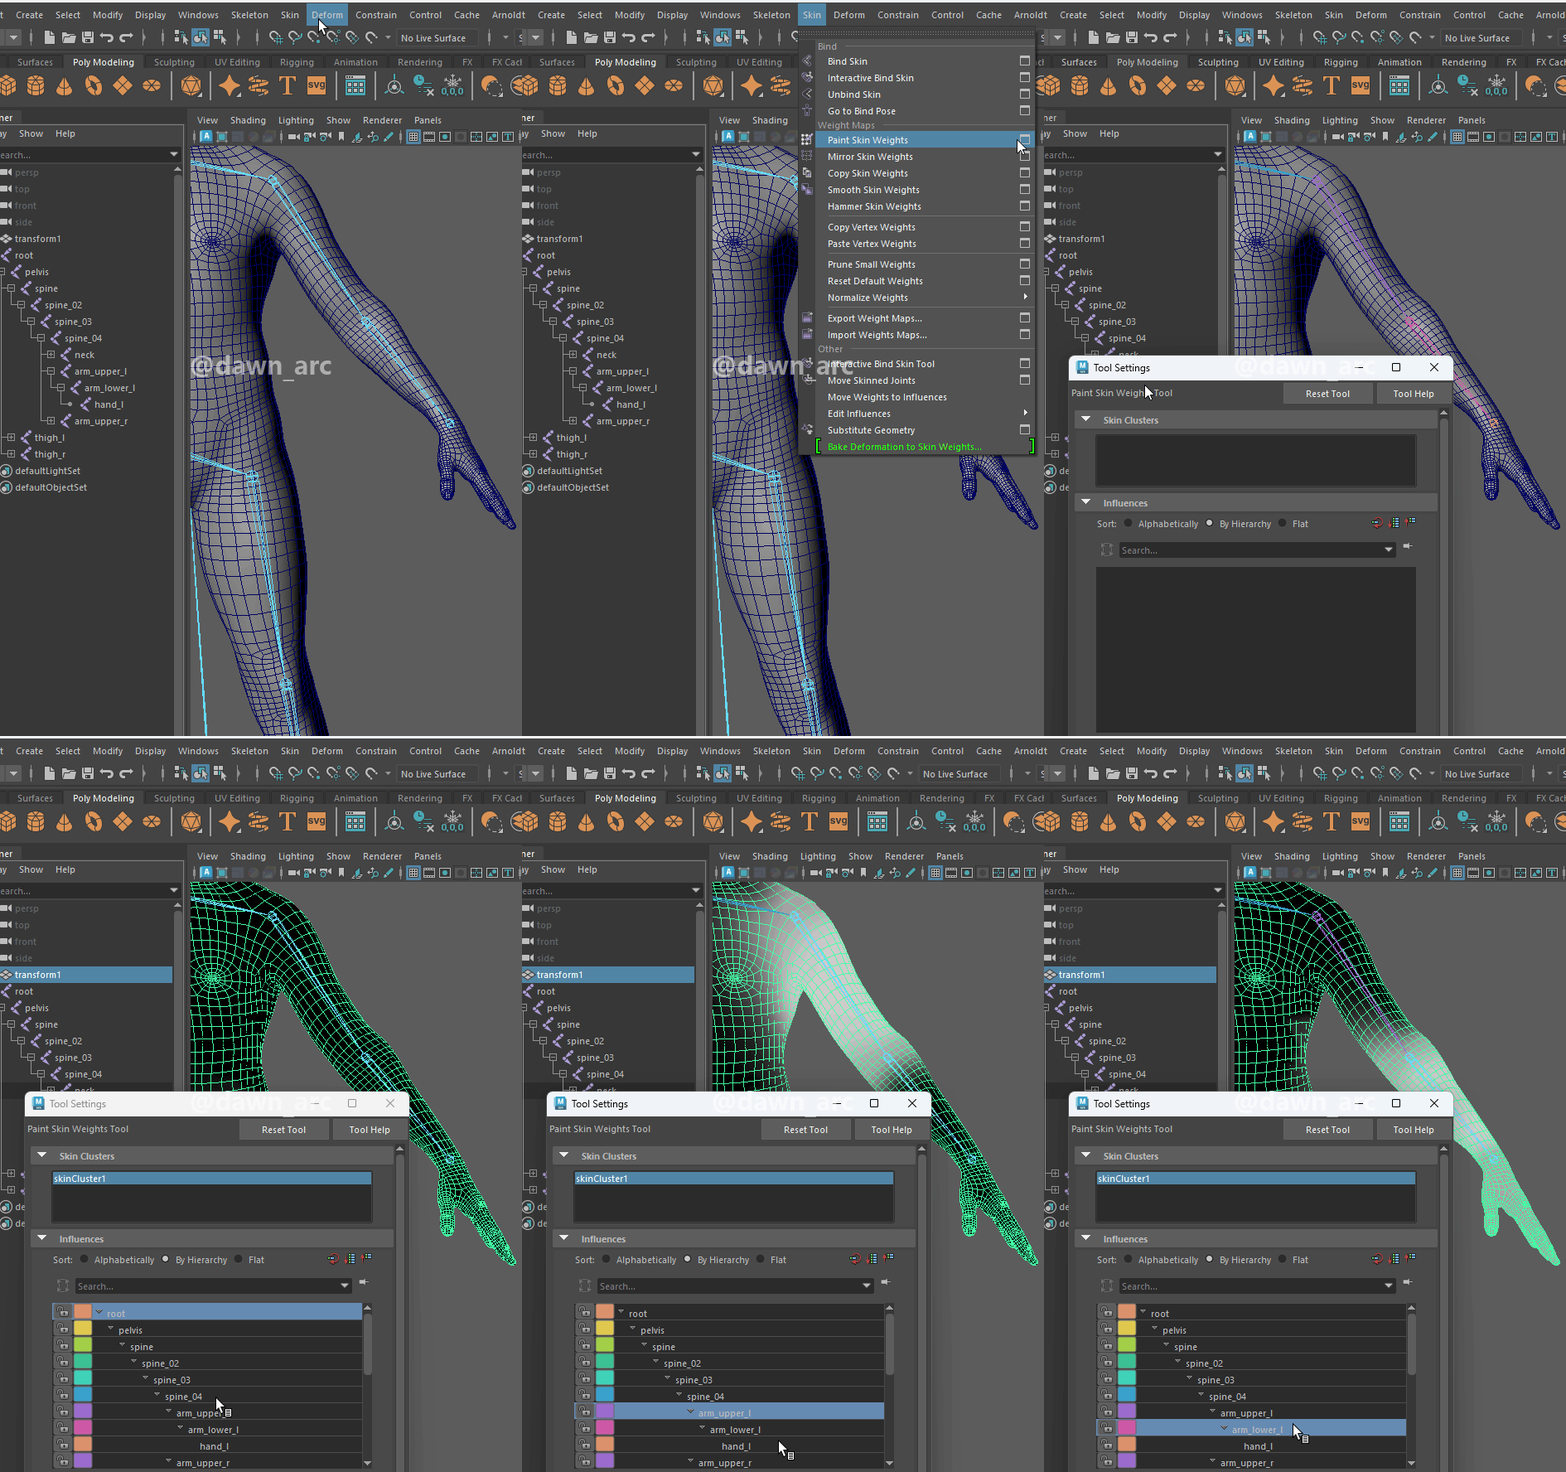
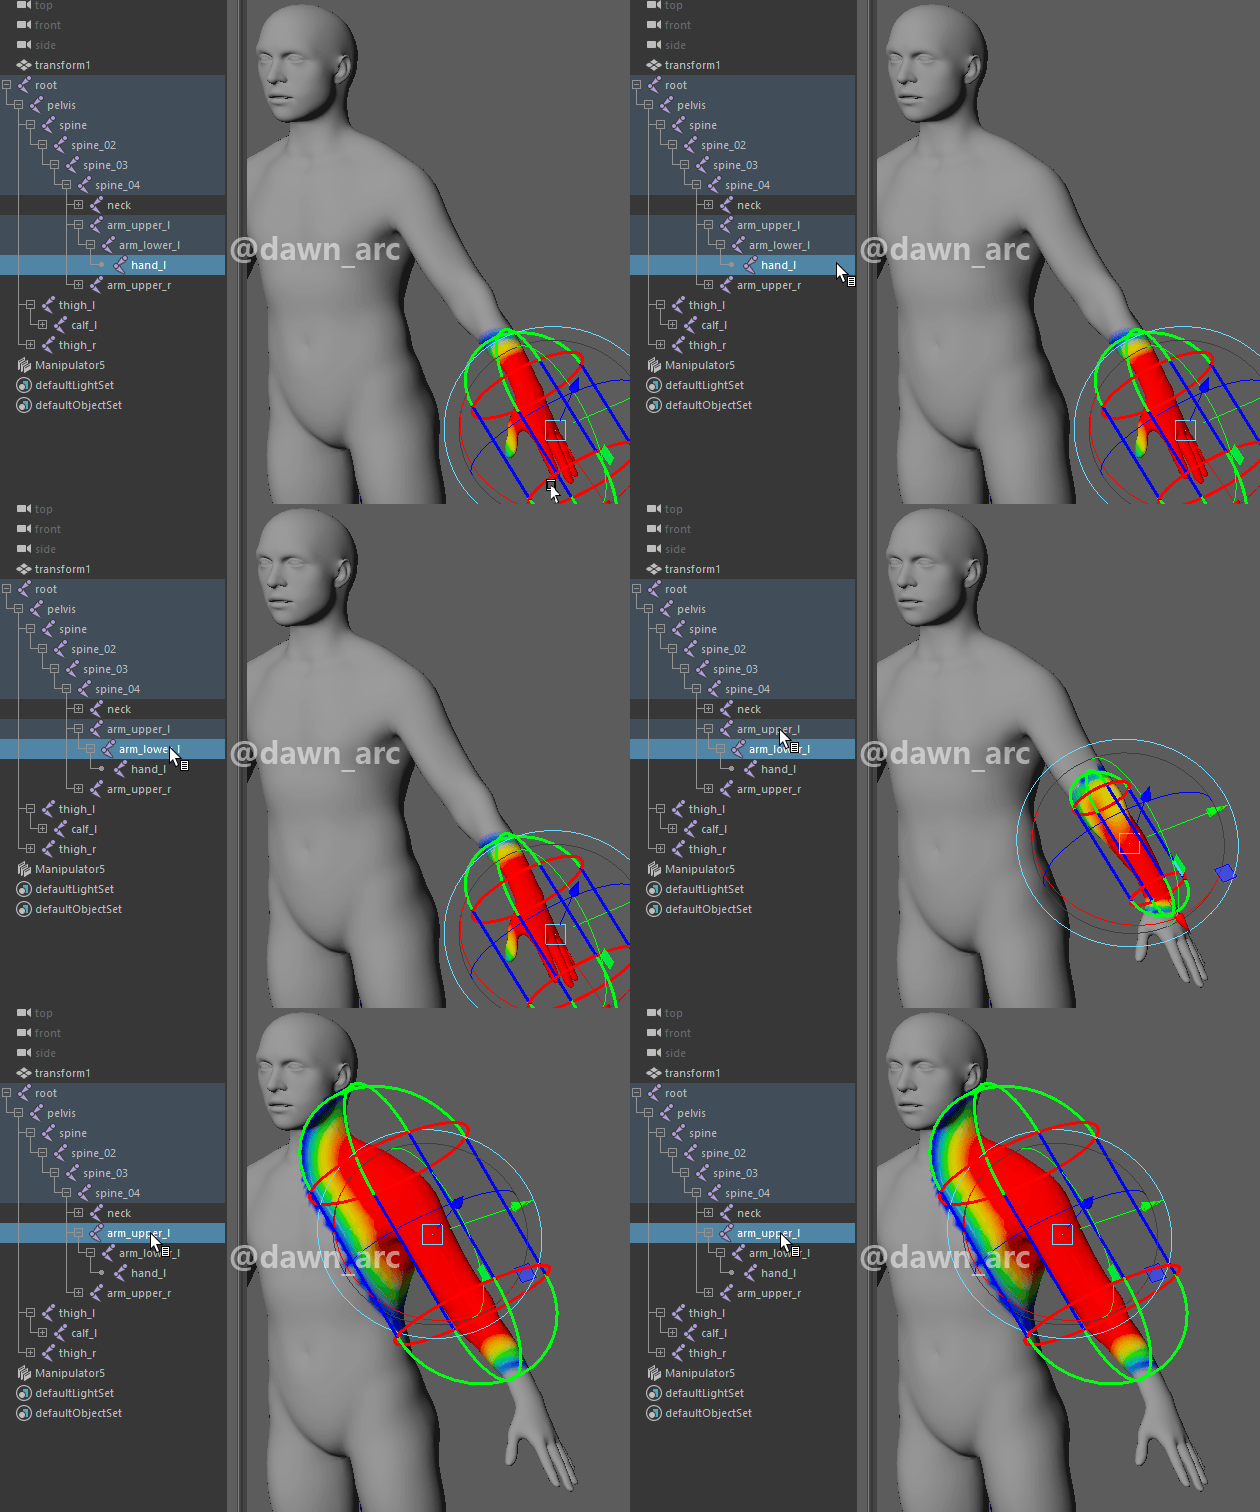
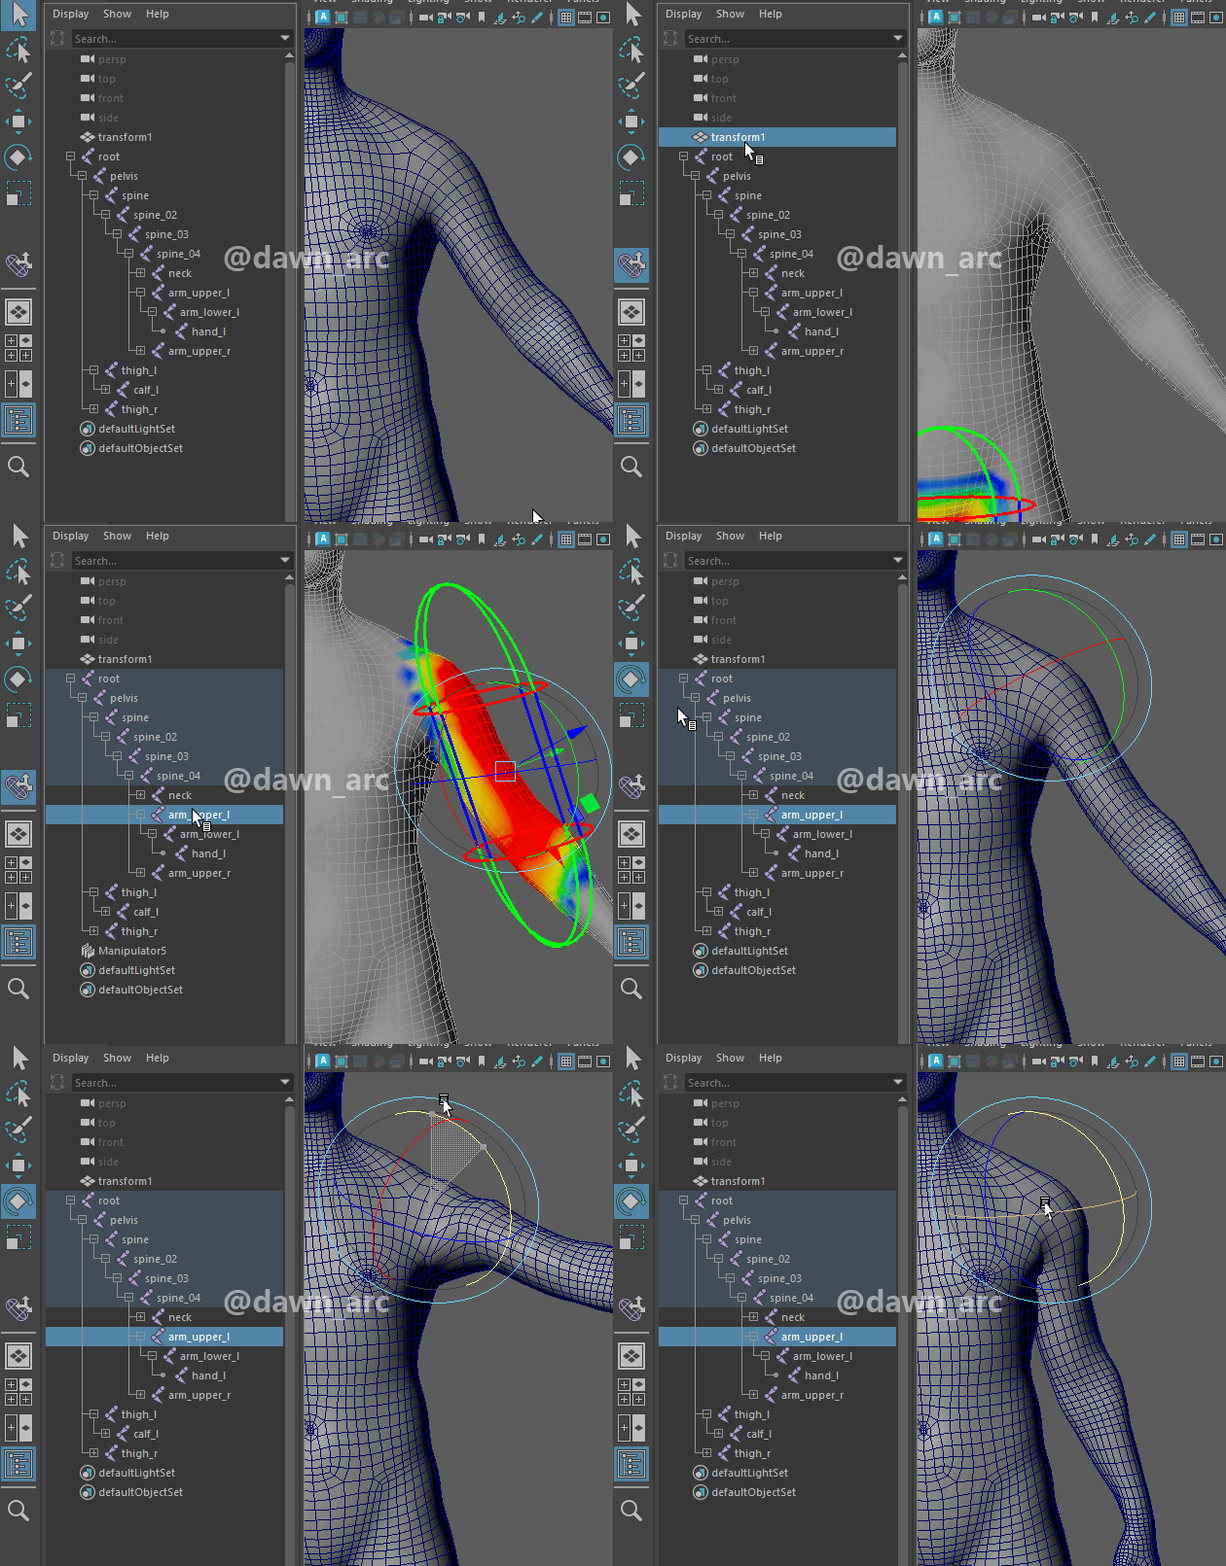
You can check the weights with visualization after open painting tool: select mesh first in Outliner, then select the target joint in Paint Skin Weights Tool.
You can check Color Ramp to check weights more intuitively.
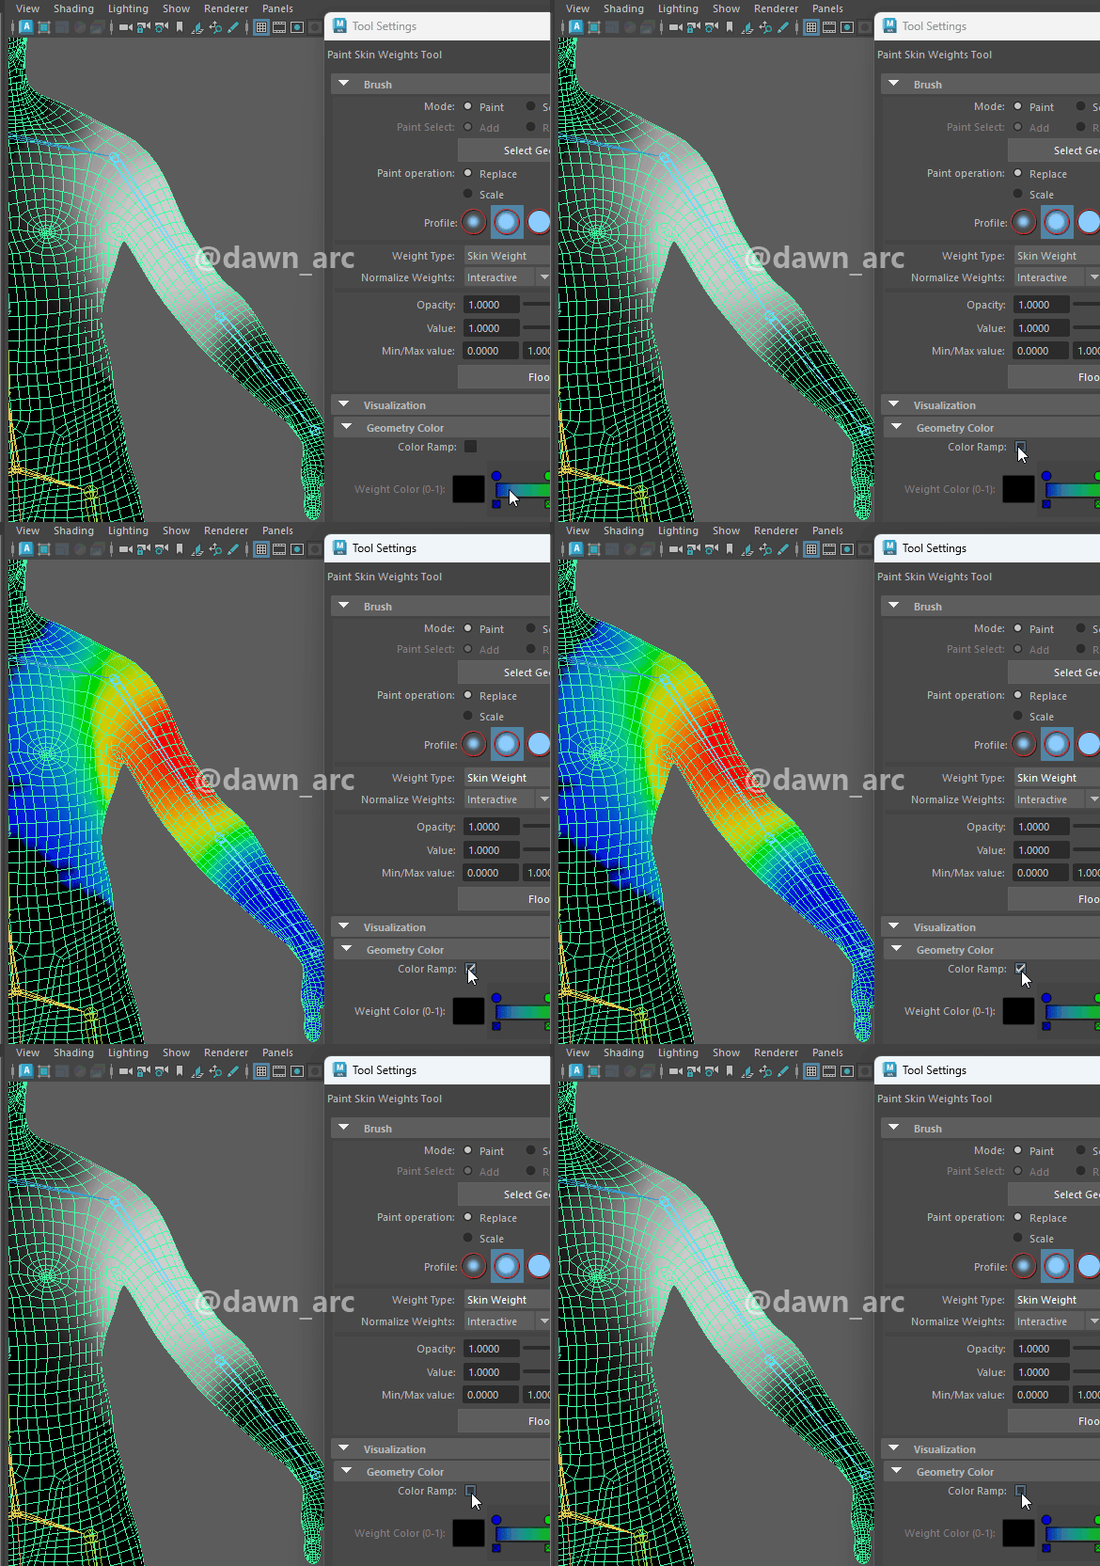
You can also switch state between Paint Skin Weights Tool and Transform Tool.
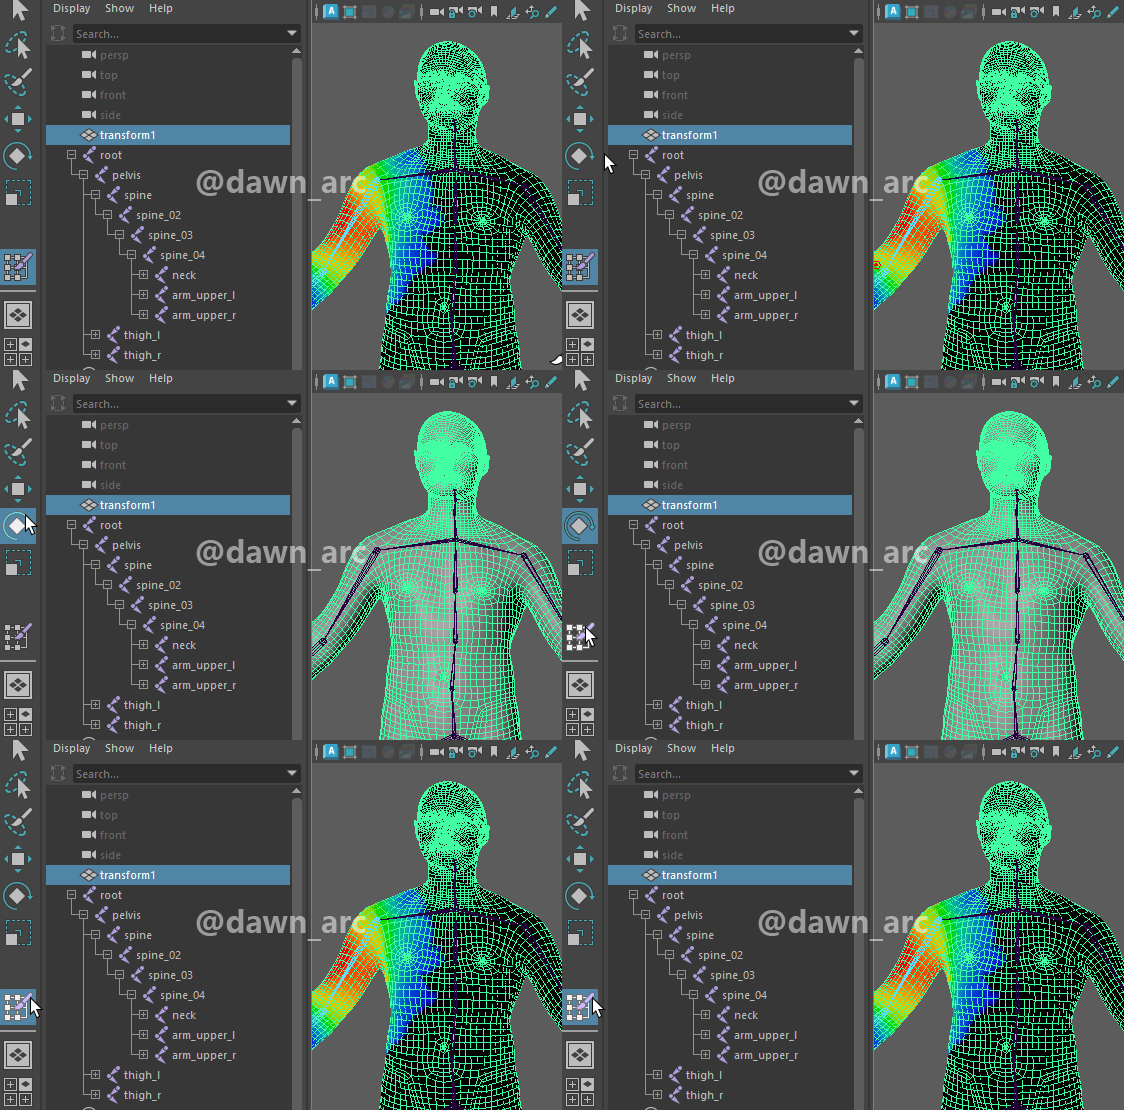
As the follows shown, the torso is severely twisted.
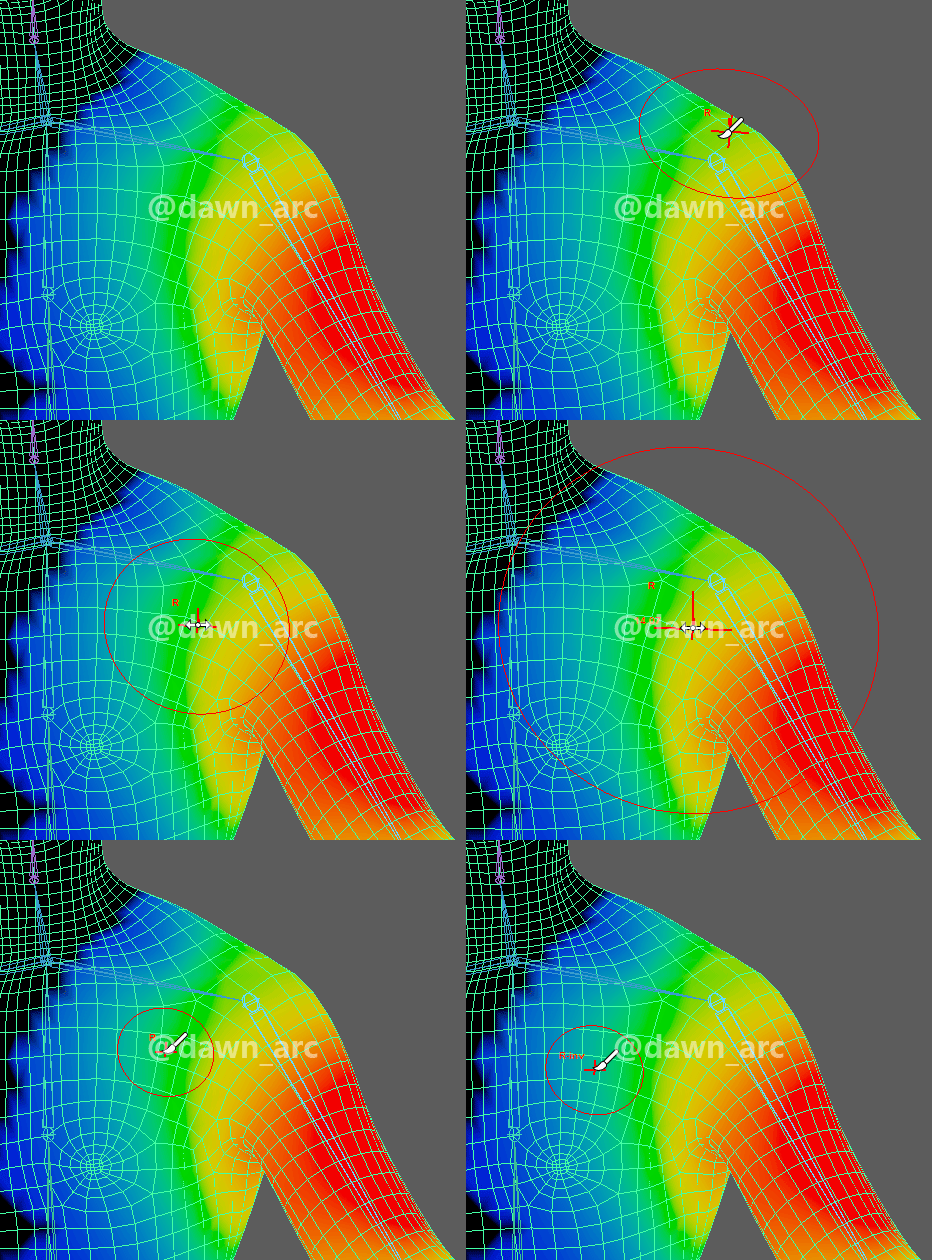
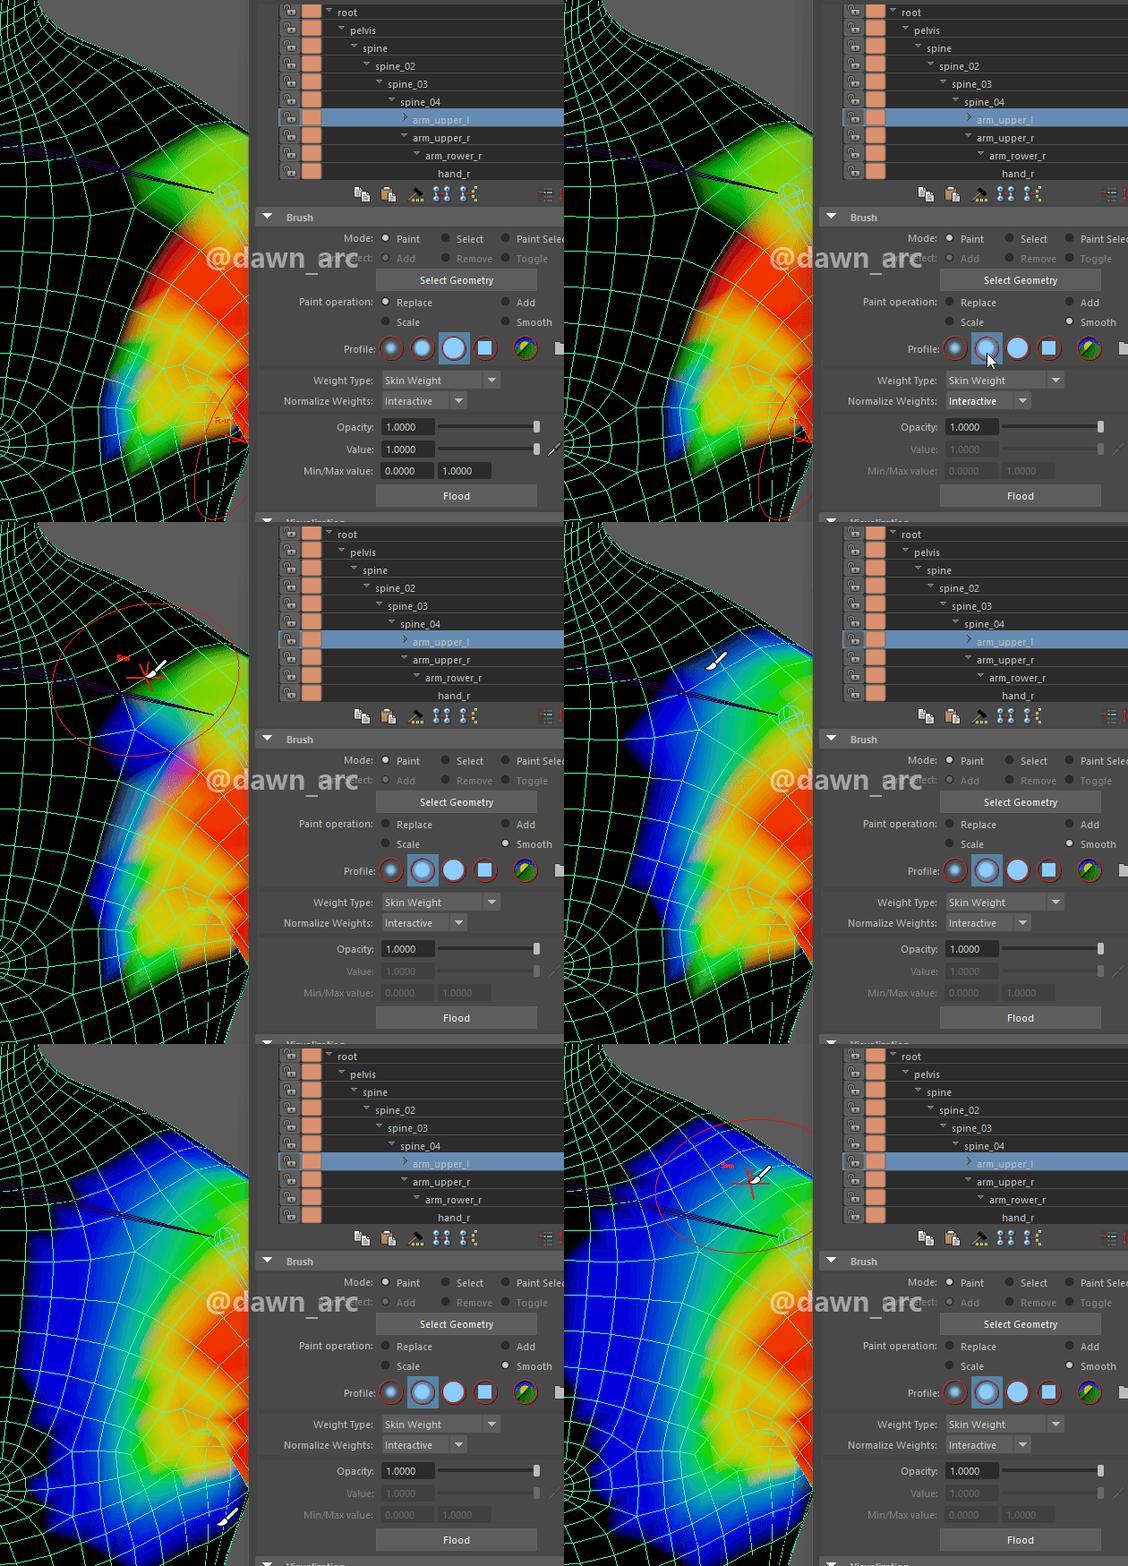
To sovle this problem, you can use painting brush.
Hold down key B and drag mouse left button to left or right to adjust brush size.
Check the Solid Brush, and hold down key Ctrl to erase the weights.
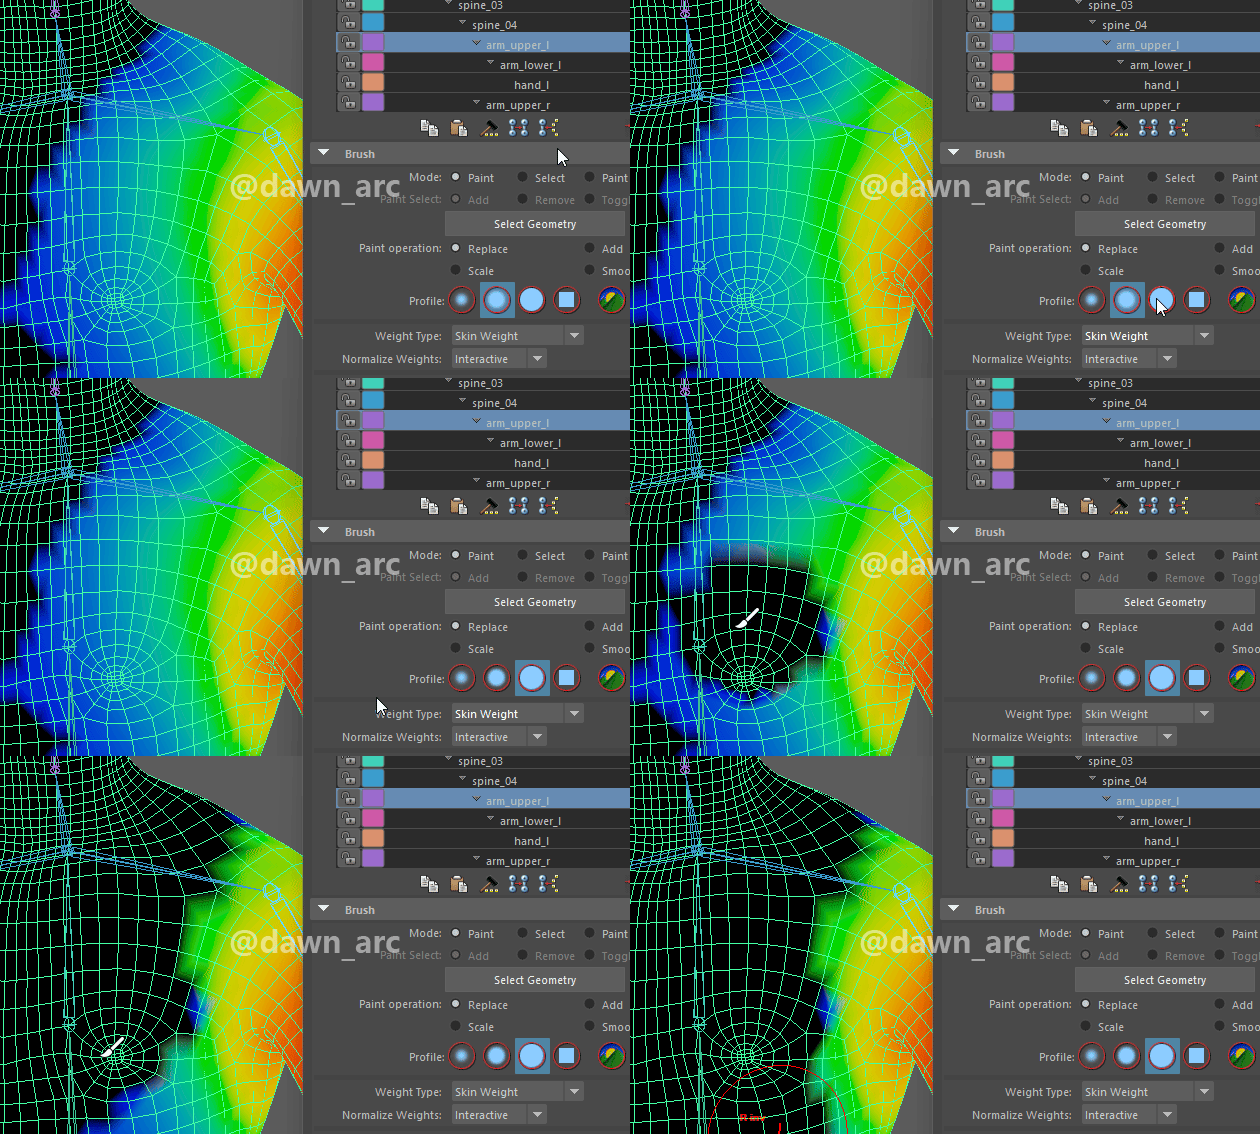
Check the Soft Brush, and check Smooth in Paint Operation, thus you can smooth the edge.
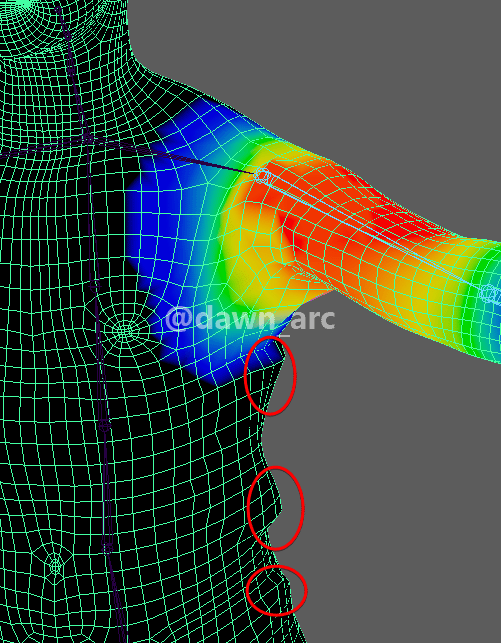
Even you tweak the weights carefully, and it looks right, but there are still flaws.
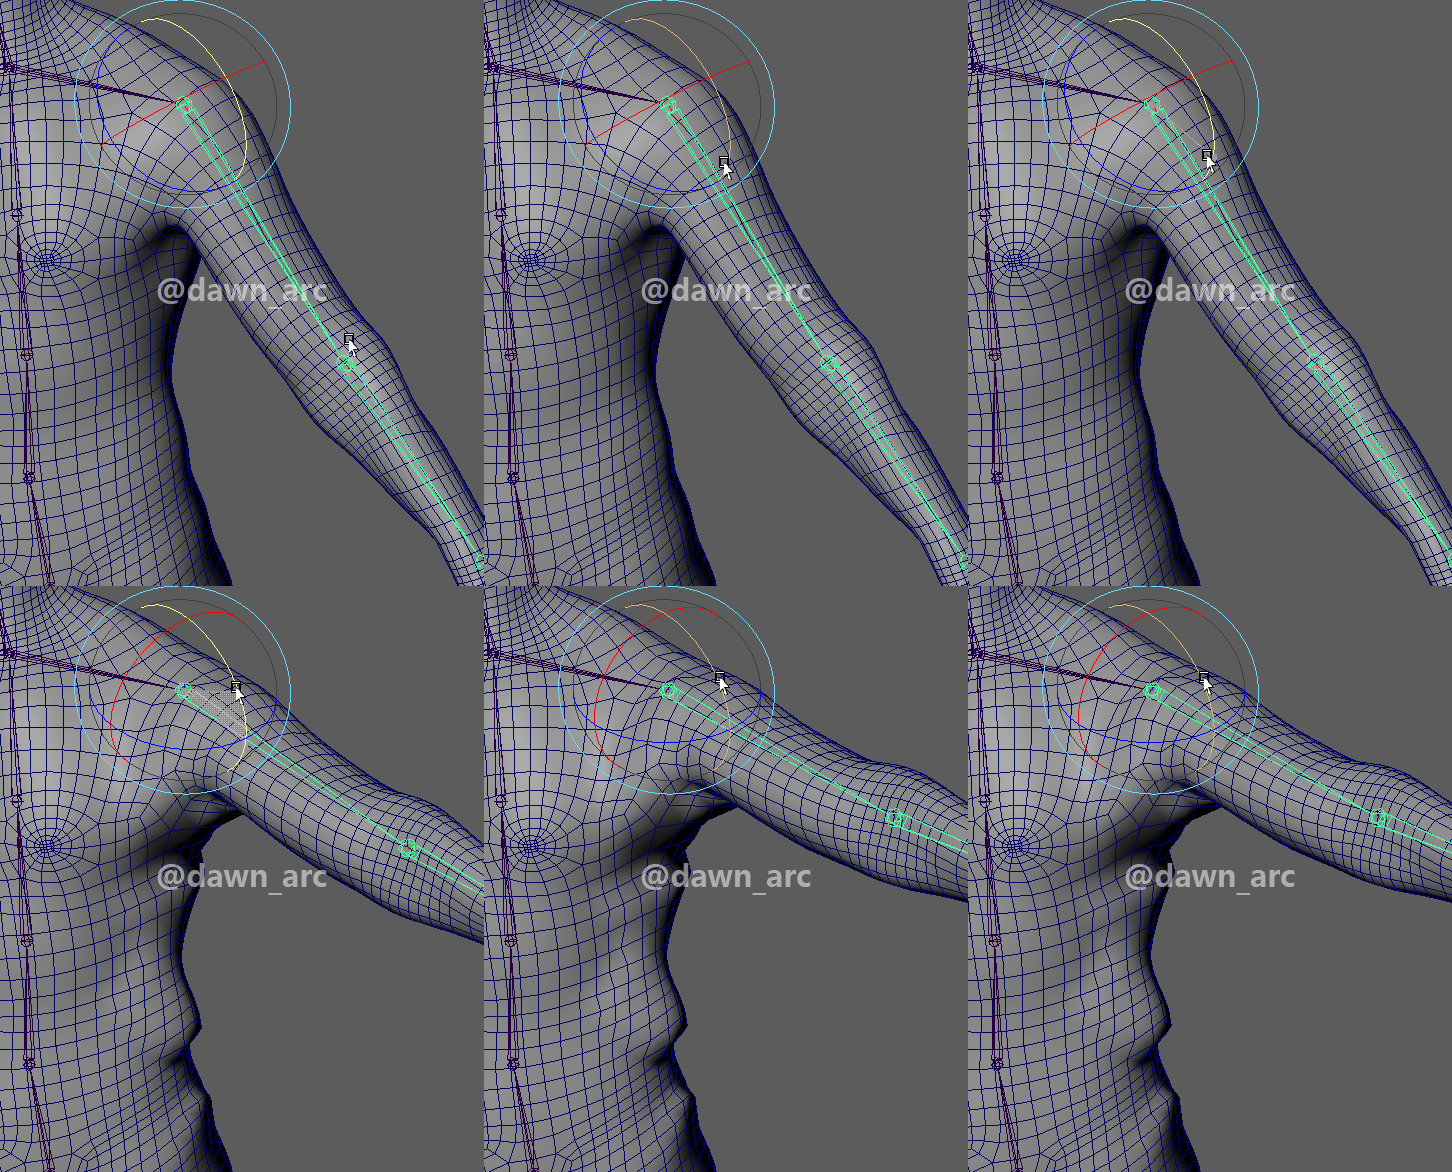
The auto skin binding is limited to rotate bone in simple scenario.
Skinning Method 2: Interactive Bind Skin
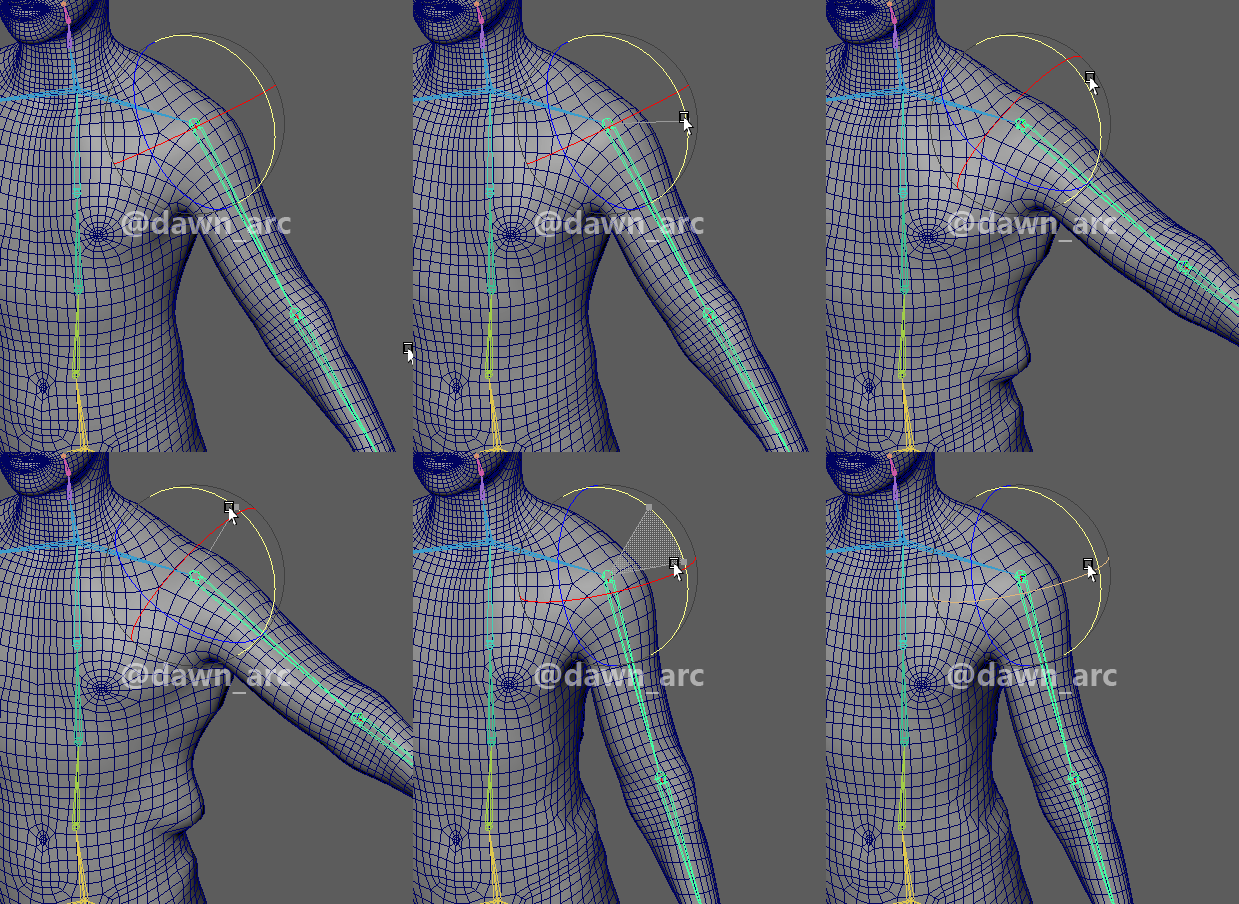
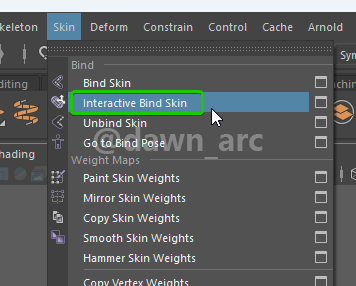
Skin -> Interactive Bind Skin.
Now you can tweak the collision sharp and transform for each joint.
The final effect for upper arm joint.
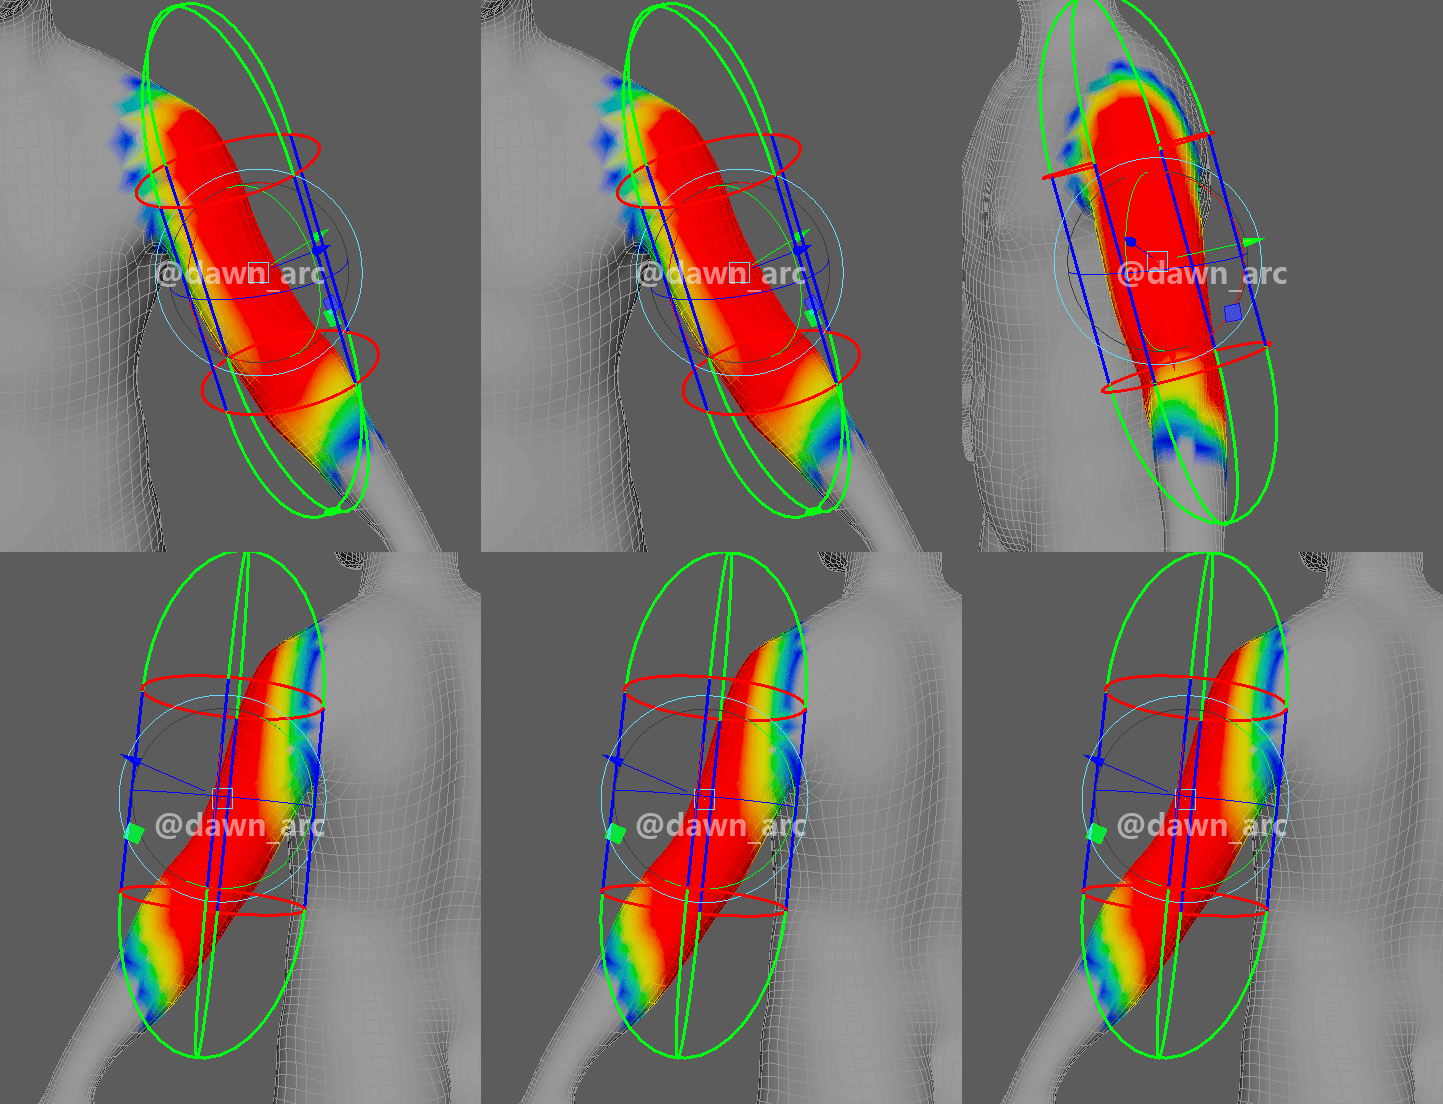
The effect is acceptable.
Skinning Method 3: Rigging in Unreal Engine asset
In UE5 rig, there’s no weight in upper arm joint, and there’s external bone named clavicle inserted between neck and upper arm.
And the weights is more light then auto bind skin.
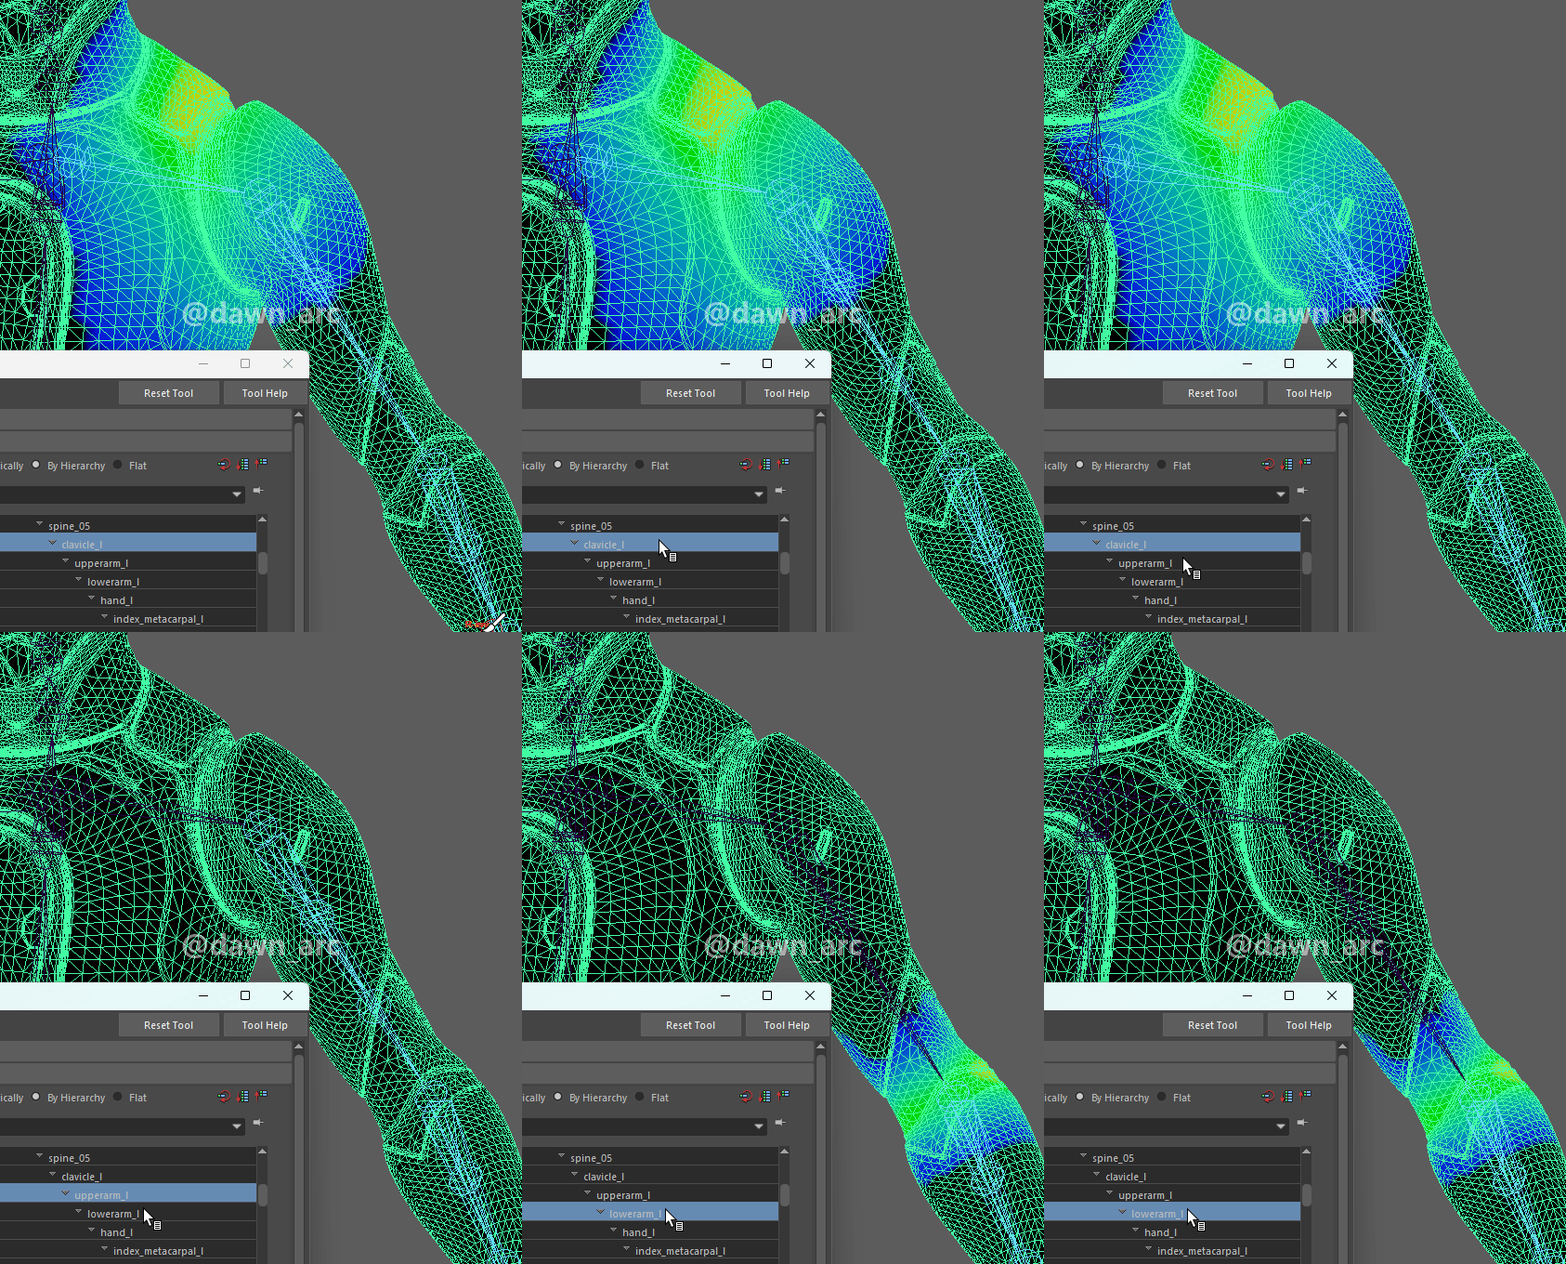
The effect is perfect.
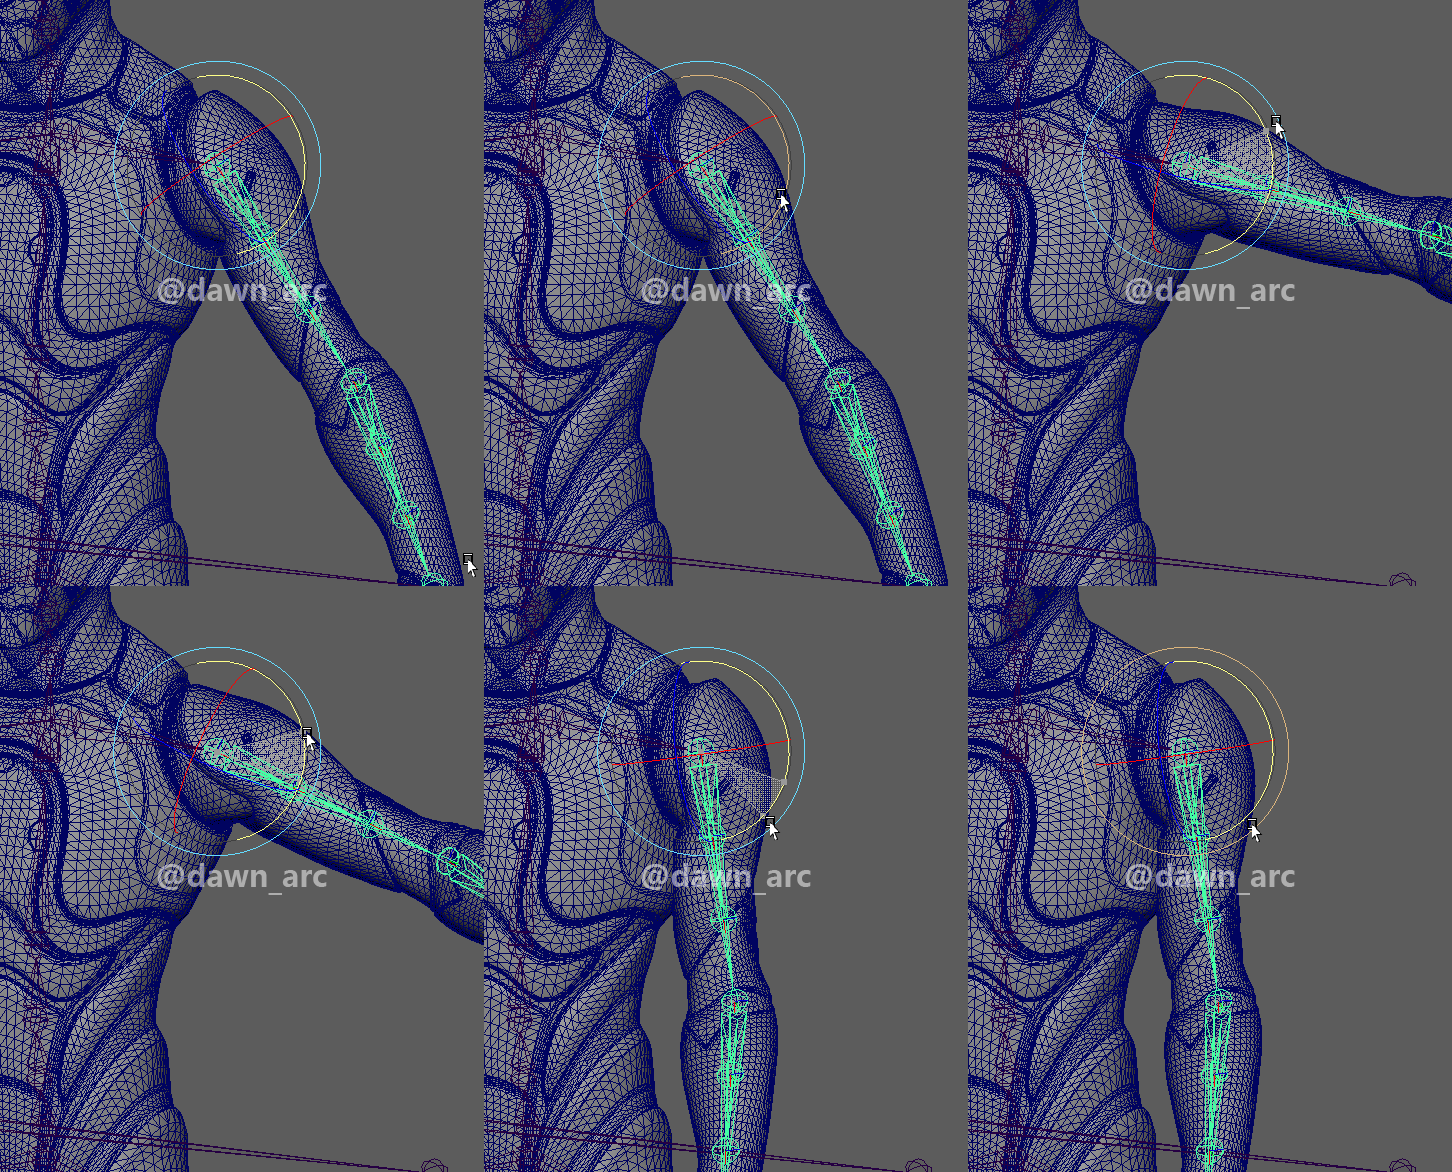
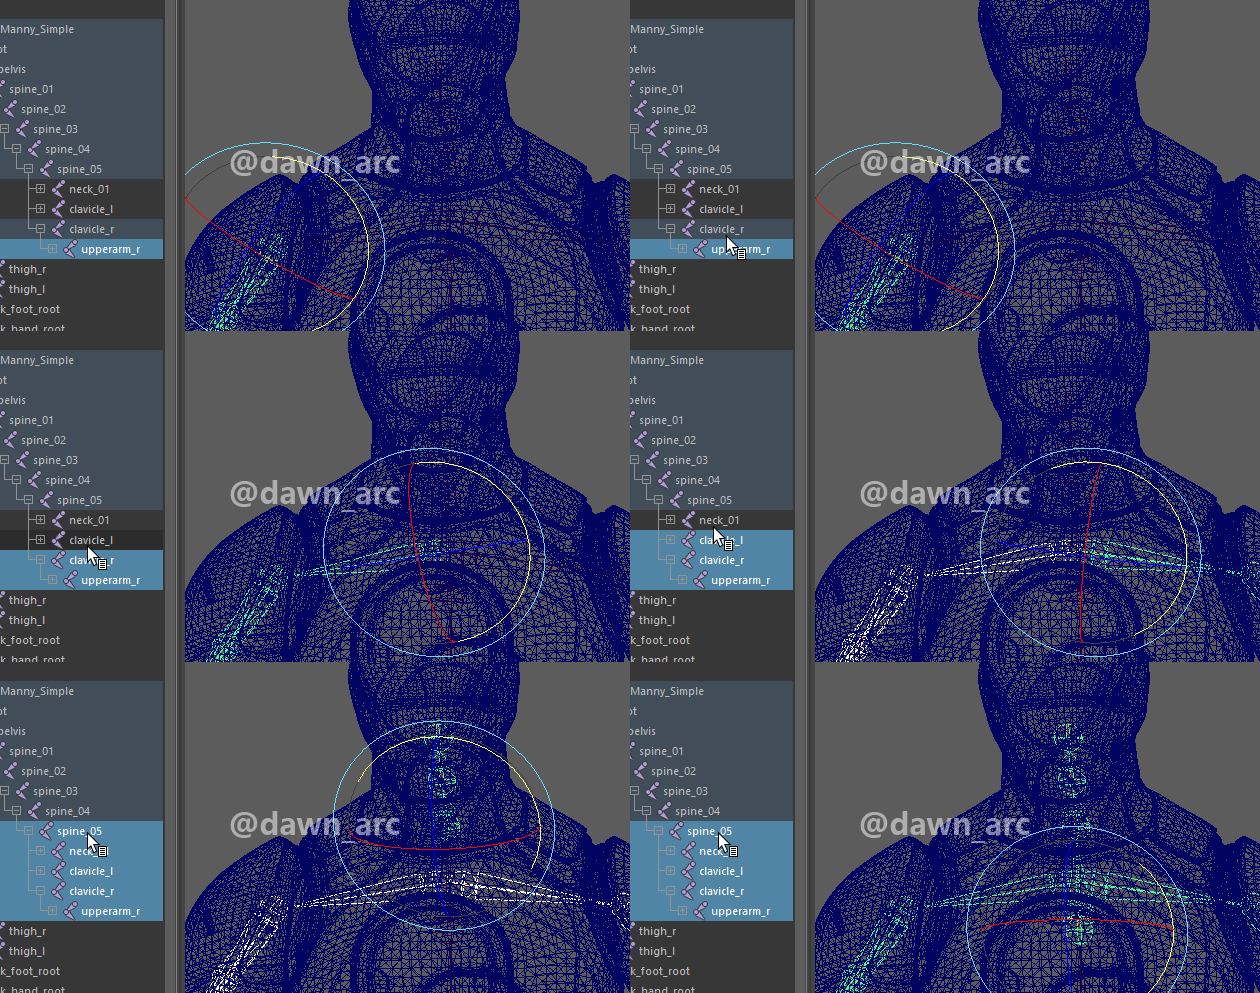
Tips: Make sure the bone at the shoulder joint don’t have any weight, and move the weights of the shoulder to the clavicle joint.
The structure of clavicle bone.
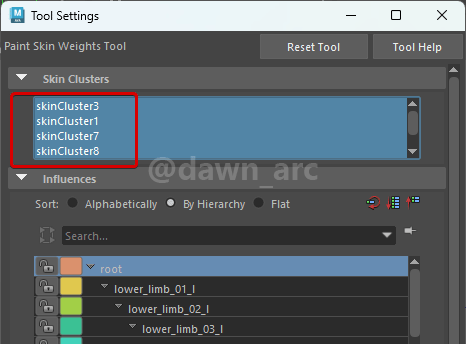
Multiple Skin Cluster
If there’re multiple skin clusters, that means meshes haven’t been merged yet.
Colored skeleton
If the skeleton’s color was navy blue (default color), this is because the asset was imported from FBX, not the Maya Binary file.
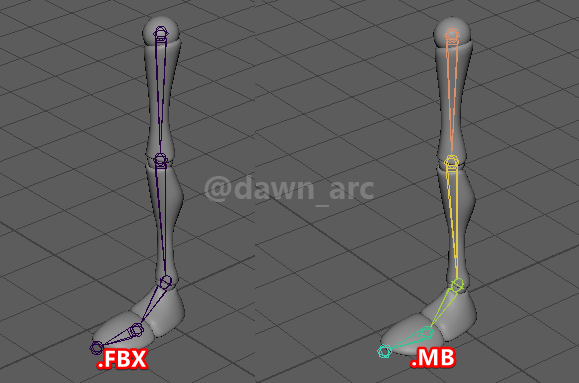
It’s just a visual effect, doesn’t affect functions.
Skin Weights Issue
If geometry scaled while rotating joint, that means the skin weights of current joint was generated by skin mapping automatically, we need re-paint the skin weights manually.
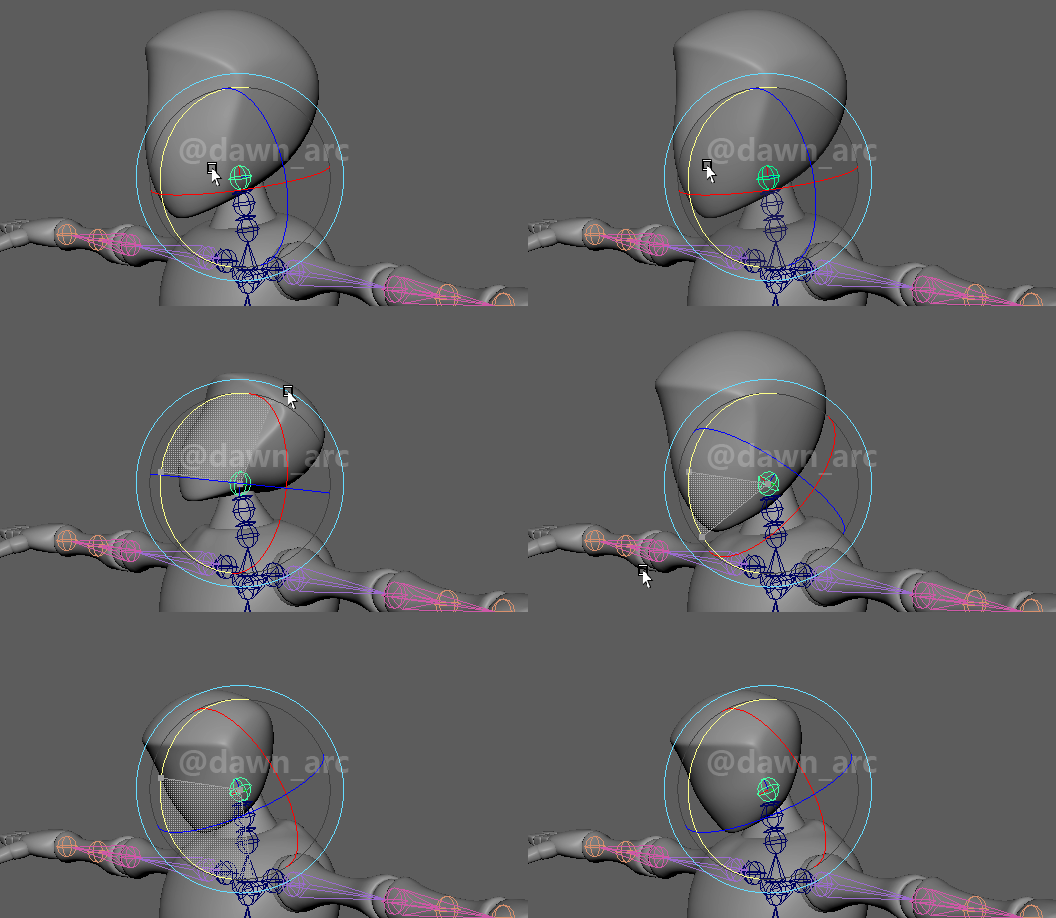
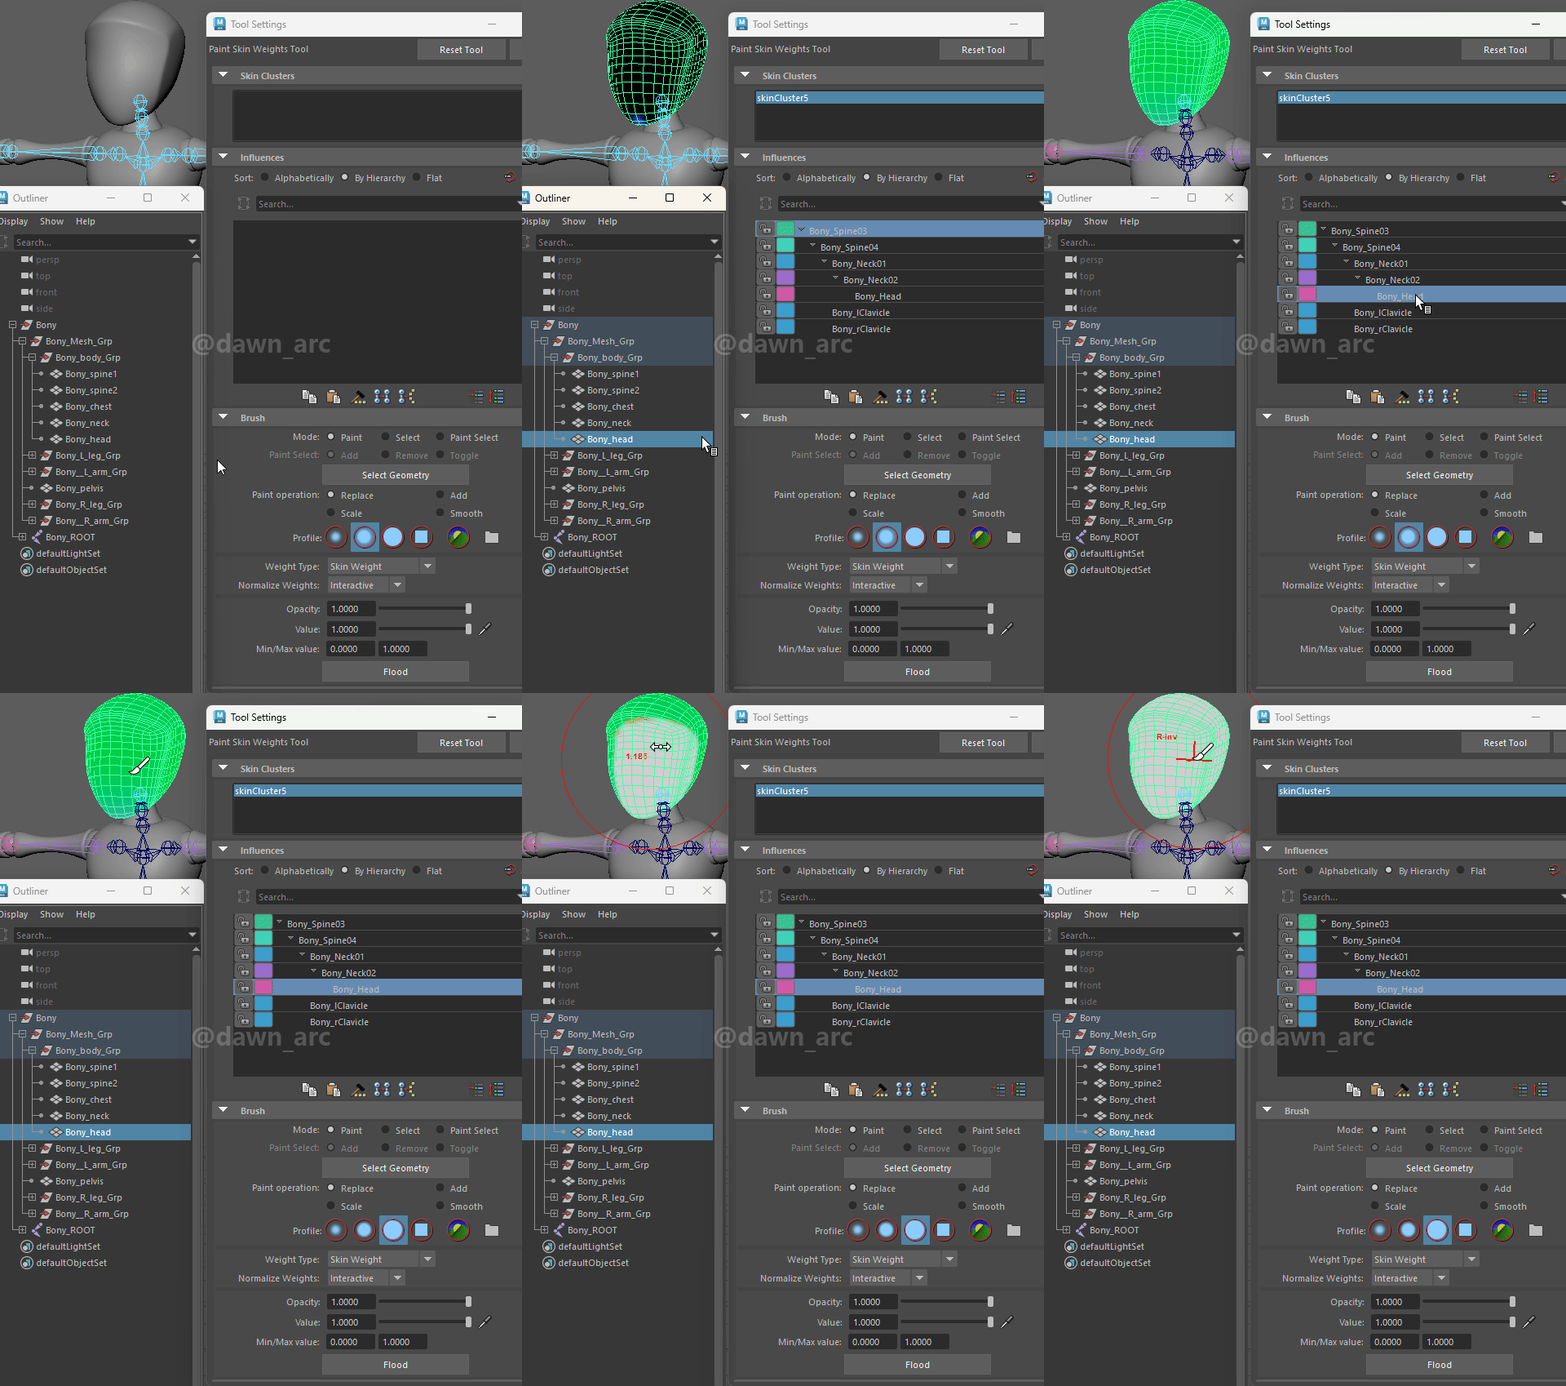
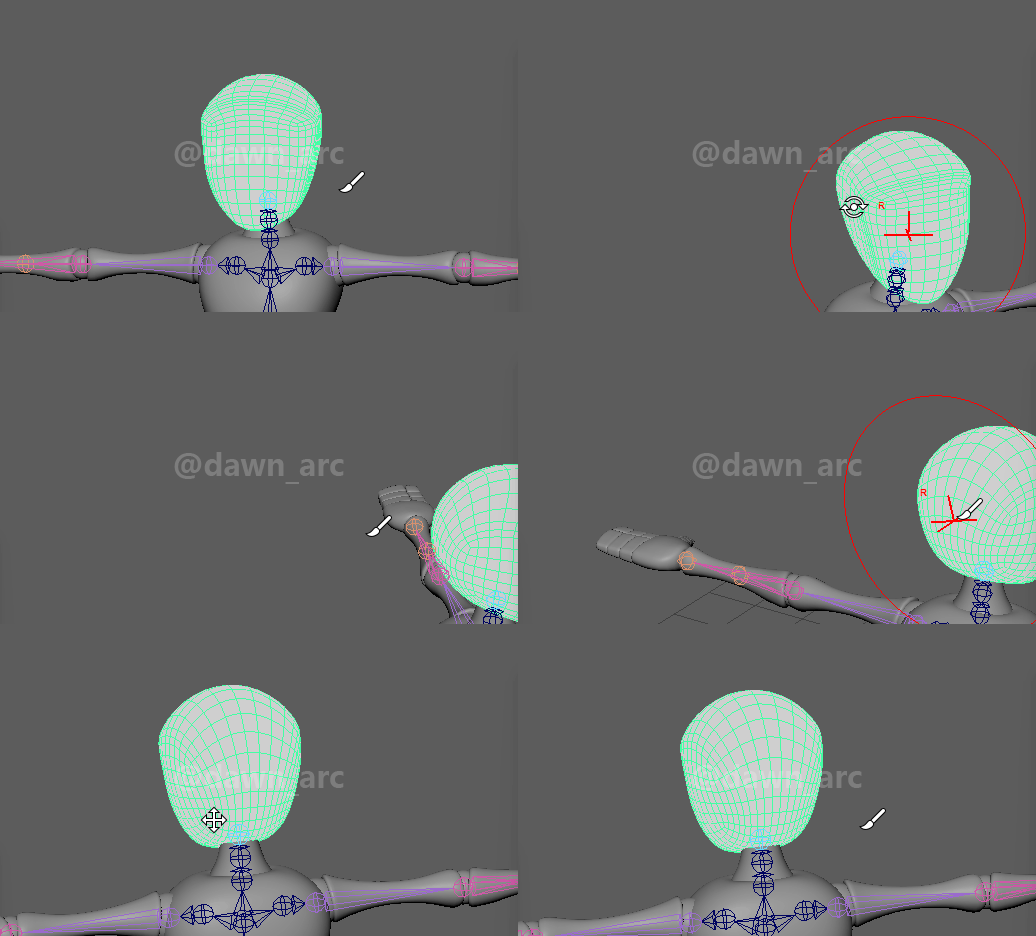
Make sure all surfaces were painted fully.
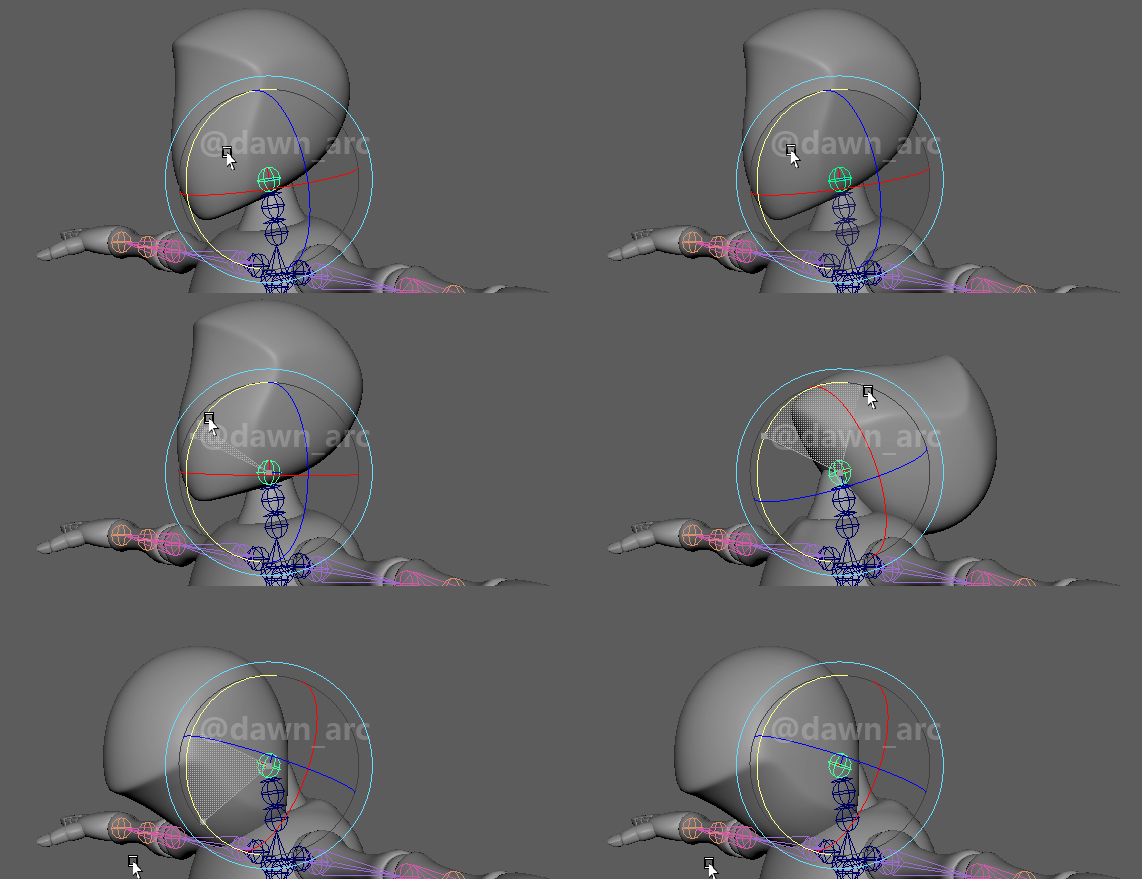
Result:
How to copy Skin Weights
To copy all smooth skin weights from one bound mesh to another
- Do one of the following:
- Select the smooth skin polygonal mesh (or group of meshes) you want as the source skin, and then select the polygonal mesh (or group of meshes) you want as the destination skin.
- Select the vertices you want as the
source, then select the vertices you want as thetarget.
- Select Skin > Edit Smooth Skin > Copy Skin Weights.
- Do the following:
- Set the Surface Association options appropriately based on the type of correlation you want to occur. For most situations, the default setting of Closest point on surface works best. If your characters differ widely in scale or proportion you may wish to use the UV space setting.
- Set the Influence Association options appropriately based on what you believe will provide the best correlation between the joints. For most situations, the default setting of Closest joint works best. If the skeleton hierarchies in your scene are identical, the One to one setting can be useful.
- Do one of the following:
- Click Copy to copy the smooth skin weights from the source skin to the destination skin.
- Click Apply to copy the smooth skin weights from the source skin to the destination skin.
- Click Close to close the options window without copying the skin weights.
Reference:
Copy smooth skin weights - Autodesk Maya Documents
How Do I Transfer Skin Weights? - antCGi (Recommended)
https://www.youtube.com/watch?v=BbKDxKKFh-U
Tricks
Well, a couple of tips:
- Skin a proxy mesh, your mesh is WAY too dense. If you have too much topology it’ll definitely be a pain in the ass, get a lower resolution mesh, you can also just do a reduce or a quick retopo (no need for a good topology, just a consistent edge flow and less polygons). Once this basic mesh is skinned, bind the same joints to your current mesh and use the copy skin weights tool in the skin menu. Tadaa !! This is called “Skinning with proxies”.
- When you bind you skin (create the skinCluster) it’s important to check the “maintain max influences”. 3 is a good starting point for the base layer of joints (the base deformation, not helper, push or whatever secondary joints you may use, exclude them from the bind for now)
- Always lock all your joints and paint them 2 at a time, a sender and a receiver, this way you won’t be surprised by Maya trying to be smart and lamentably failing.
- Do not waste you time with Maya’s default skin weights, use the fastest bind method, flood all weights on the root and then proceed to paint each joint one by one by just removing weights on the root. With 2 joints unlocked this is easy. Only paint 0 or 1 for no, no smooth. This is you blocking. Once each joint has its blocking weights, you have a good idea of the areas affected by each joint, now, unlock each joint by pairs to smooth in between them. Work as much as possible with edge loop selected, you can even never use the paint tool brush. Next step, polish. Again, doable without the brush, using vertices selection by area, part of a loop, here you will use the component editor, but the brush is fine too. The idea is to break the remains of rigid that you may have around a loop, I call that step “break the loops”.
Origin: Paint skin is soooooo pain - reddit.com
Tools & Plugins
ngSkinTools is a skinning plugin for Autodesk Maya, introducing new concepts to character skinning such as layers, any-pose-mirroring, enhanced paint brushes, true smoothing, and more.
https://www.ngskintools.com/
References
Paint Skin Weights Tool
https://help.autodesk.com/view/MAYAUL/2025/ENU/?guid=GUID-99189E9D-237F-471E-A02C-BE6593B4828B
Export and Import Skin Weights in Maya
https://www.youtube.com/watch?v=hOjL-40P4-E
SKINNING IN MAYA IS EASY! (my simple process)
https://www.youtube.com/watch?v=WQMjCm-KAis
紫光阁名录:章佳·阿桂
阿桂(满语:ᠠᡤᡡᡳ,转写:agūi;1717年9月7日—1797年10月10日),字广廷,章佳氏,初为清满洲正蓝旗人,以平回部驻伊犁治事有劳,改隶正白旗人。官至武英殿大学士兼首席军机大臣。